This is a sponsored post written by me on behalf of Brother USA. All opinions are 100% mine. Thank you for continuing to support sponsors that make this blog a lot more Aww Sam! You can find more about our sponsorship opportunities here.
Can you believe March is already here? And it’s over halfway done with as well? I can’t believe that it has already been a year since last March, it feels like it hasn’t ended. Being stuck inside, and quarantining for the past year has taken a toll on everyone’s mental health, from isolating us in our homes, to increasing our anxiety about the future and even going outside. That’s why crafting has become important! Studies have shown that it can help relieve some of this anxiety, while also helping you learn new skills and create things!
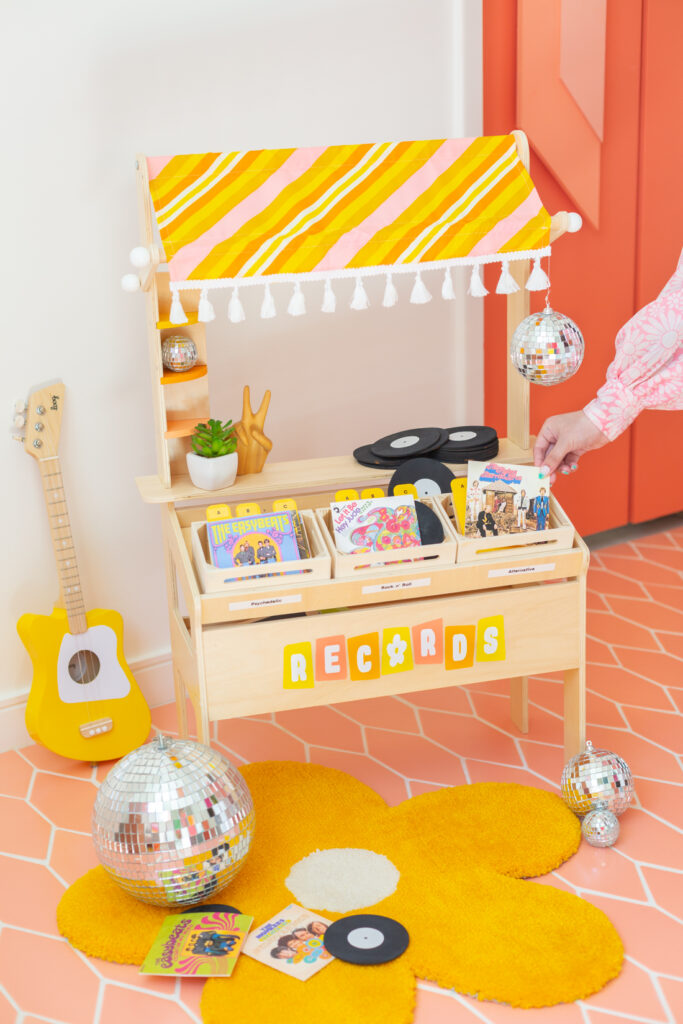
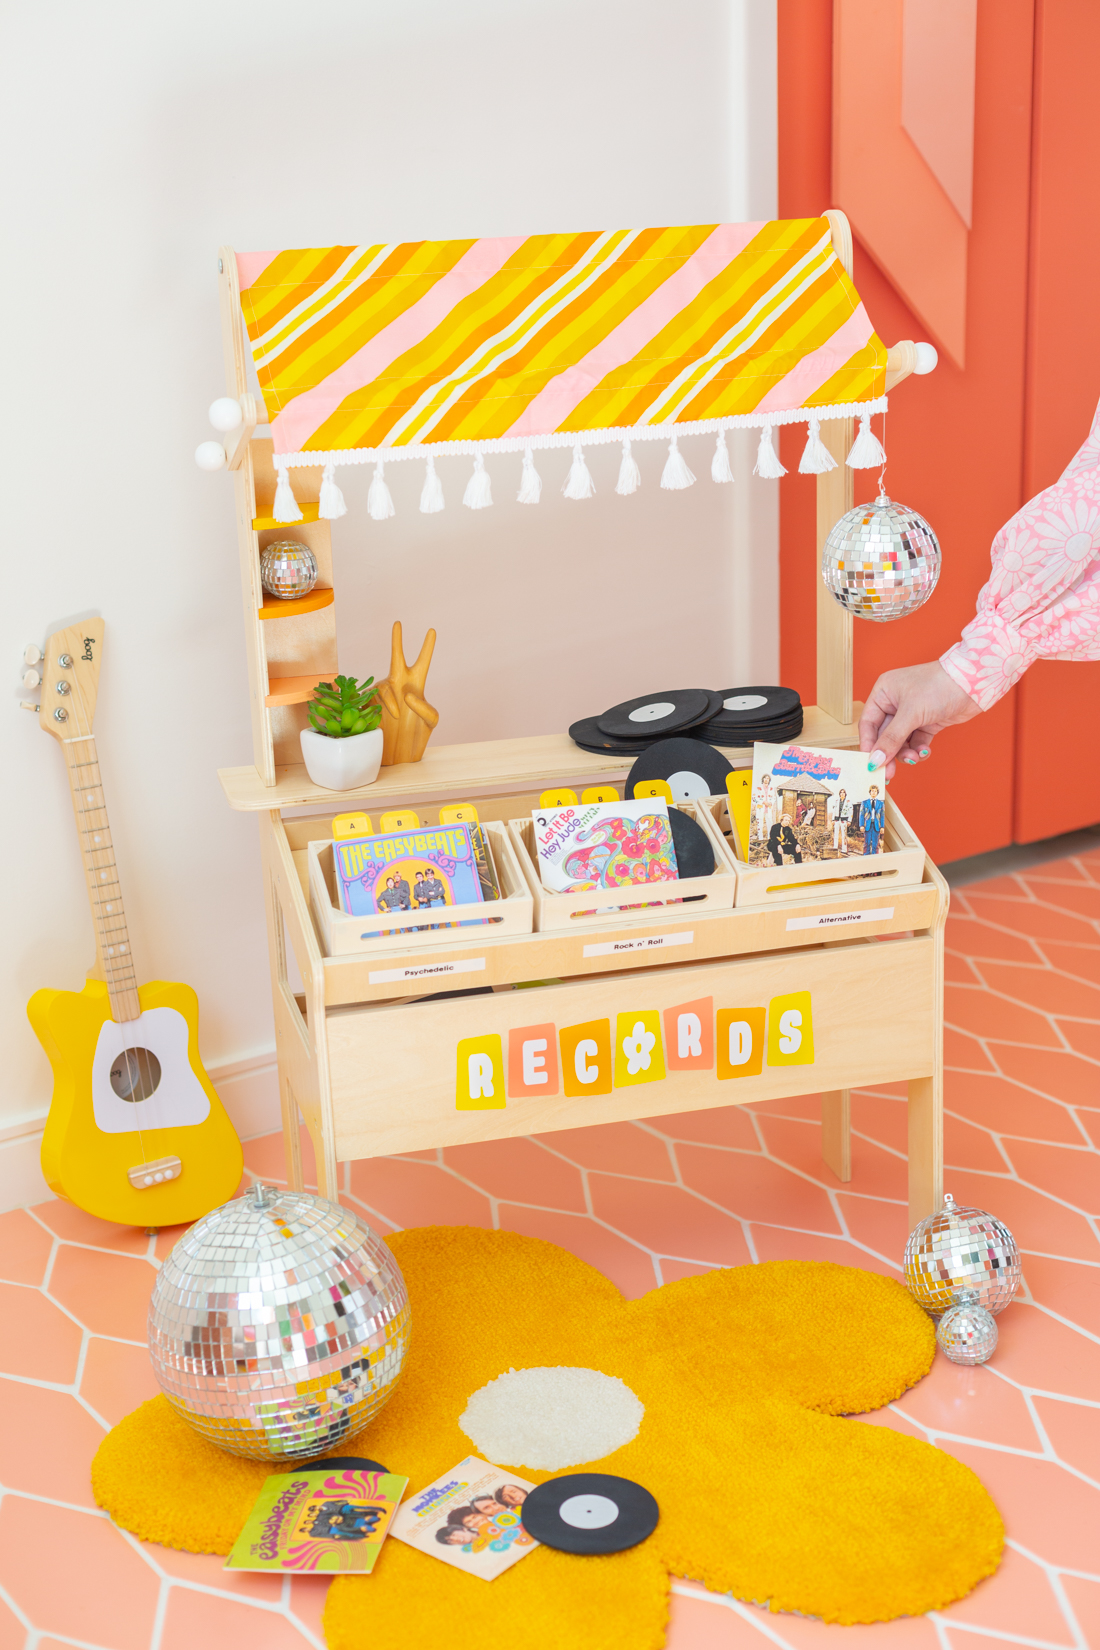
Speaking of crafting, did you know that March also happens to be National Craft Month? A whole month to celebrate crafting in all its forms, from beginners crafts to expert crafters. That’s why I’m so excited to partner with Brother to bring you this kids record store stand! With our baby on the way, crafting for them has definitely helped relieve more than just anxiety about the pandemic, and it’s served as a place for me to focus my creativity. It’s been great letting my creativity flow with the help of Brother’s wide range of crafting machines!
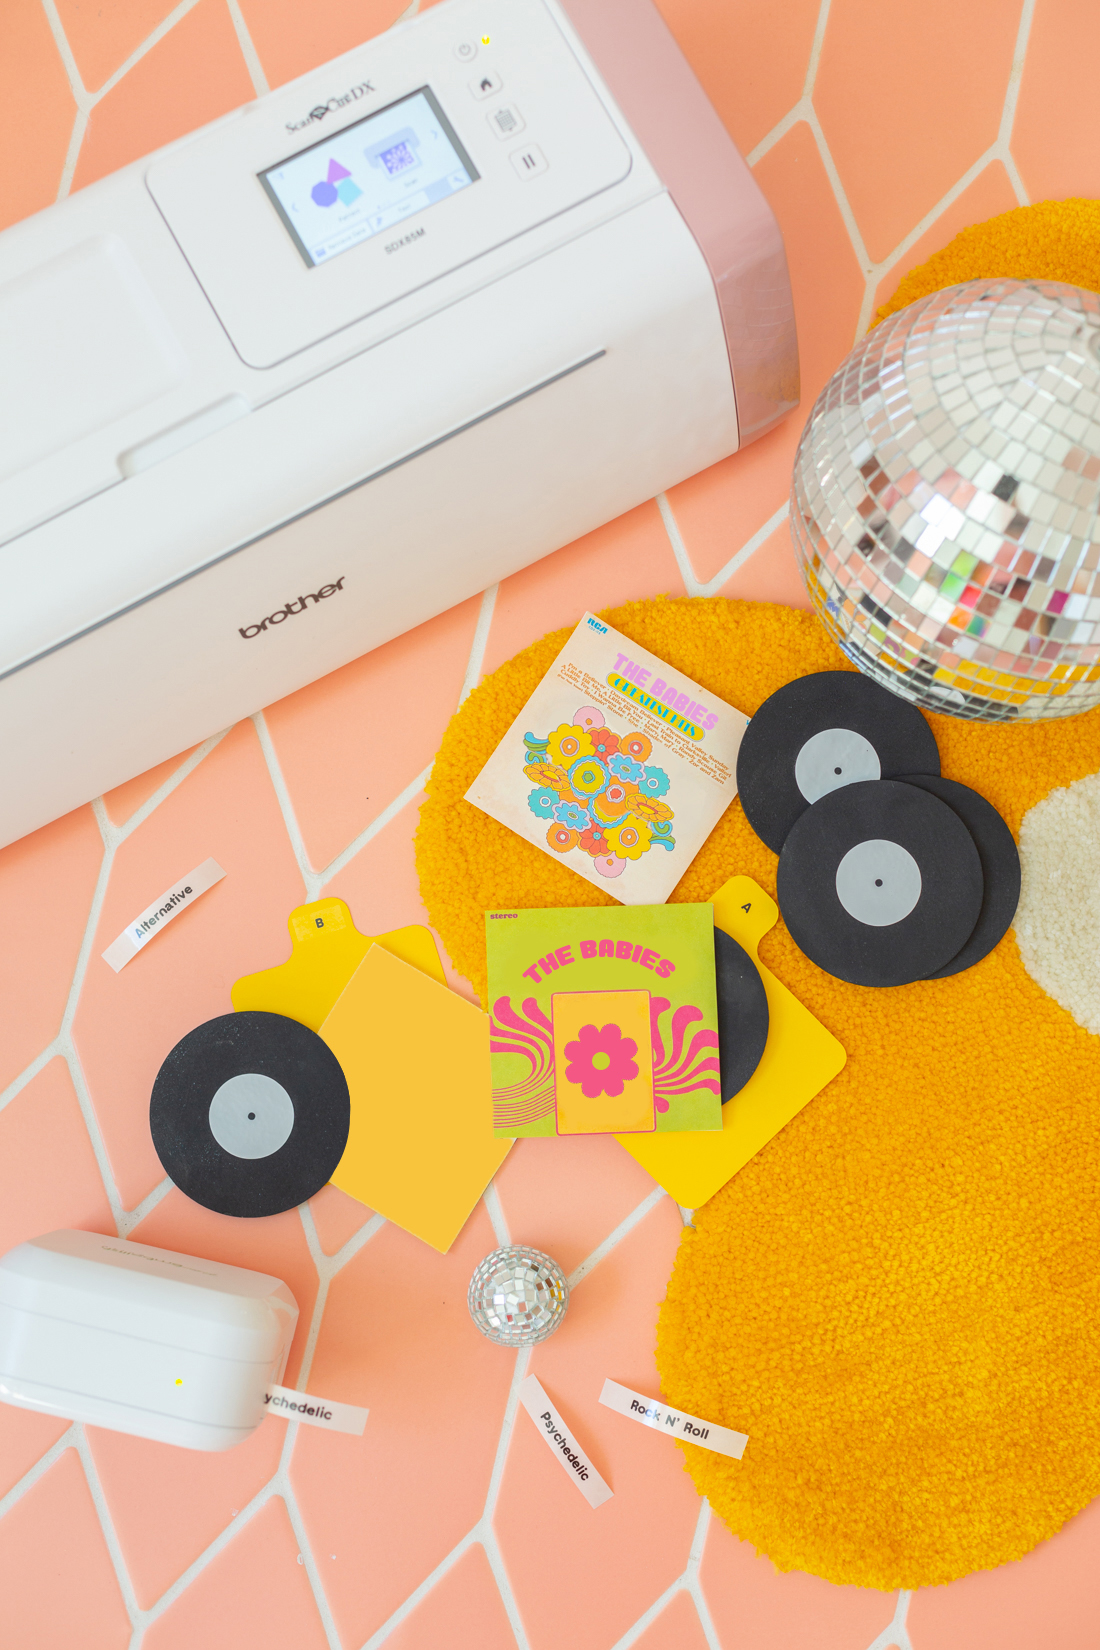
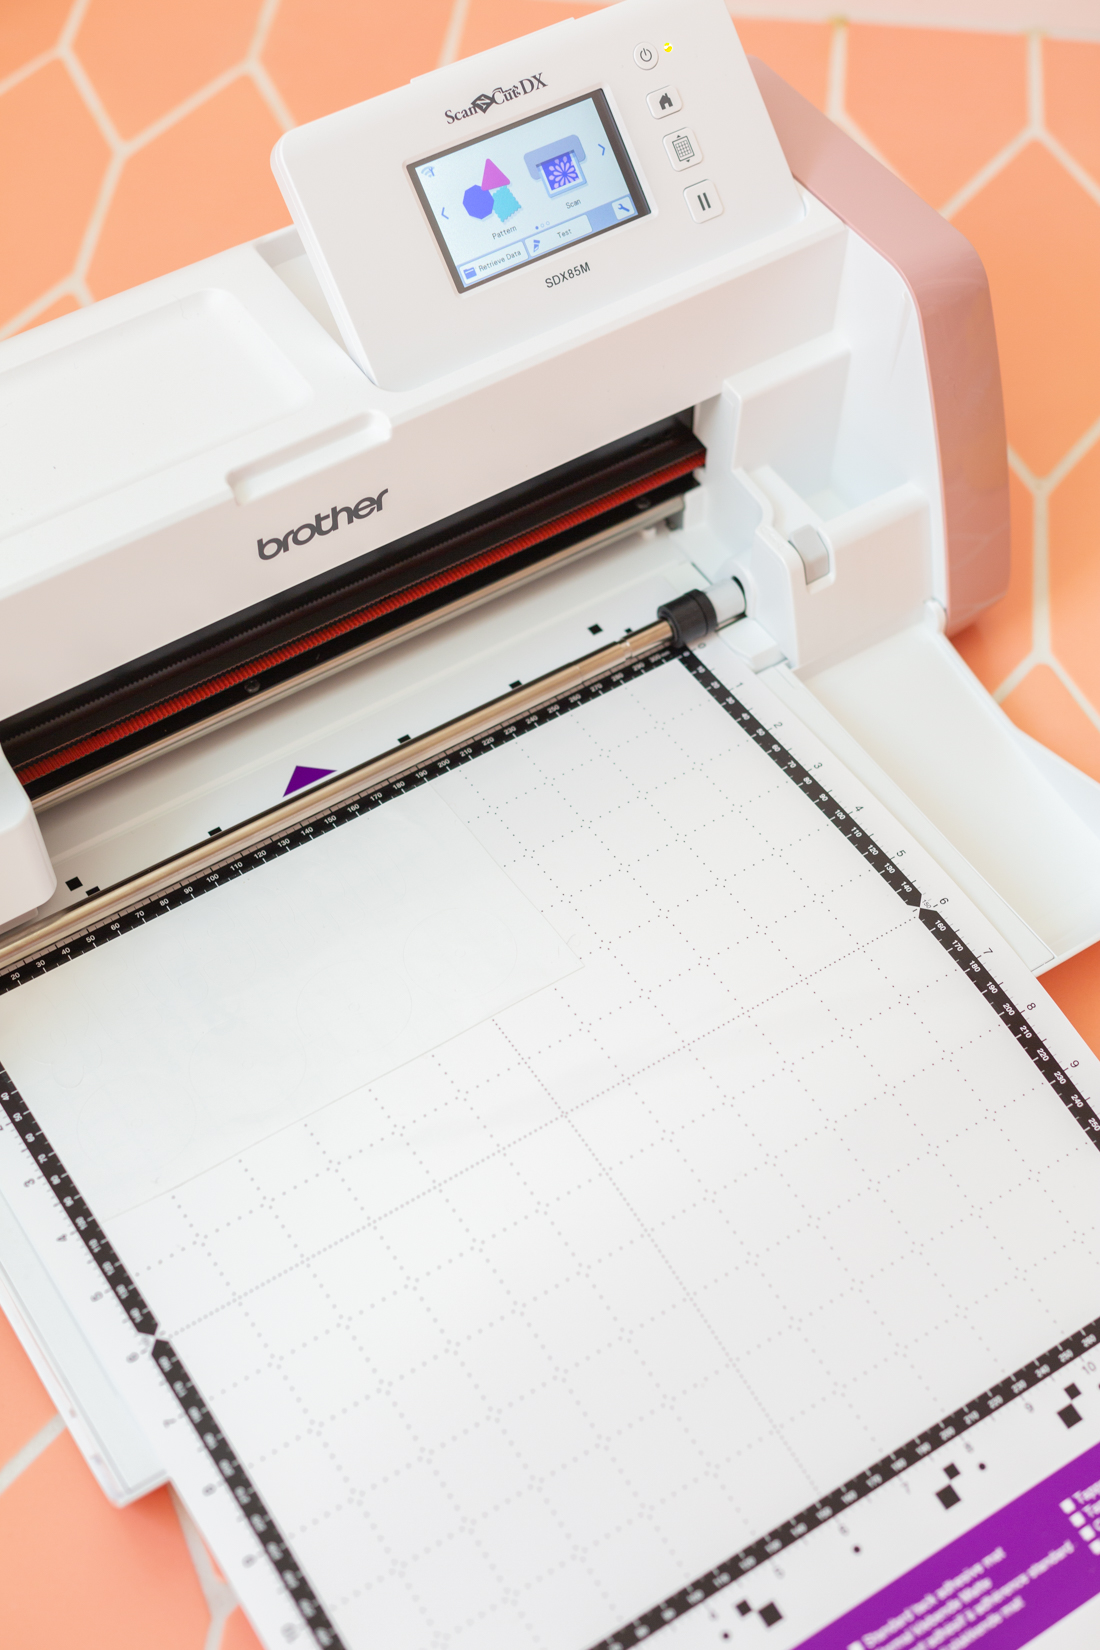
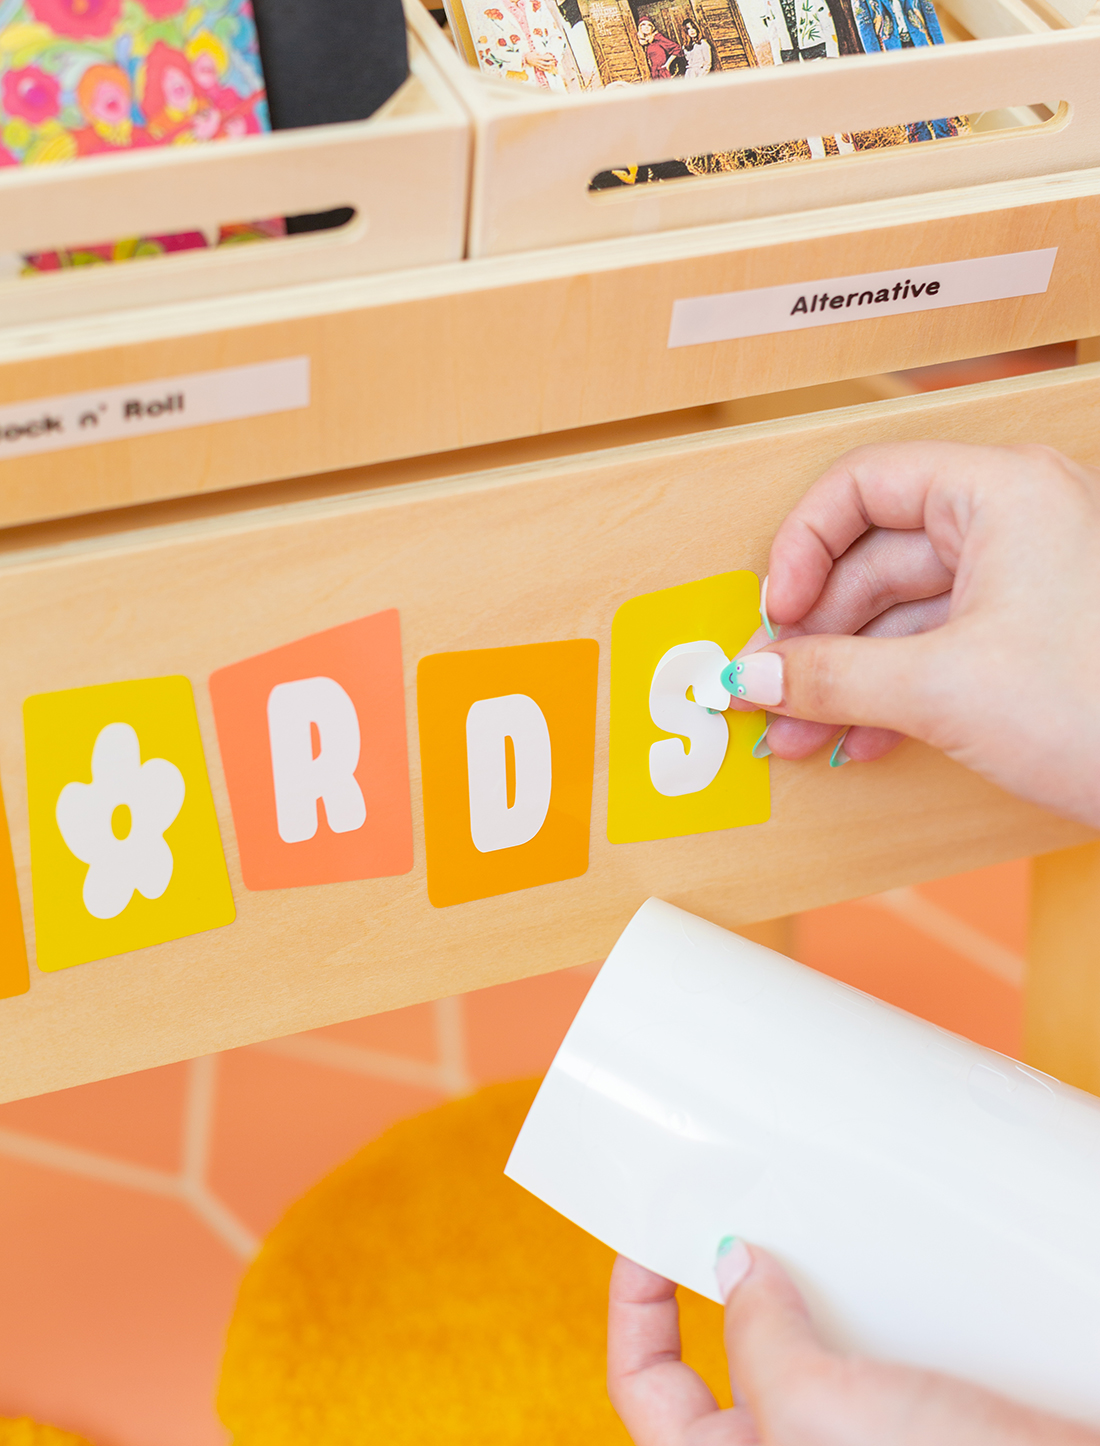
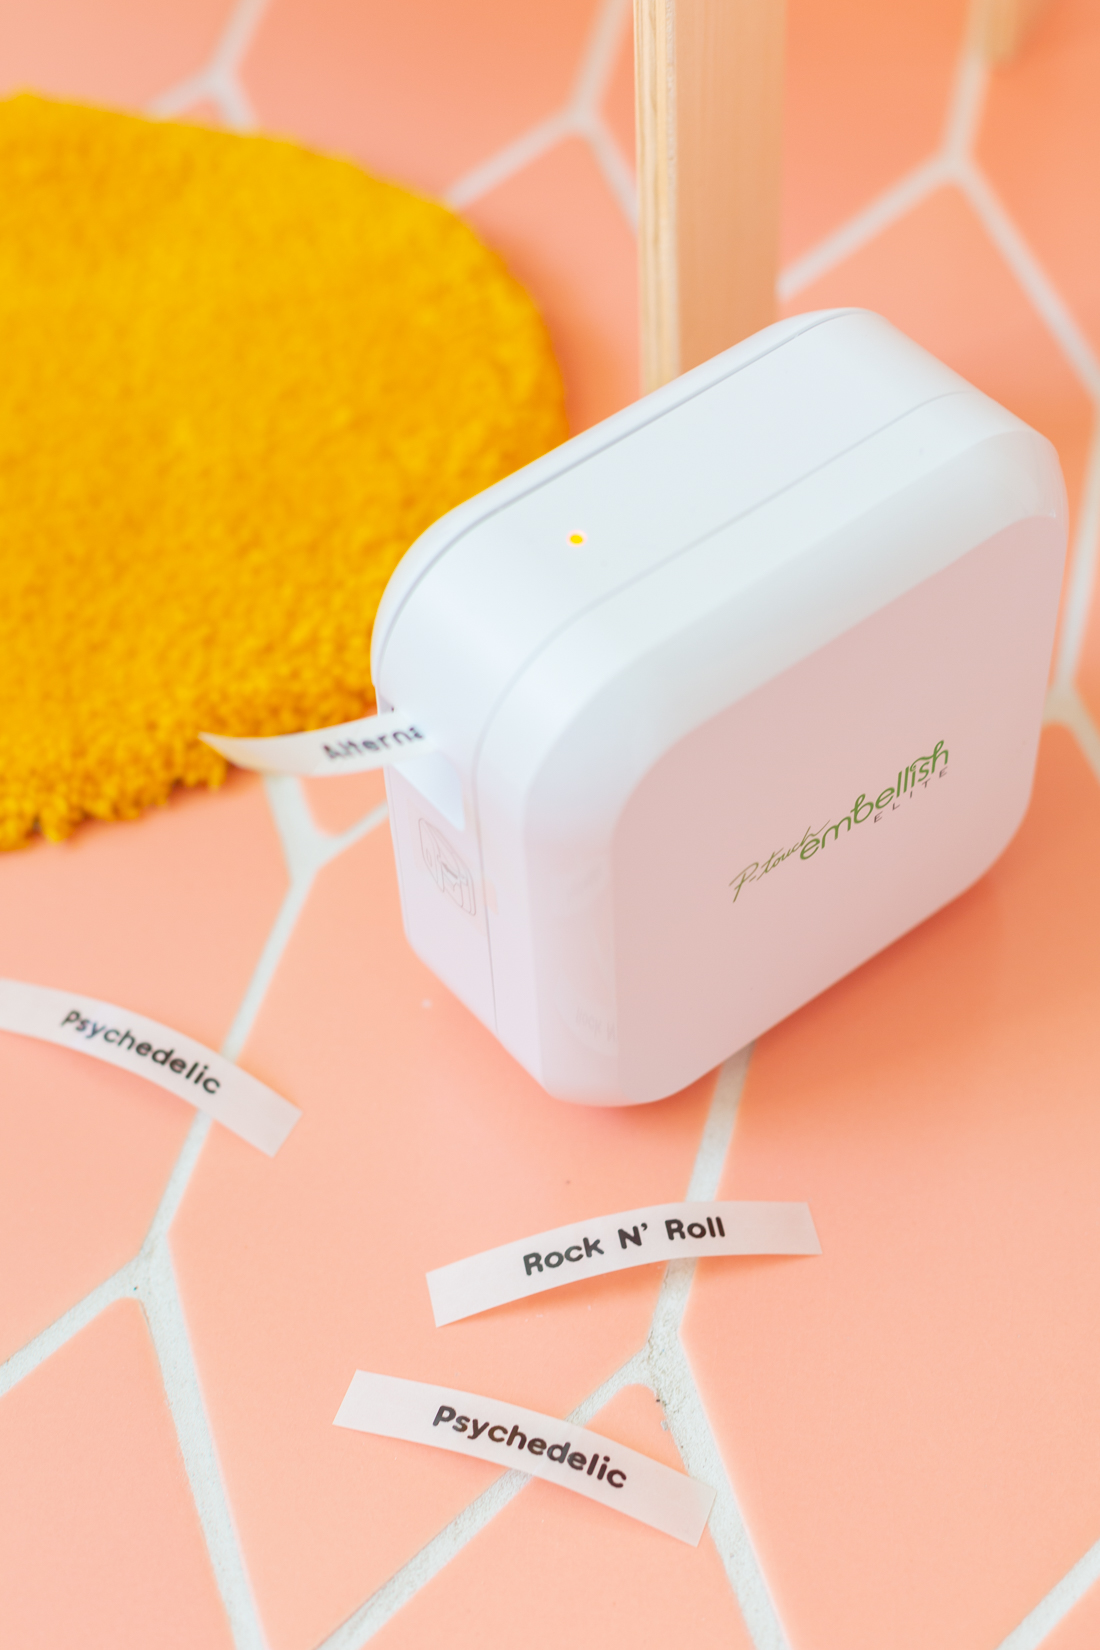
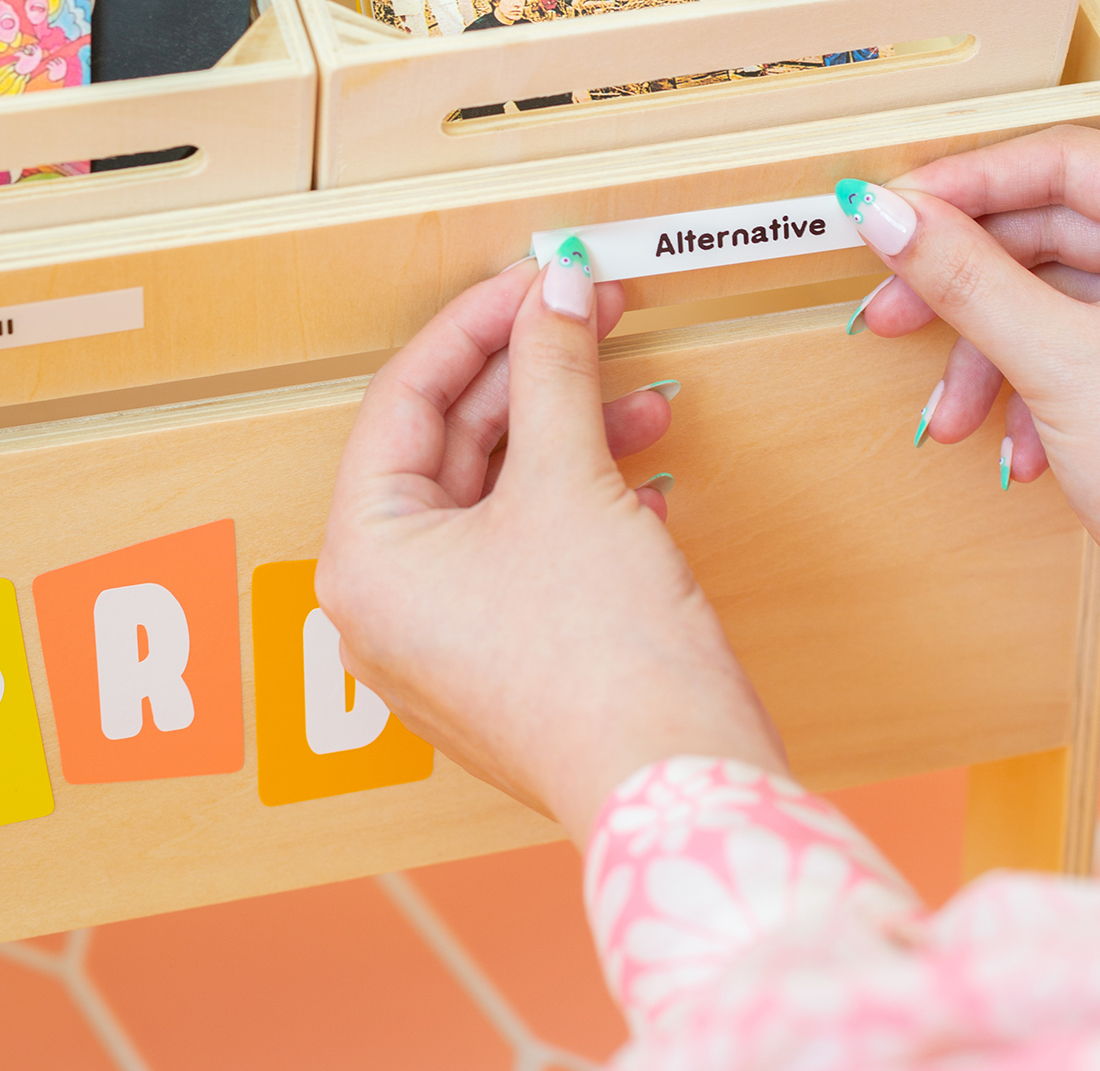
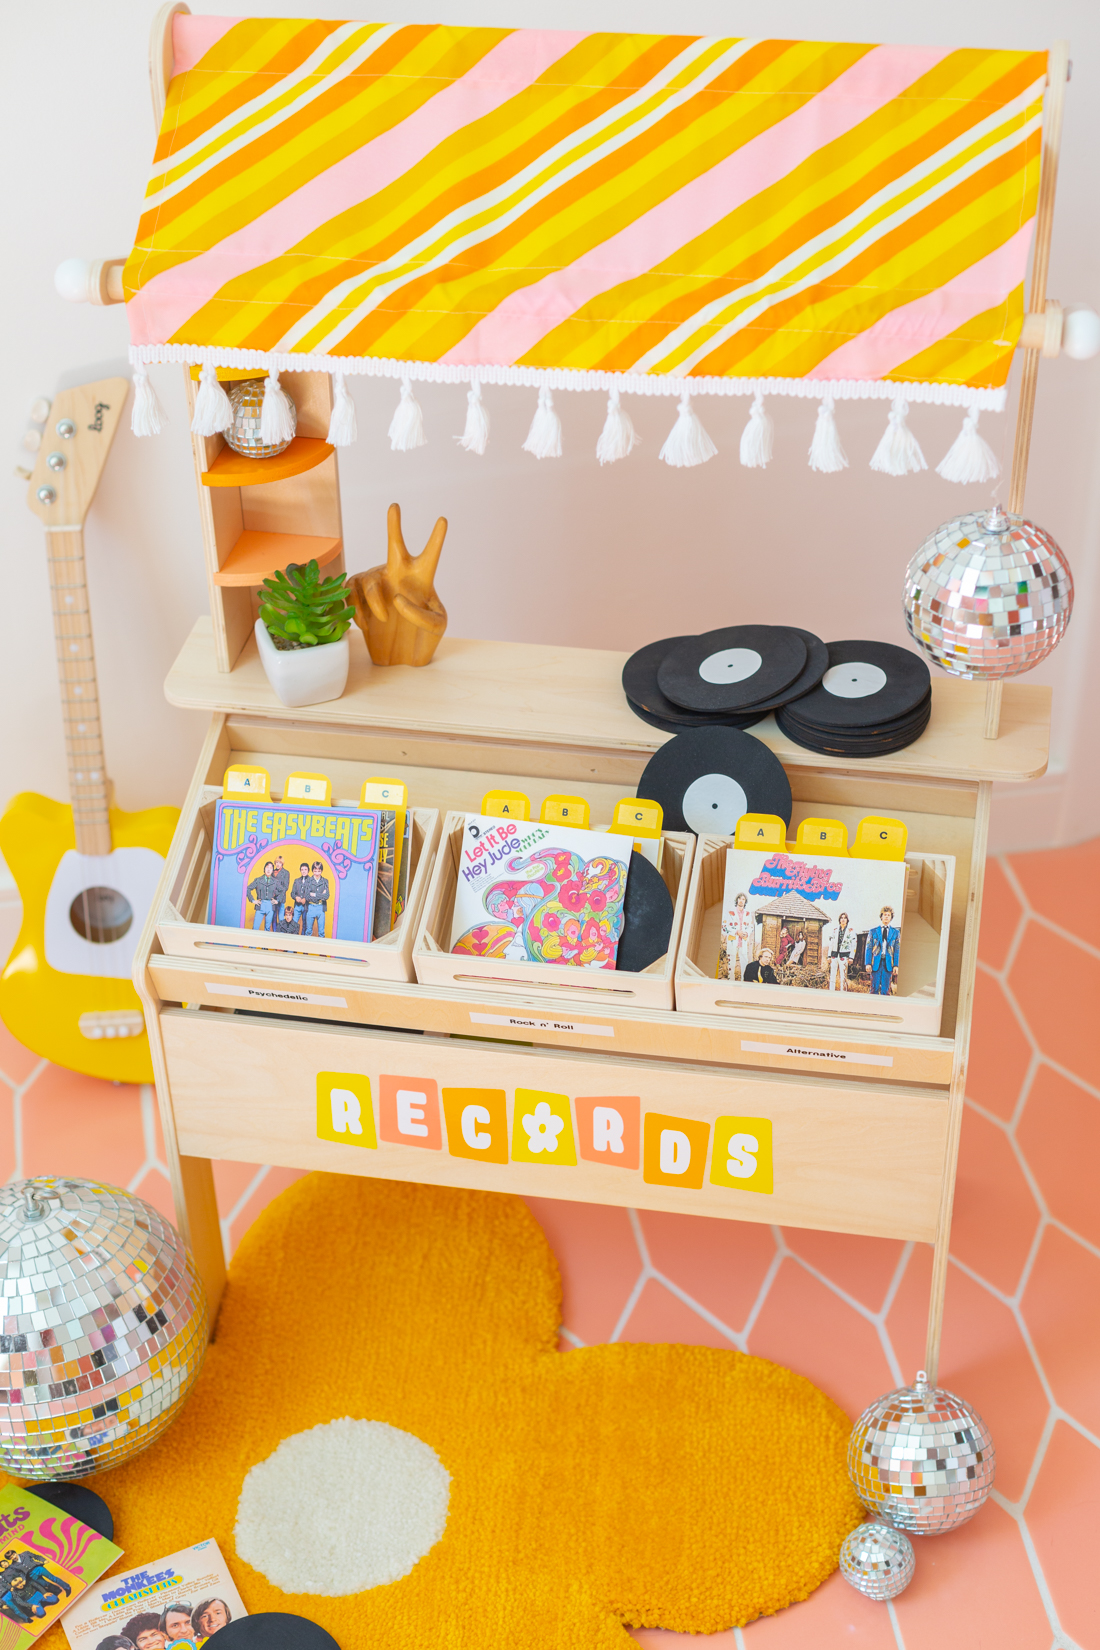
The Brother P-touch Embellish ELITE Label Maker was perfect for making the genre stickers, and record dividers, and I think they help the stand look more “authentic”! Kyle and I have been to plenty of record stores trying to find the perfect album or just browsing for inspirational cover art, and we wanted to recreate that feeling of flipping through the stacks of records to find a treasure with our dividers. We also used the ScanNCut DX SDX85M to cut out the dividers themselves, because it’s so precise and it takes some of the more tedious work out of your hands, giving you more time to focus on being creative and decorating your record stand.
 4″ wooden circles (here)
Black milk paint (here)
Wooden crates (we chose these)
Play market stand (we chose this one)
White and yellow card stock
ScanNCut DX SDX85M
Brother P-touch Embellish ELITE Label Maker
Brother P-touch 1/2″ black print on white tape
Brother P-touch 1/2″ black print on clear tape
Orange, coral, yellow, and white permanent vinyl sheets
Fabric to replace awning (optional)
Fringe to add to awning (optional)
Scissors
Hot glue gun

 1. First, assemble your record store stand, and place your wooden crates on the stand.
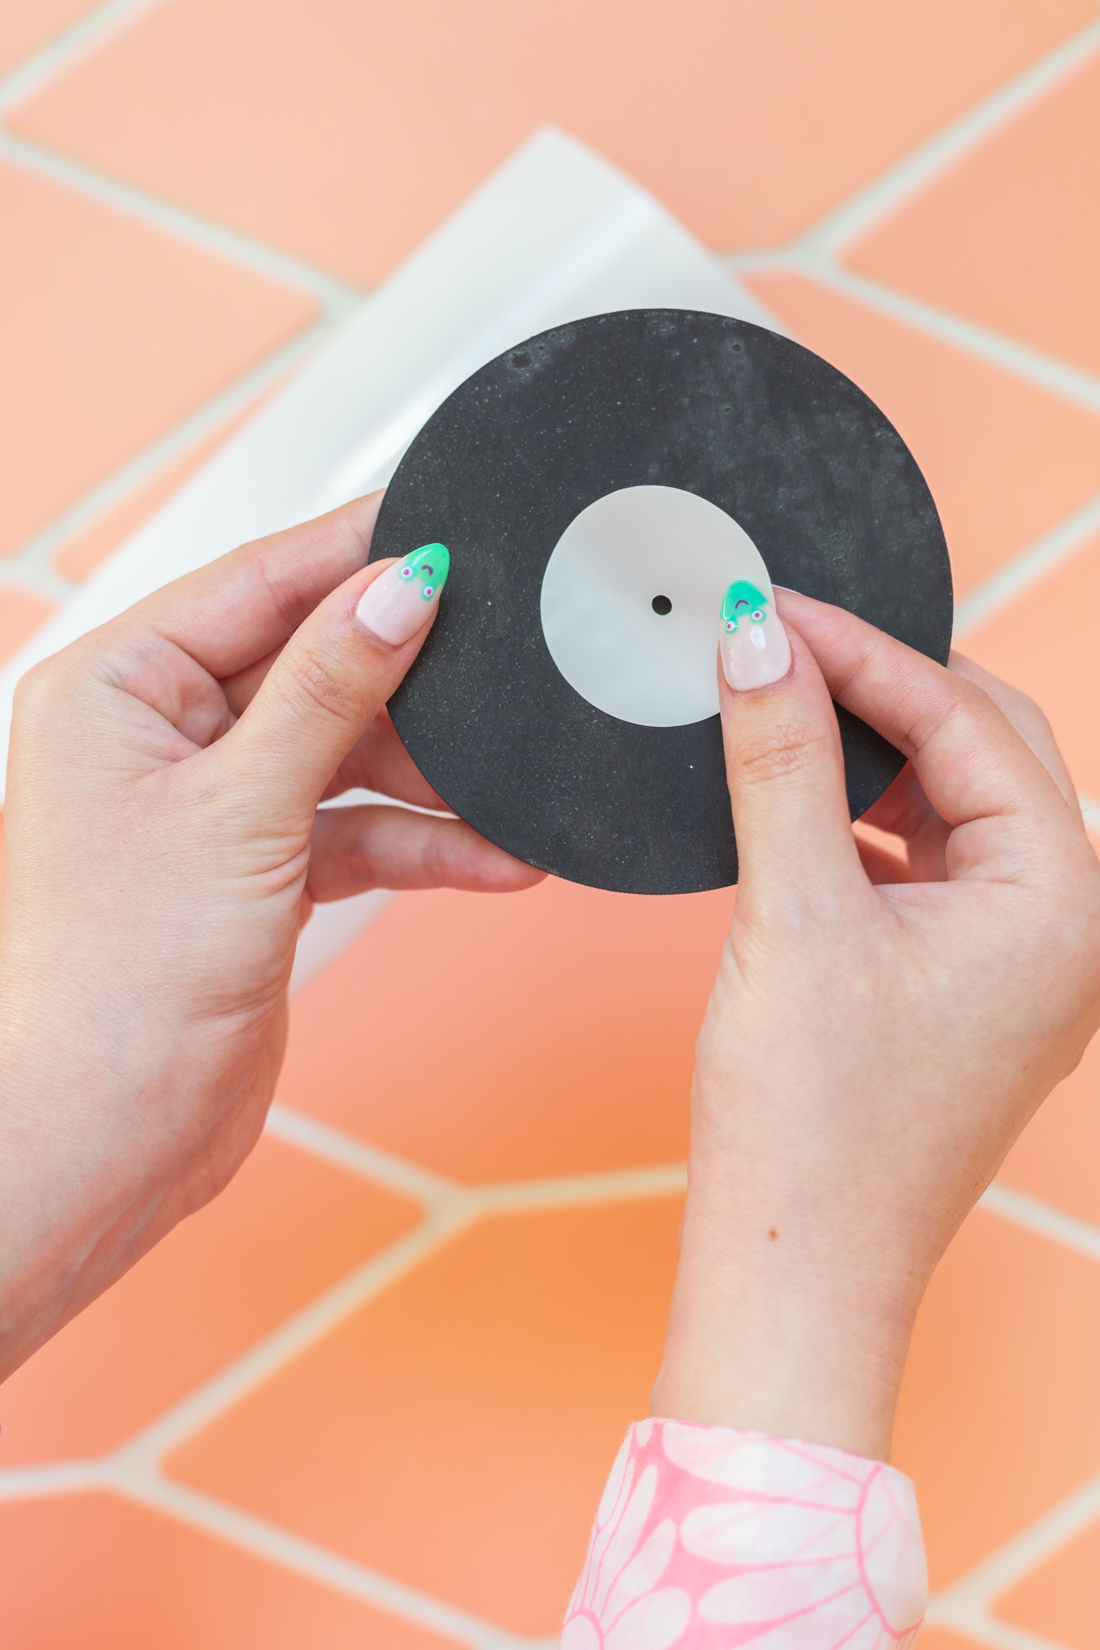
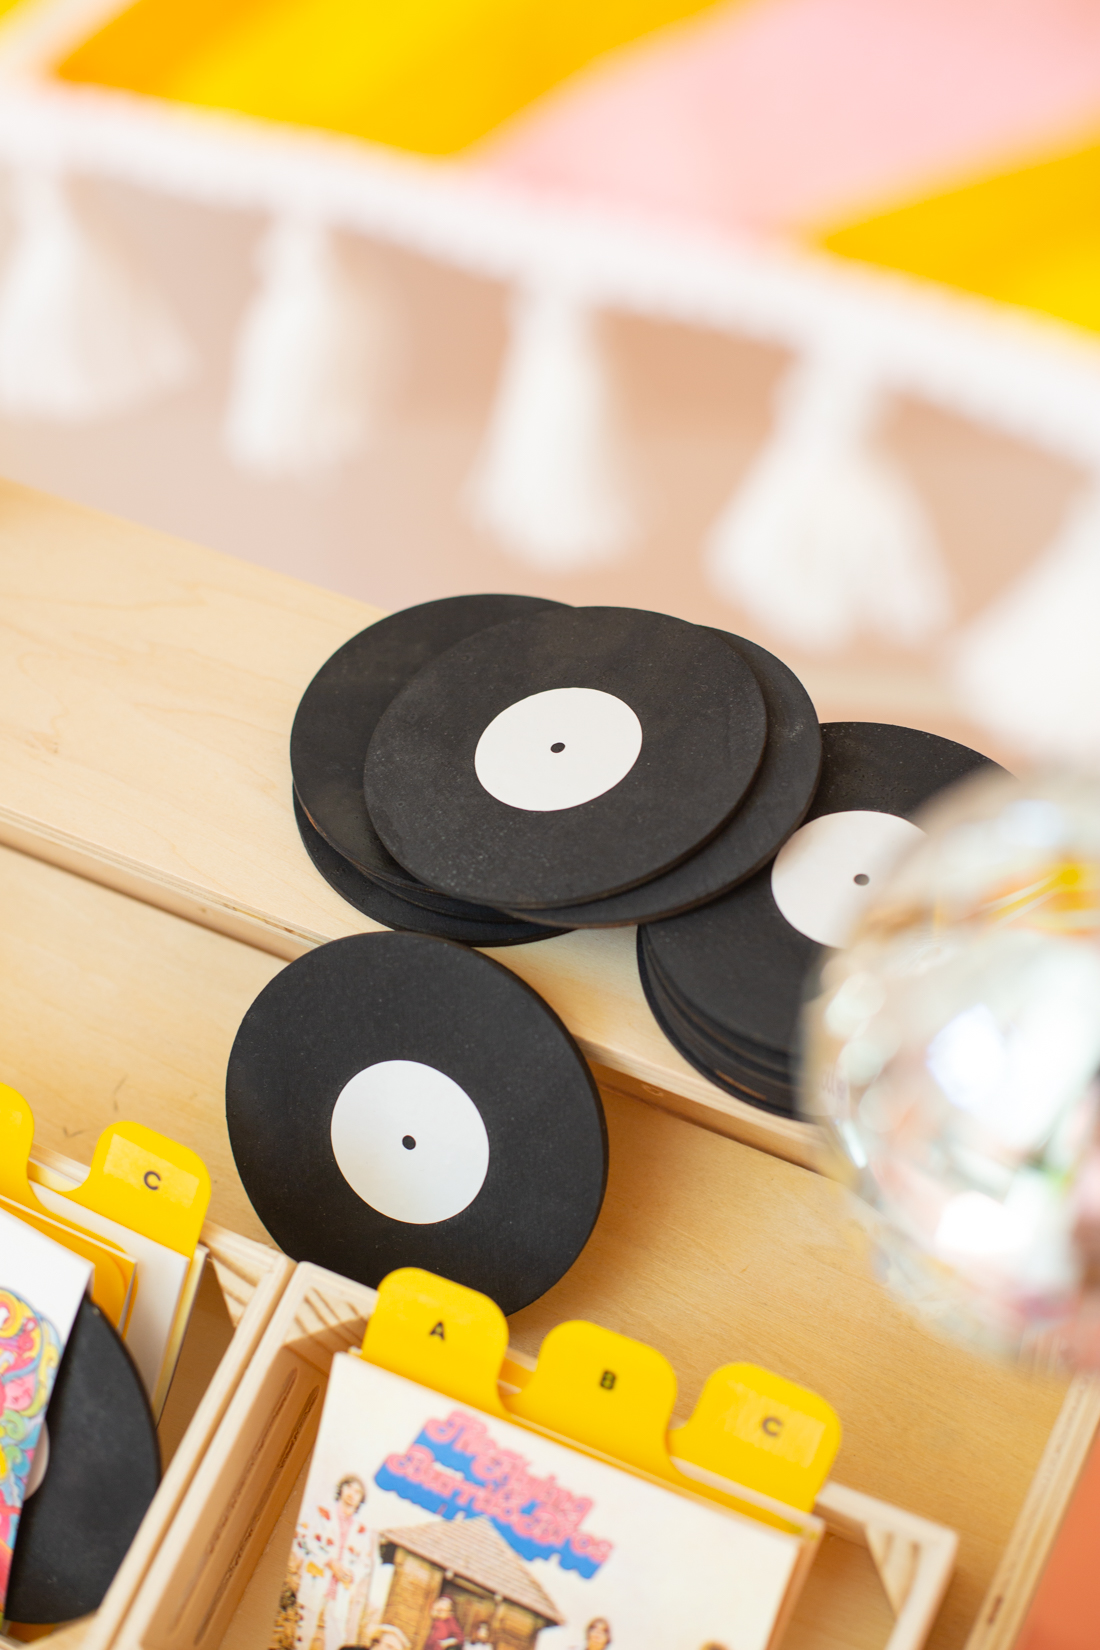
2. Next, mix together your milk paint and paint your wooden circles. Now, using the Brother ScanNCut DX electronic cutting machine and white vinyl, cut out the centers of the records and apply them. Print out the record fronts and backs out of white cardstock, then cut out and assemble them with your hot glue gun.
3. Using the ScanNCut DX electronic cutting machine, cut out the record dividers, then using the Brother P-touch Embellish ELITE print out your labels on the 1/2″ black print on clear tape. Place them on your record dividers. Then use the ELITE to print out the genre labels on 1/2″ size black print on white tape as well, and place them beneath the record crates.
4. Now, using the ScanNCut DX electronic cutting machine, cut out the sign letters, and shapes, and place them on the front of your stand.
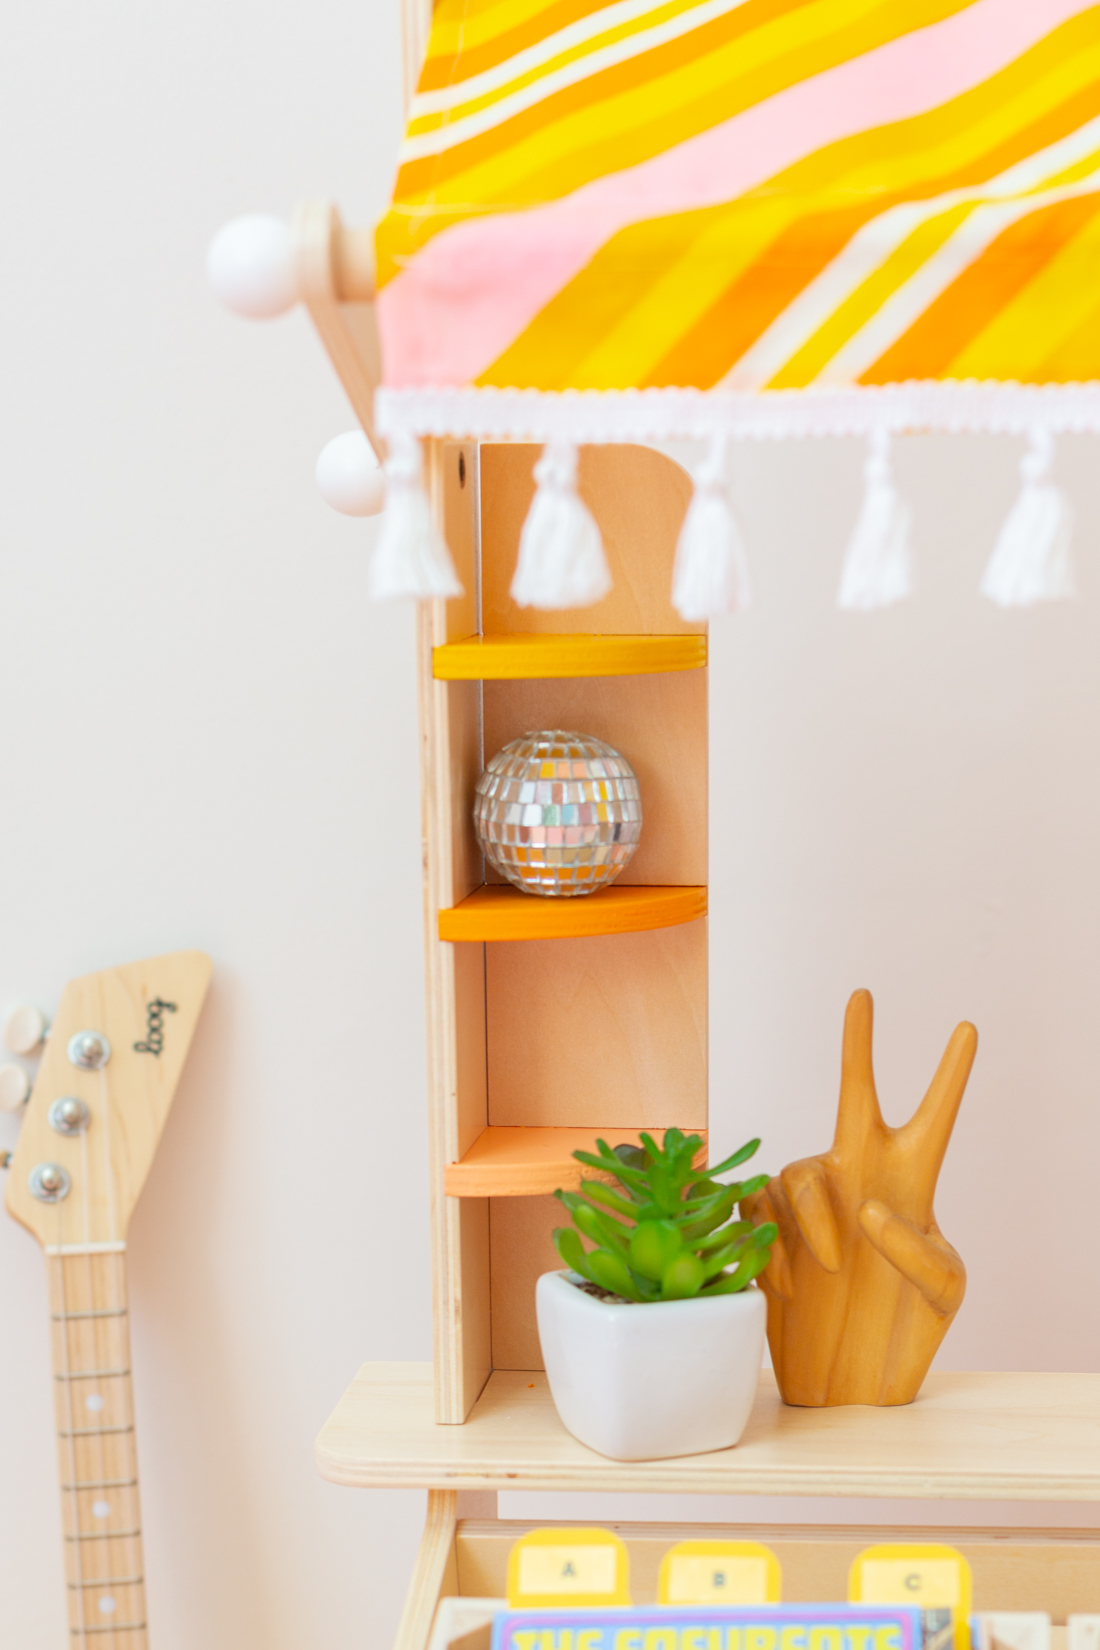
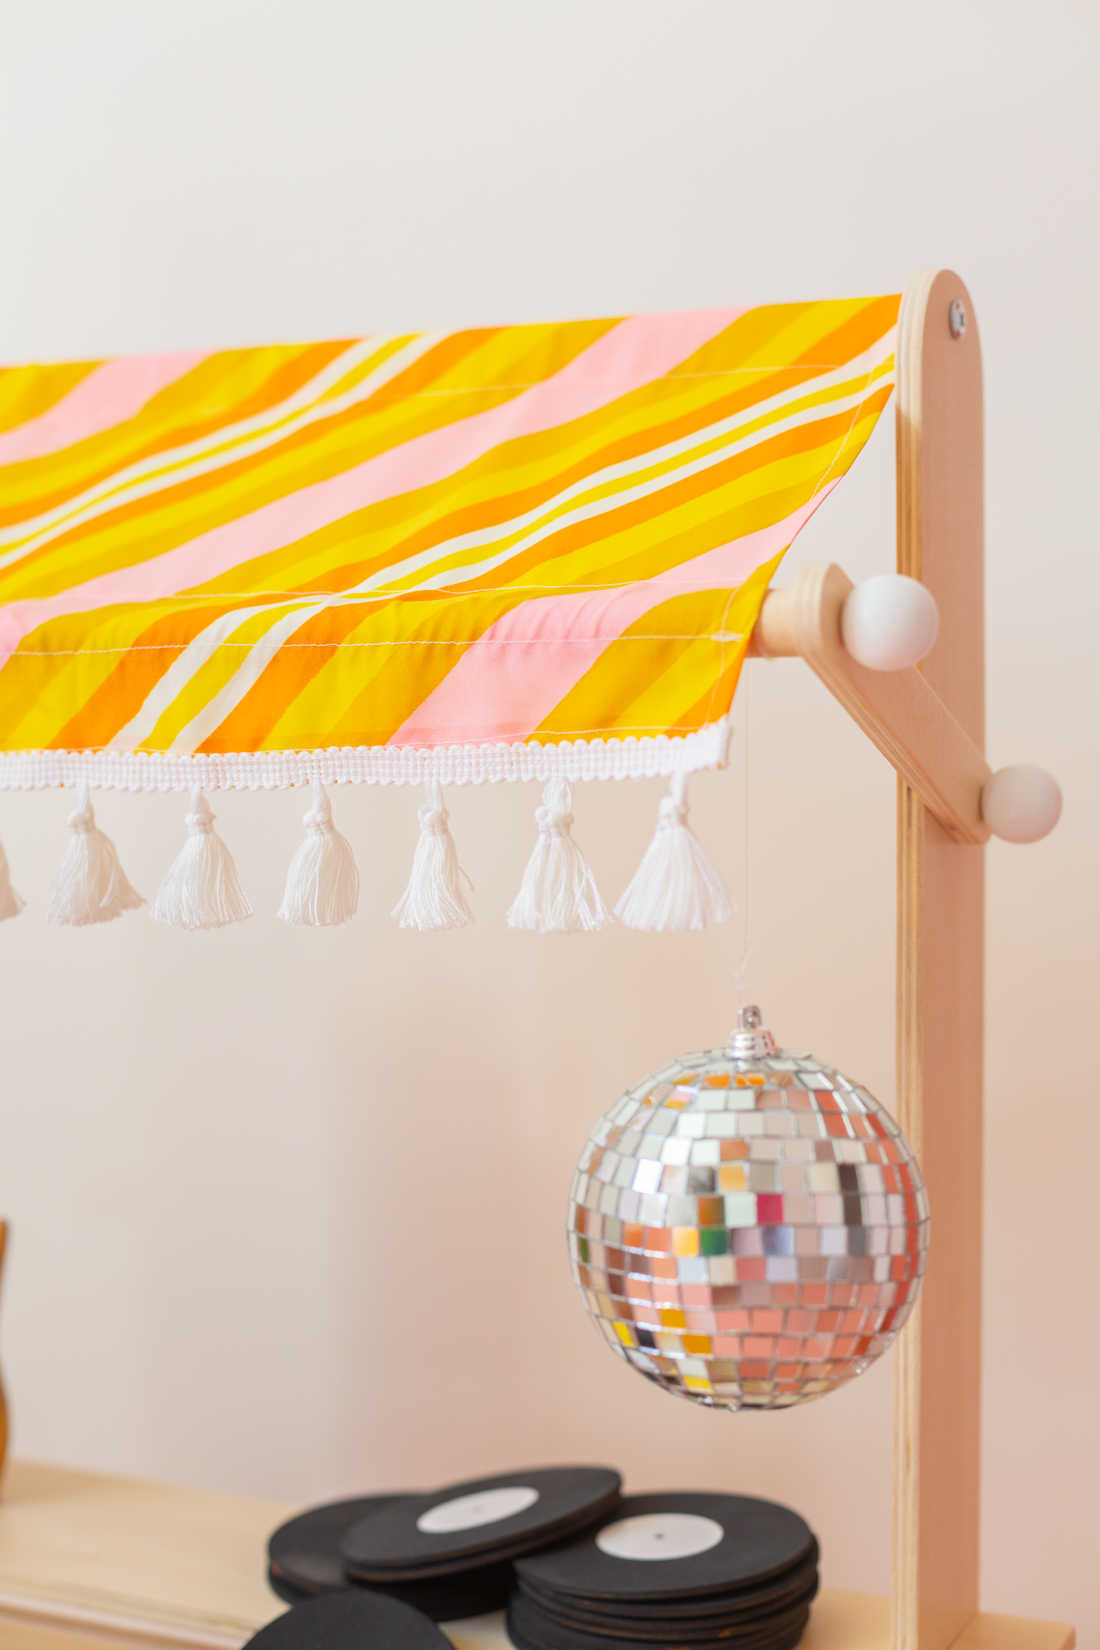
5. We used the old awning as a pattern to make a new one, and sewed our fringed trim onto the end of it to create a banner that better fit our stand. We then hung a disco ball using fishing line from one end of the awning.
Now who’s ready to groove out to some tunes? I’m so excited to be able to play with our little one in their new record stand even if I have to wait a little. This project has to be one of my favorites, because not only does it stand out in its uniqueness, but it’s also a way for us to share our interests and connect with our baby. Being able to make this project helped me de-stress and relax during such a hectic time and that was so gratifying. Crafting for our baby has brought me so much joy and kept me sane during this truly crazy experience. Hopefully crafting can be your creative escape as well!


