
IT’S FINALLY HERE!!!! The first room reveal in our new home, and jeez has it been a long time in the making! We are SOO excited to be able to share this with you, because it really is a room that has been a labor of love, from the bottom of the closet to the very top, everything has been hand picked and designed by us. When we first bought our house we both agreed that one of the first rooms that needed to be renovated was the closet, because the majority of our largest boxes from the move were ones containing clothes.
Starting the closet was a new experience for both of us, because neither of us has ever lived in a space that could be completely remodeled like our home. Apartments usually only allow temporary changes, like the vinyl flooring we put down in our rooms or a temporary coat of colored paint that would repainted white. We came into this with our limited knowledge of apartment renovations and whatever we could learn, and have definitely learned so much along the way. I’ve been so excited and nervous to share this room and I hope you all love the space as much as I do! Let’s get to it!!!
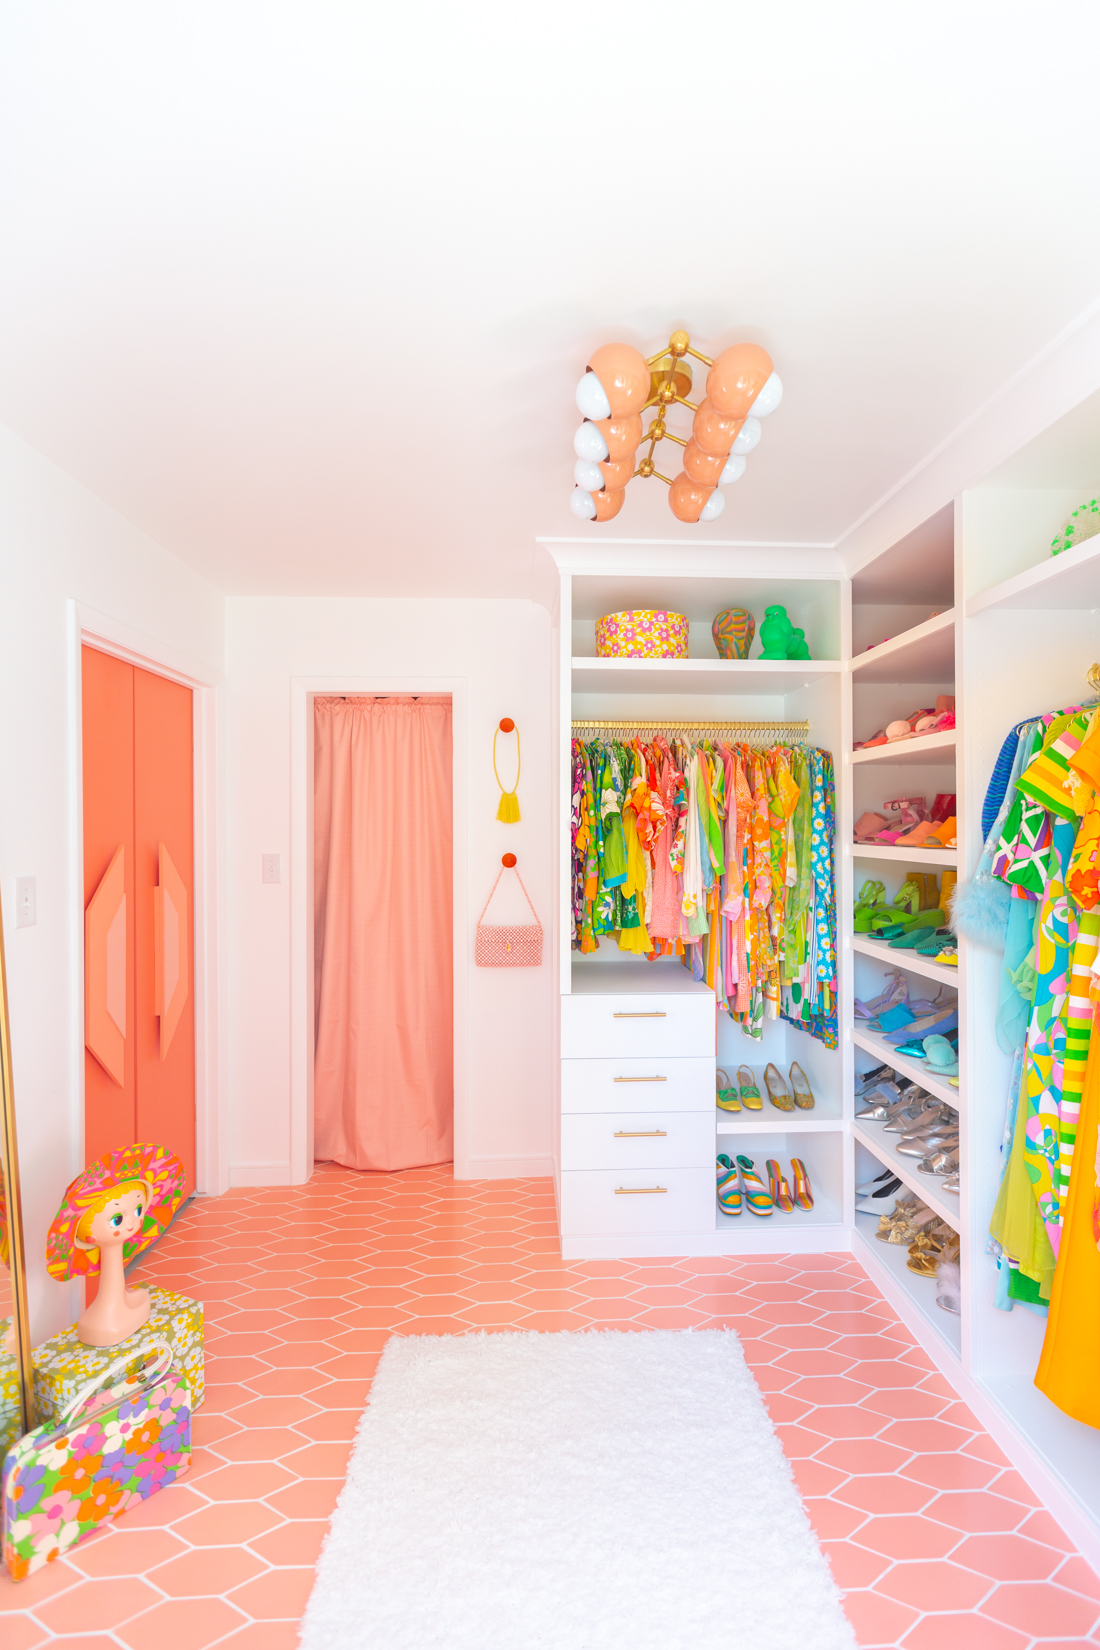
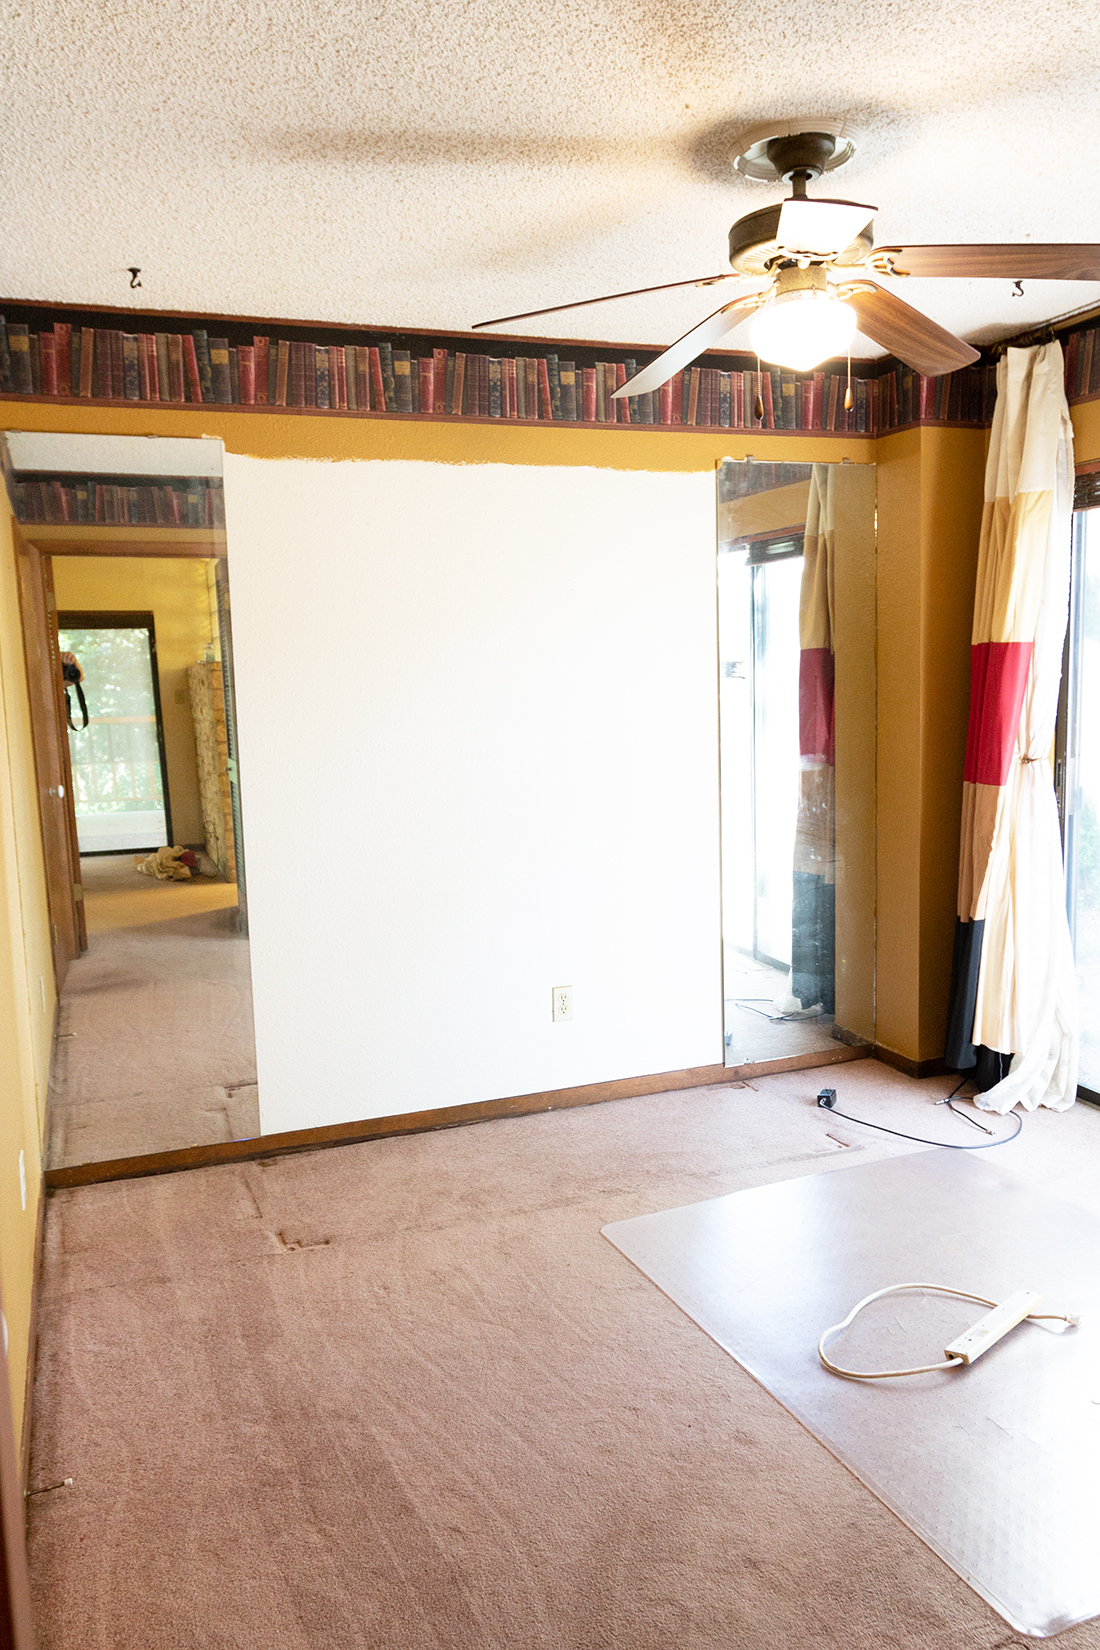
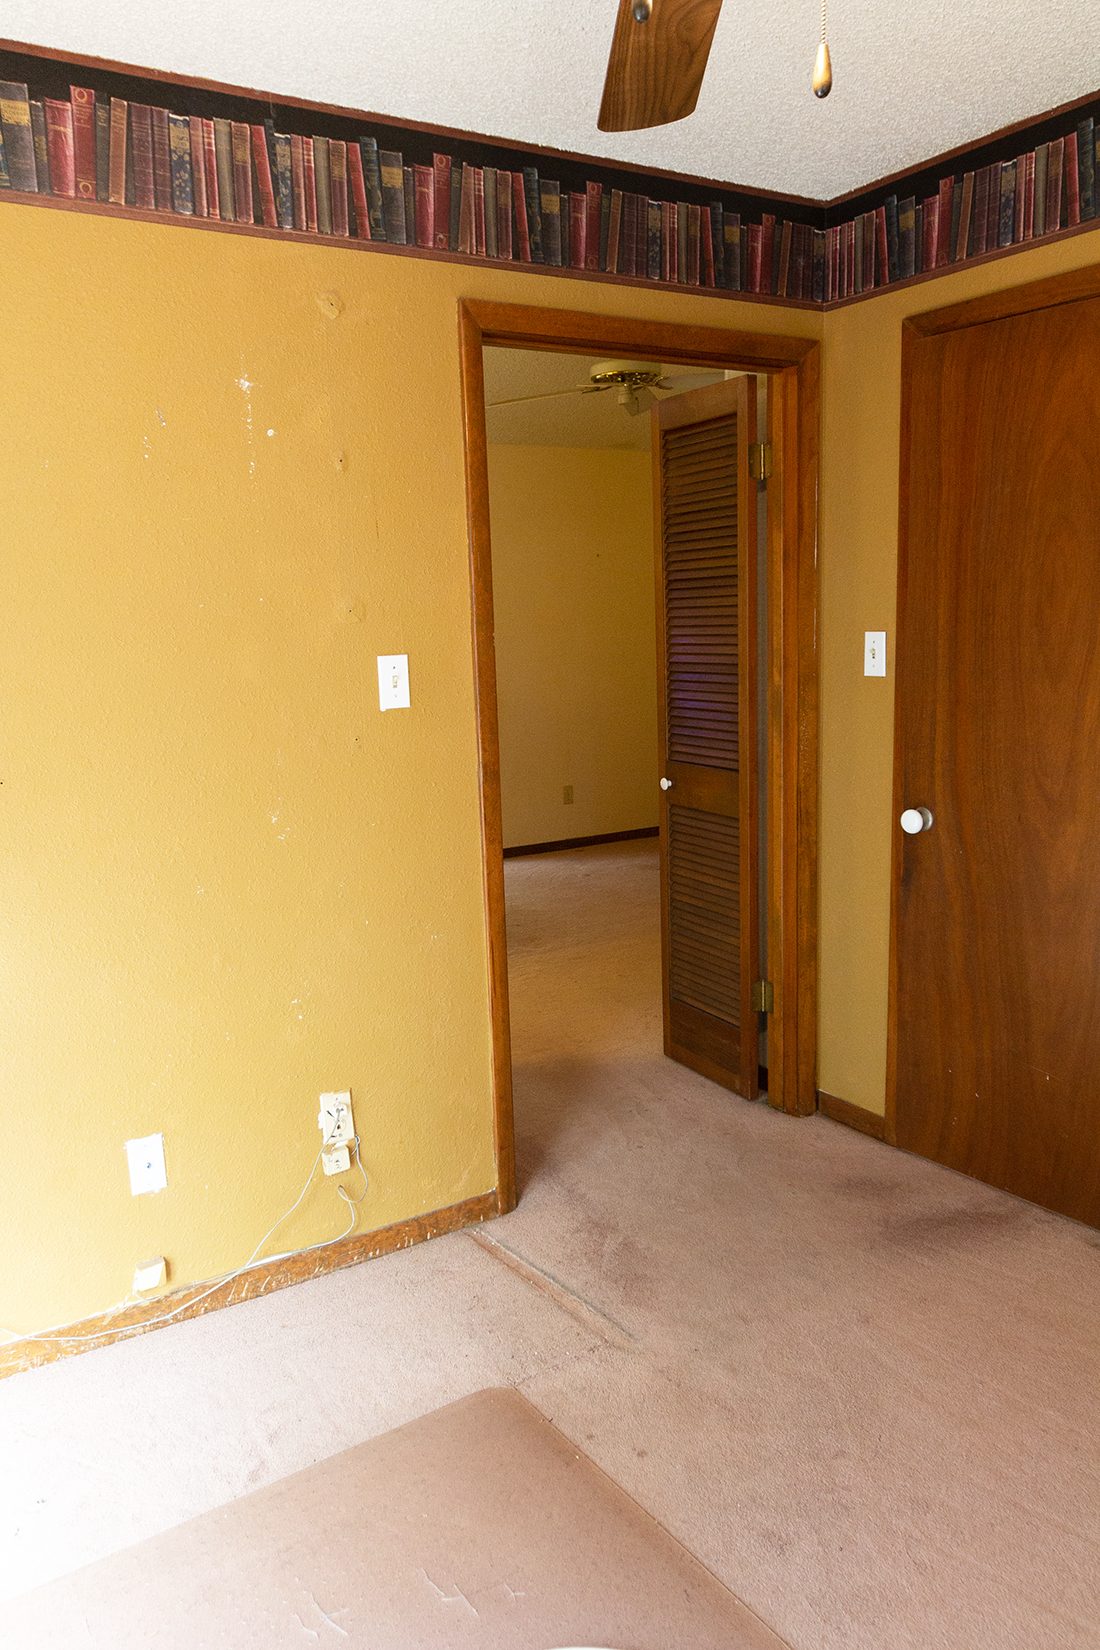
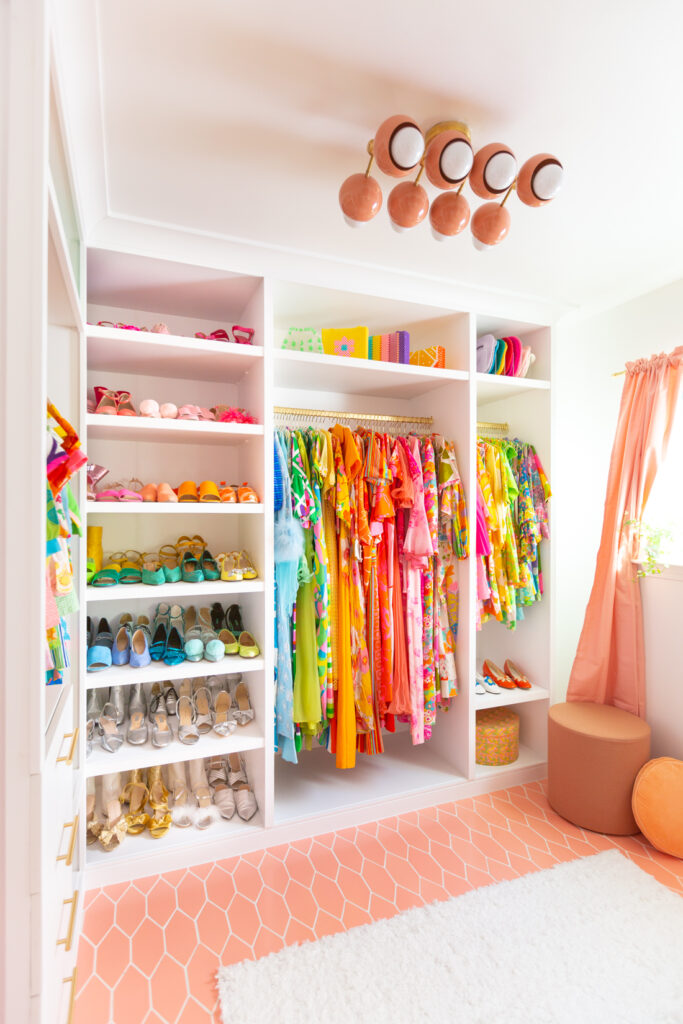
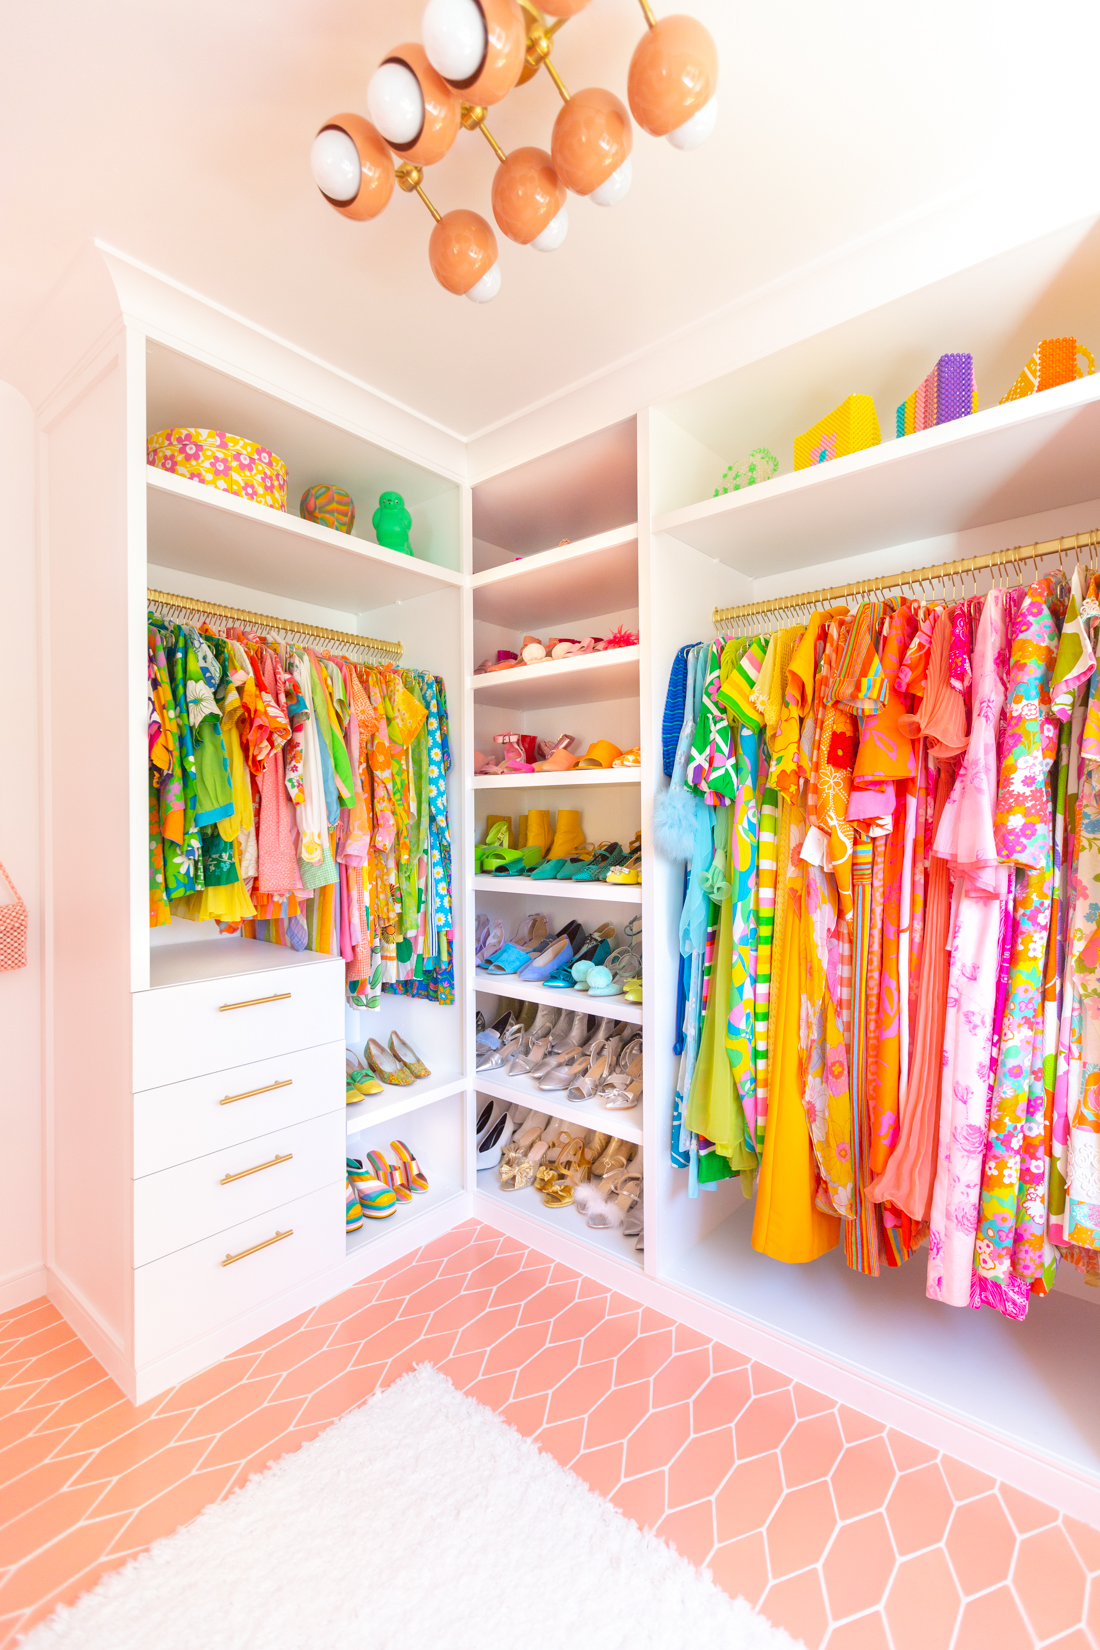
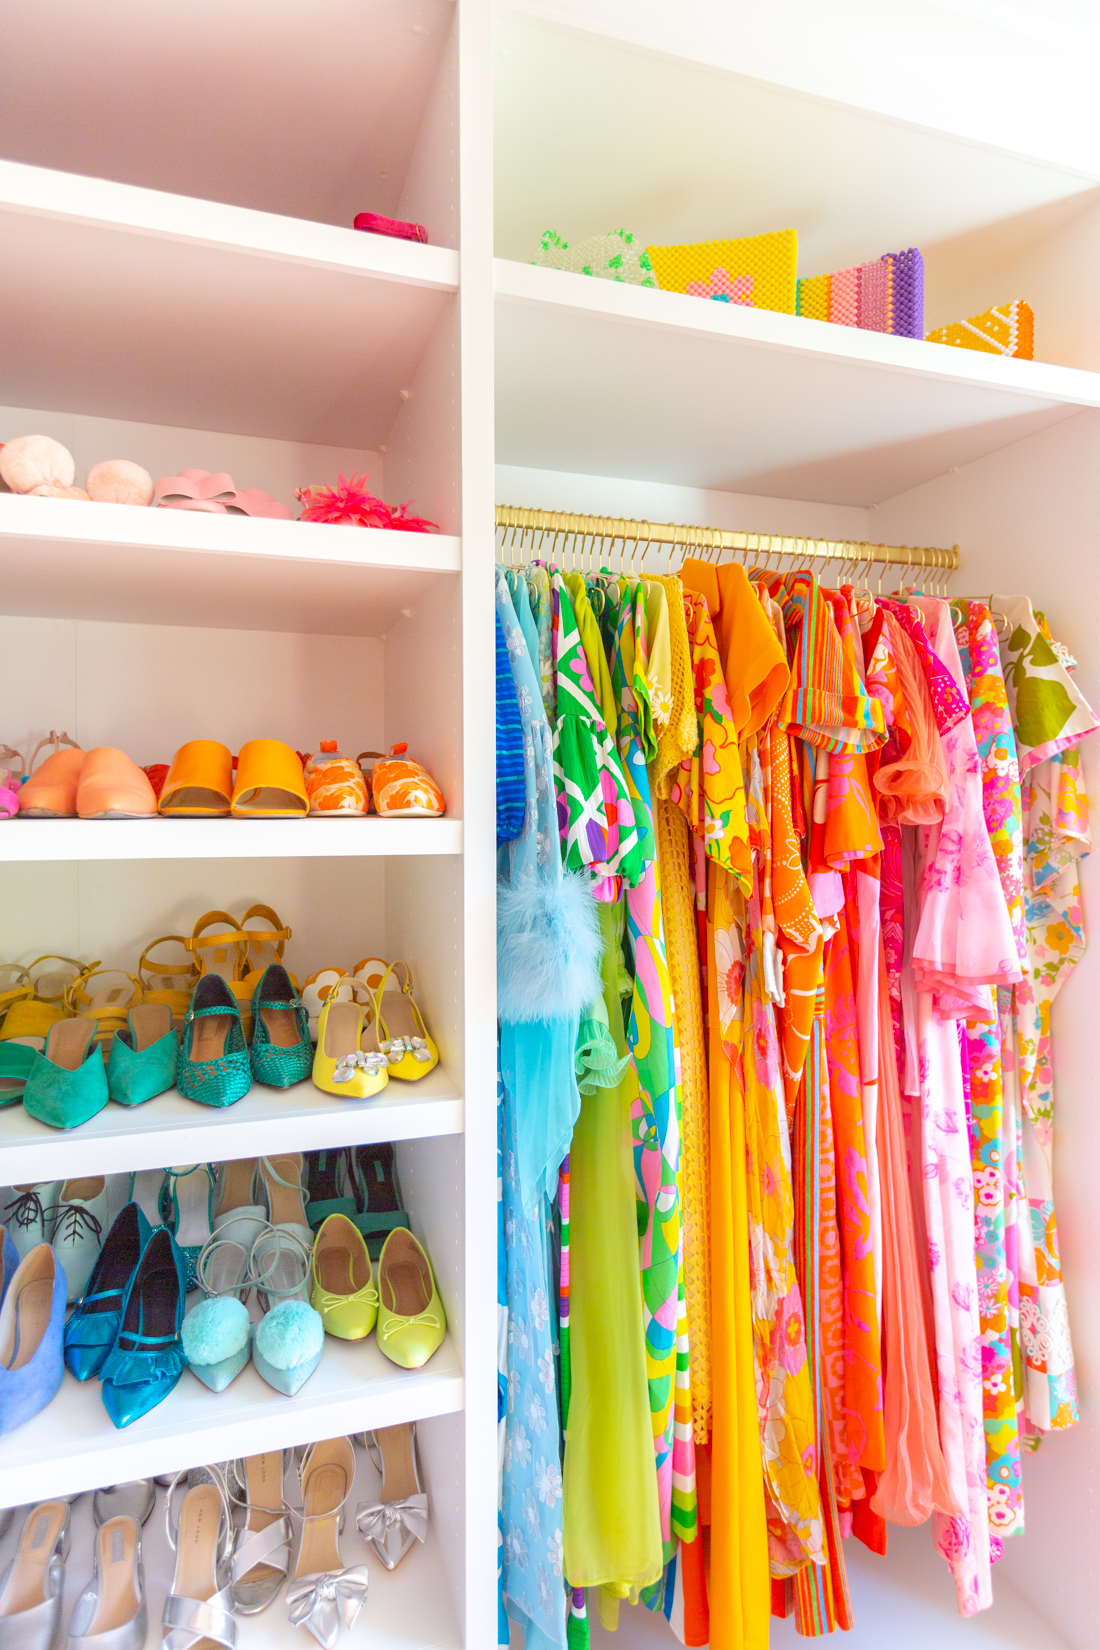
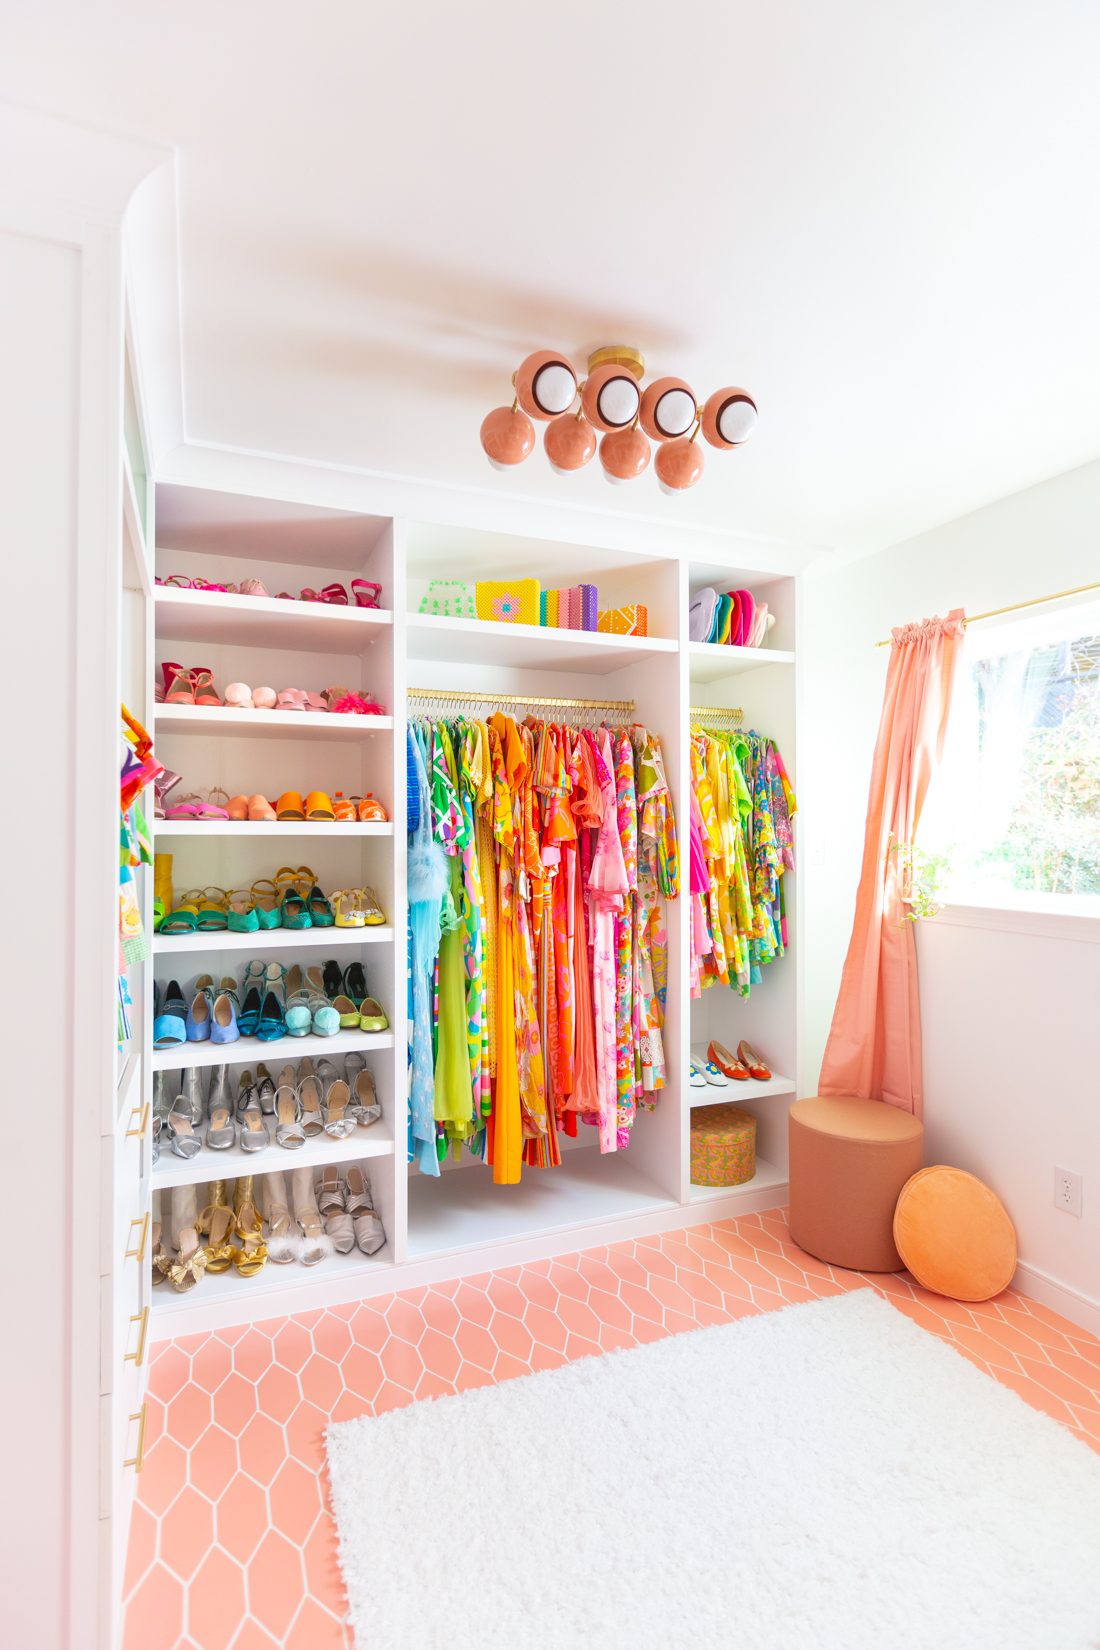
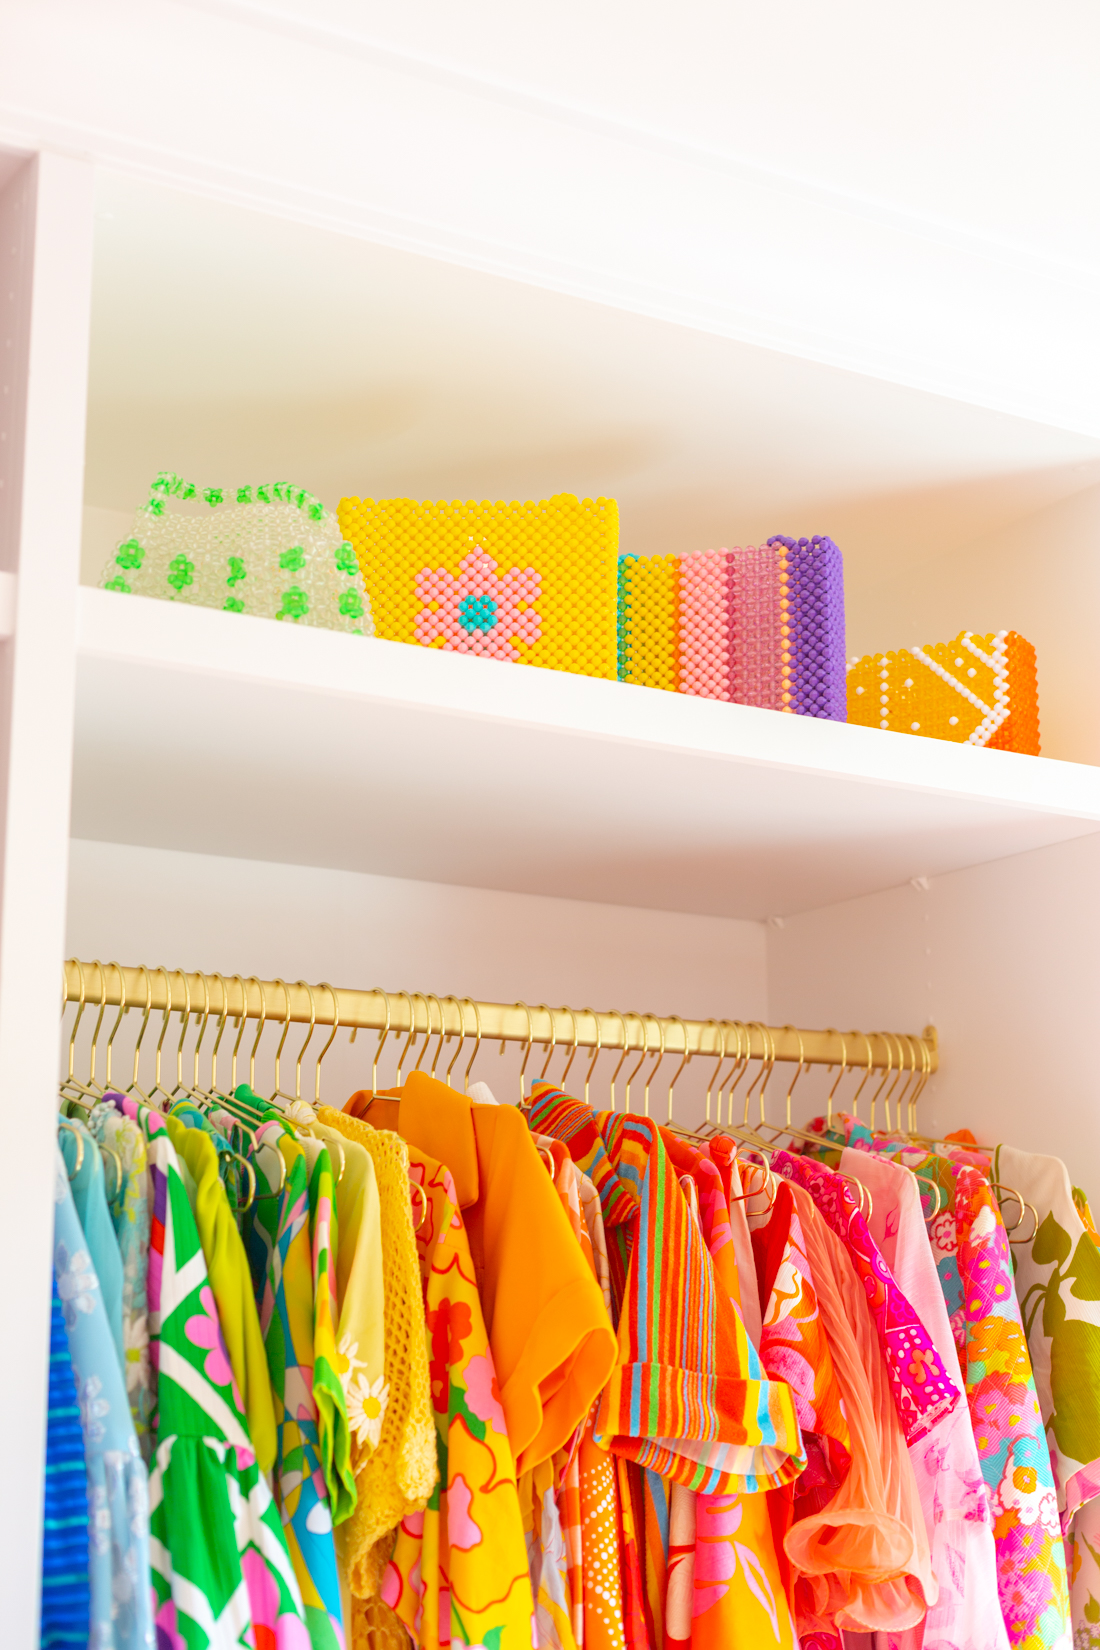
The most important part of this entire process has been remodeling this room from a carpeted 1970’s office into a beautiful walk in closet! Who could have imagined how different the before and after photos would be?? We sure couldn’t! These two before photos don’t really do justice to how bad the room looked before but you can see, the carpet definitely needed to go! The original wall colors also made the room feel much smaller and a little bit more gloomy than the room had to be, so we brightened everything up with our favorite Dunn Edwards White and also got rid of the popcorn ceilings. The biggest change, however, was hacking an IKEA PAX wardrobe! That’s right, the entire closet is one giant IKEA hack!! We bought and built five PAX wardrobes, and then attached trim, baseboard and crown moulding to make them look like built-in storage and shelving! Pretty crazy how much of a difference those things can make when it comes to a standard wardrobe from IKEA, right?
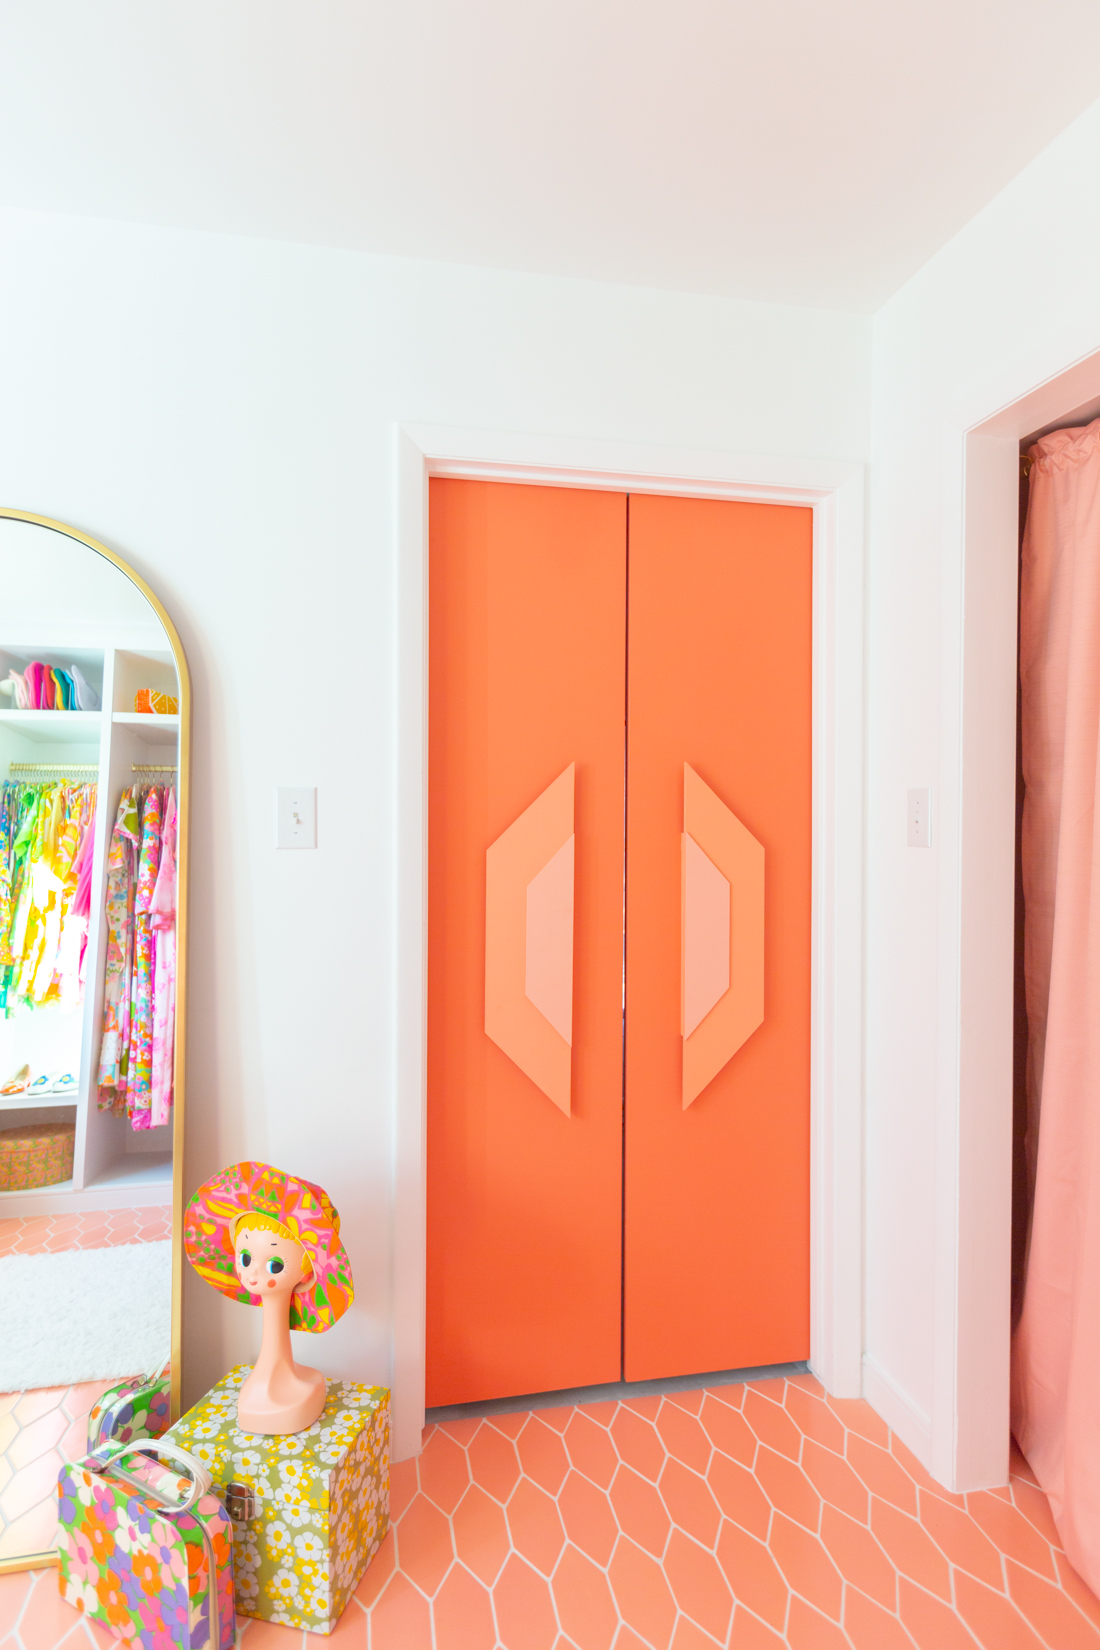

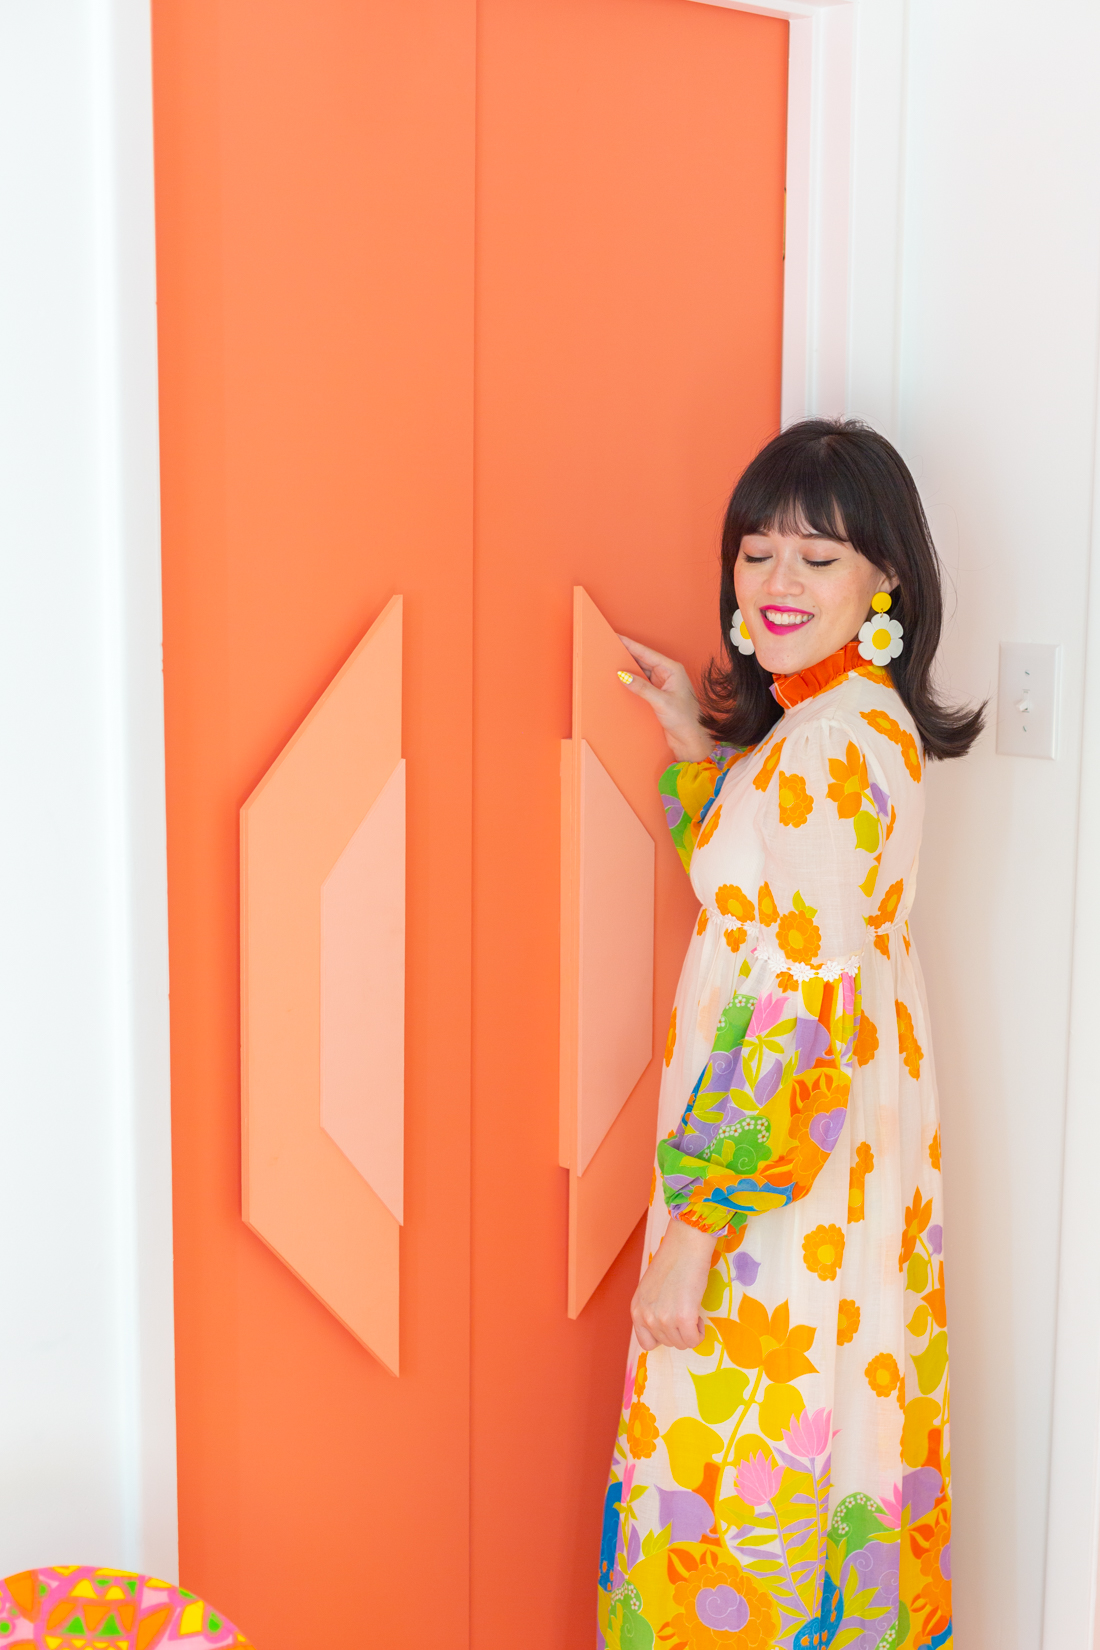
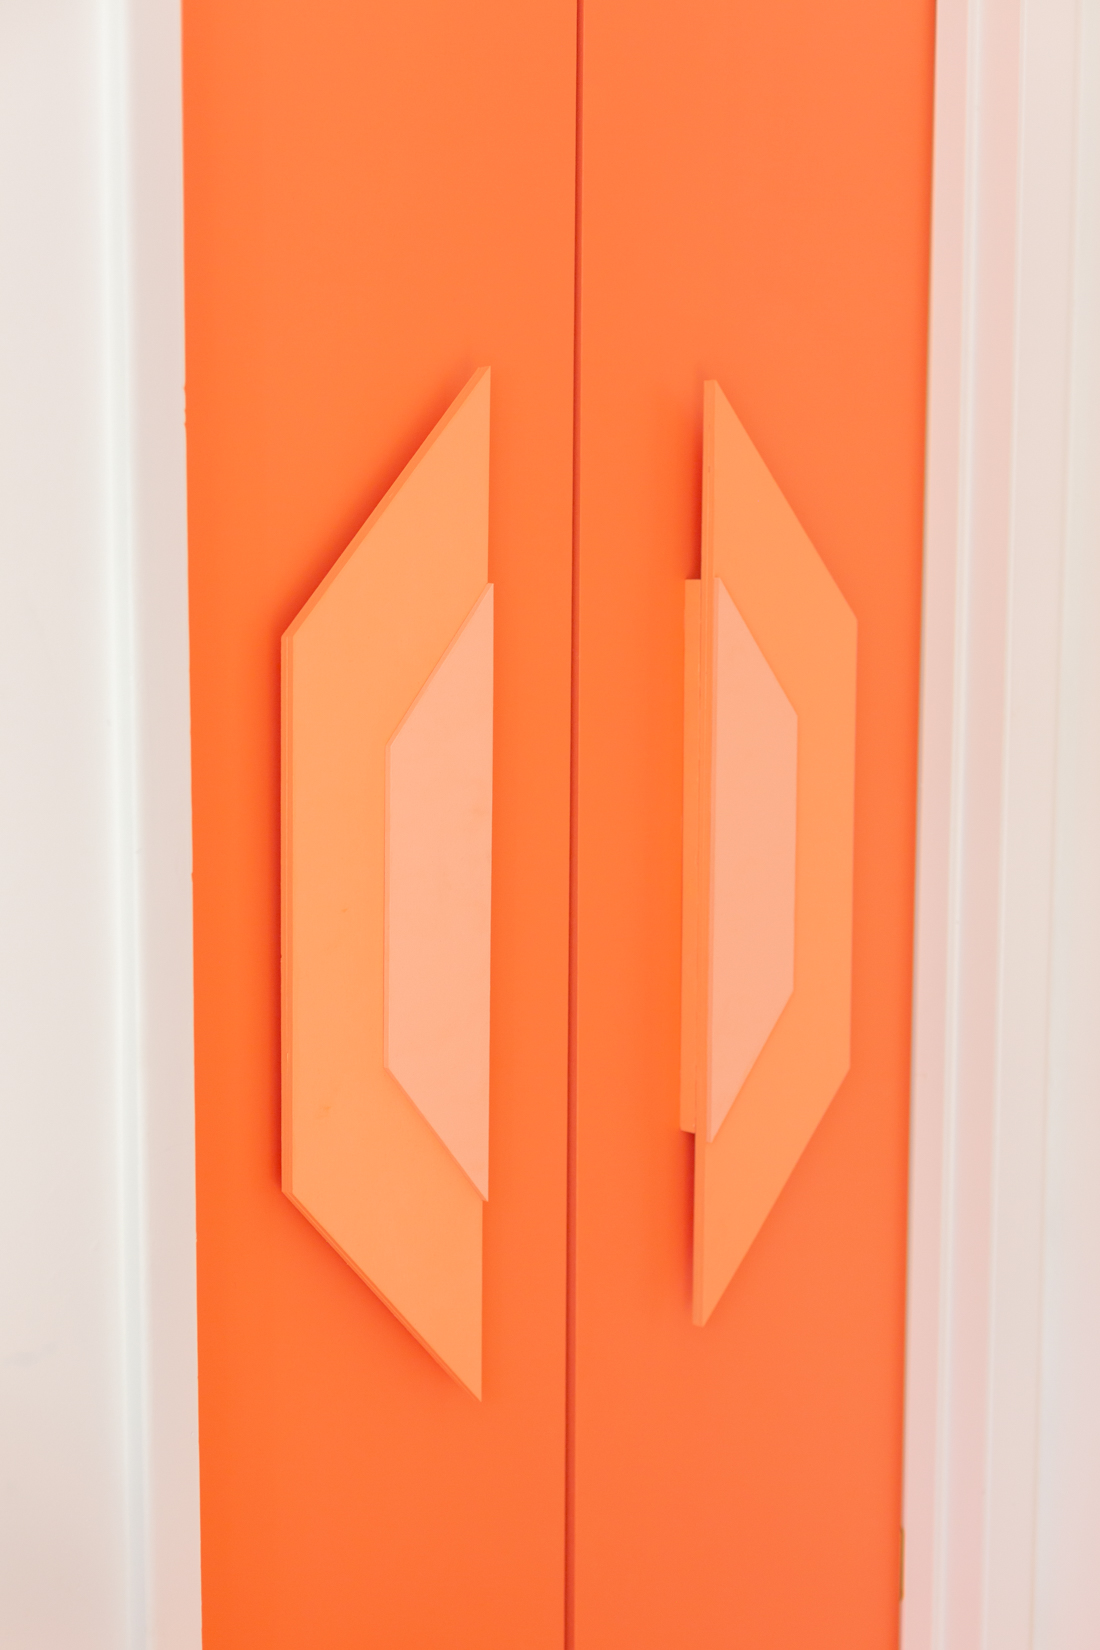
When we were remodeling the closet, I wanted to keep the original design of the double doors and add a fun handle. I had the handles laser cut into these polygon shapes, and then painted them and assembled and painted them by hand. Hanging a door proved much harder than it seems, so we definitely learned a lot during that process, but we did it!!! If you remember, I had you all vote on the colors of the handles, and this is what we ended up going with! It felt really good to make the whole door on our own, and it really helps to tie the room together; especially since the shape of the door handles matching the shape of the tile.

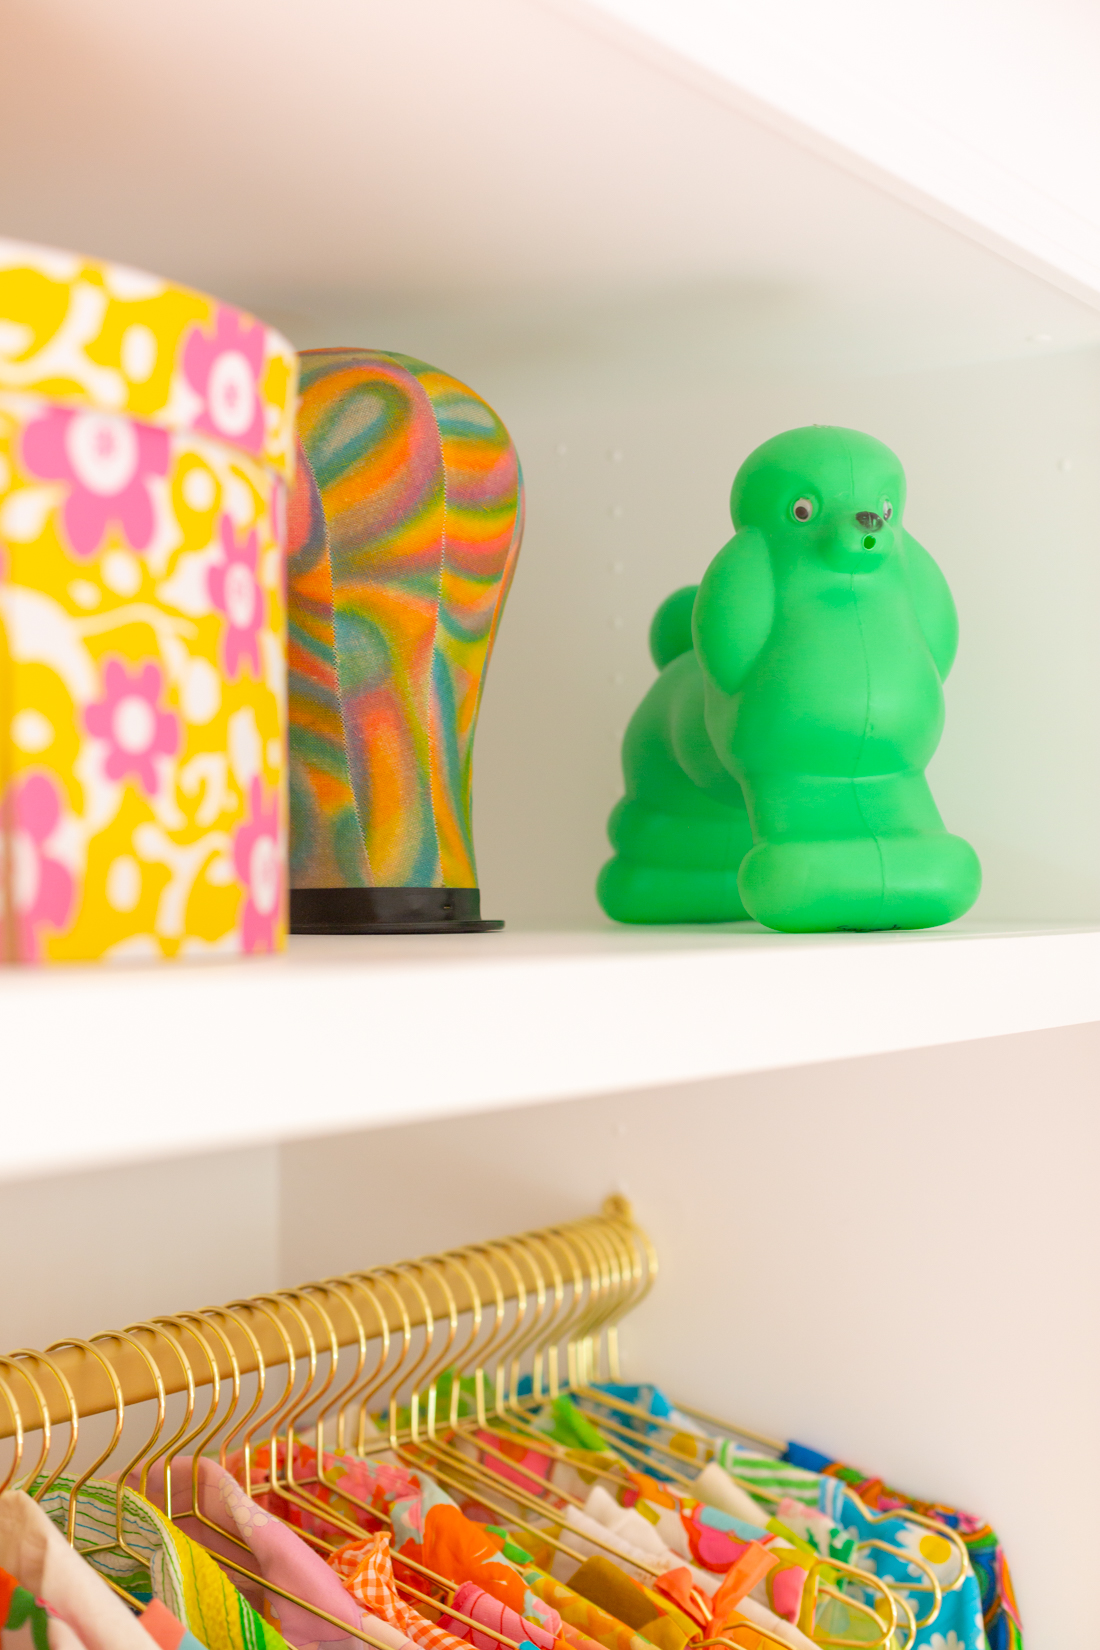
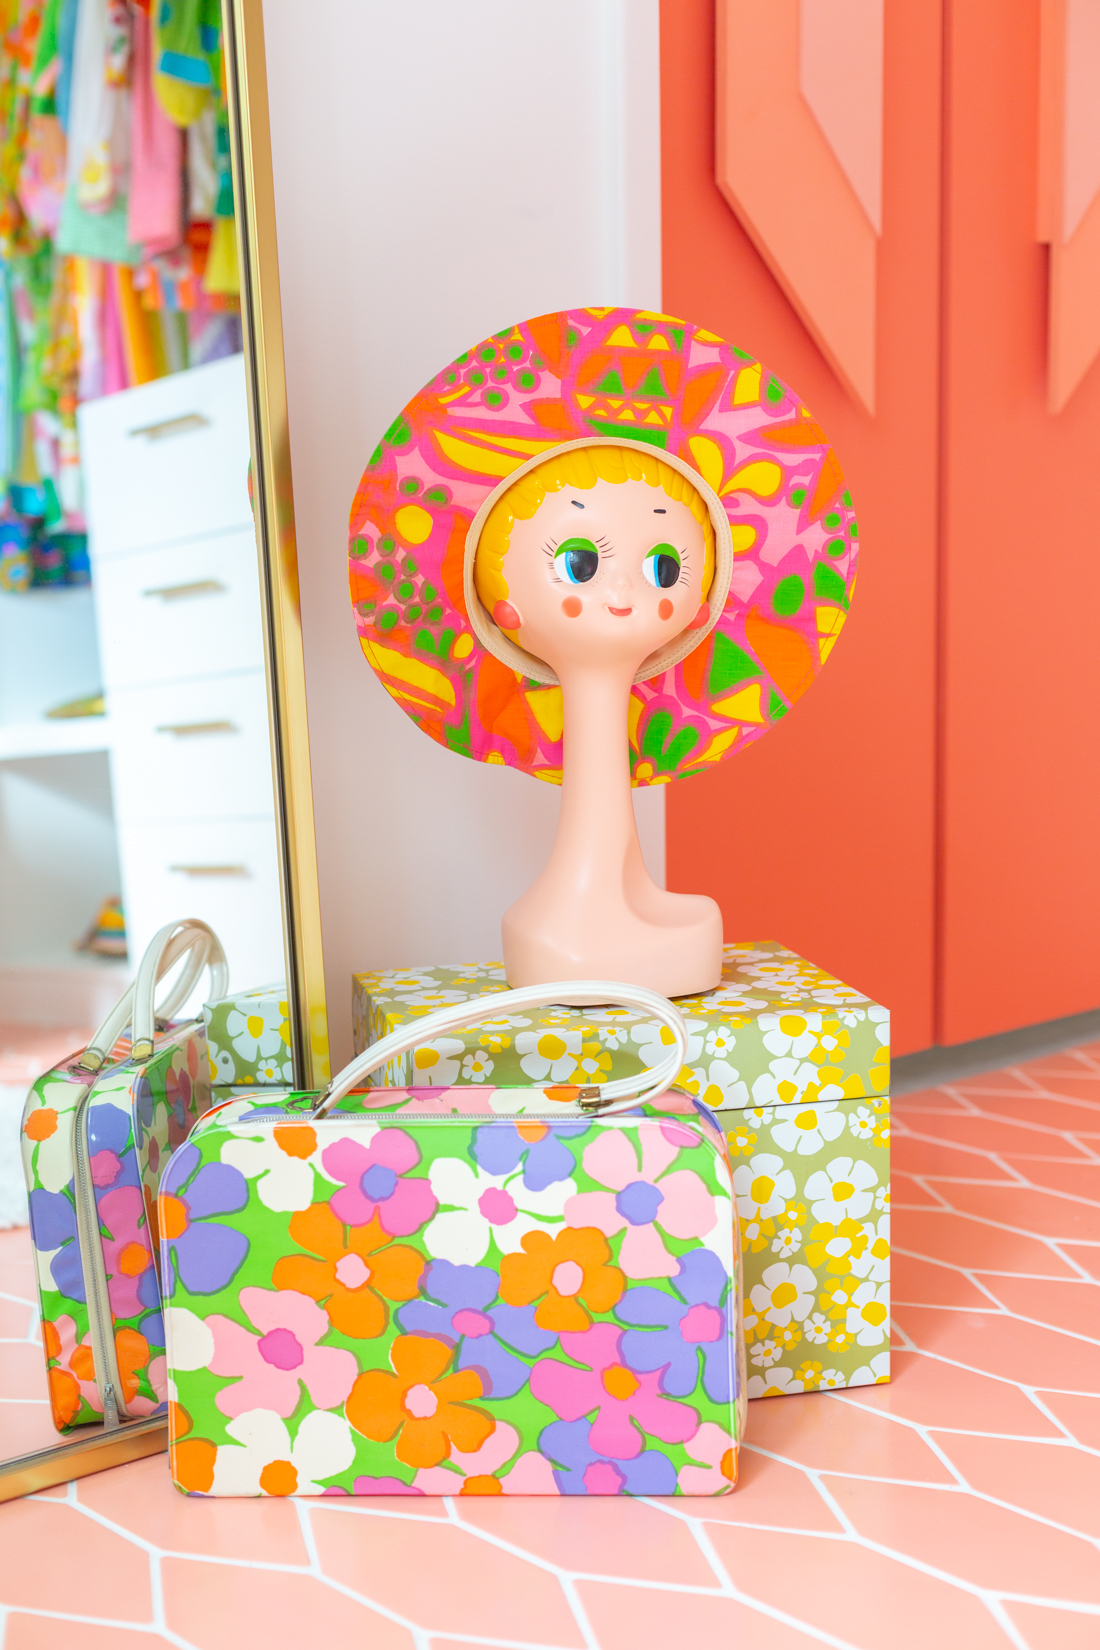
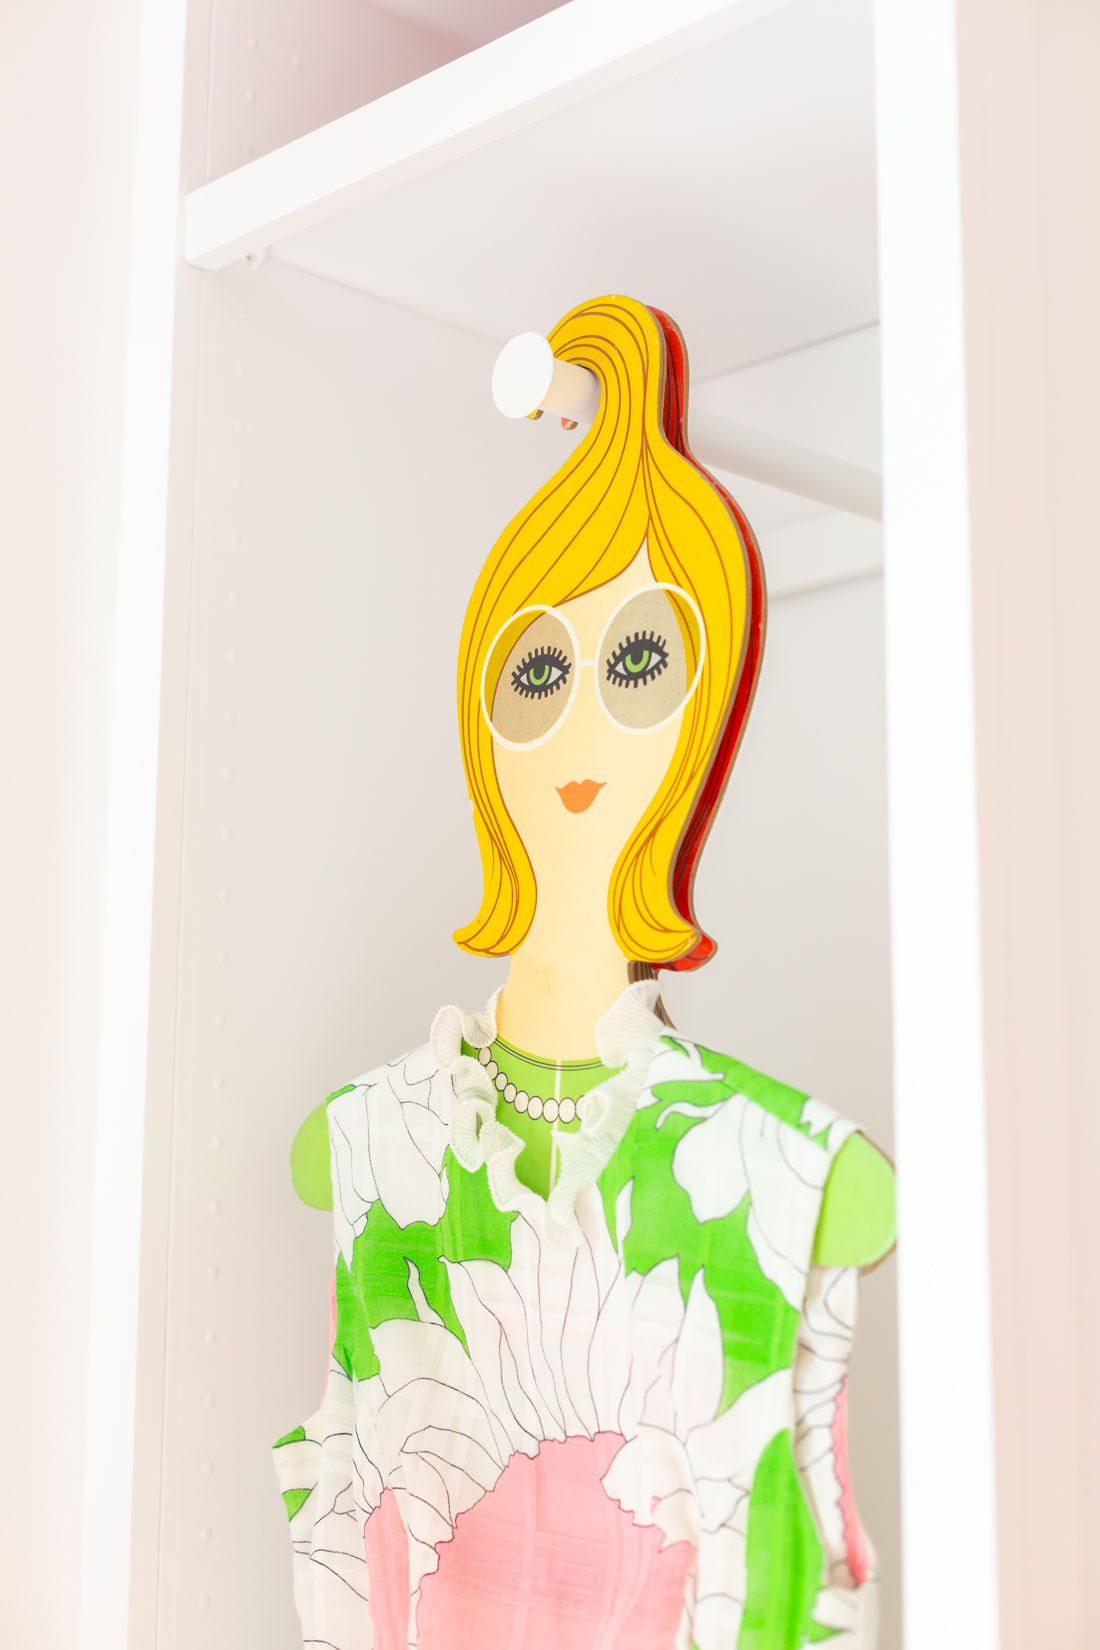
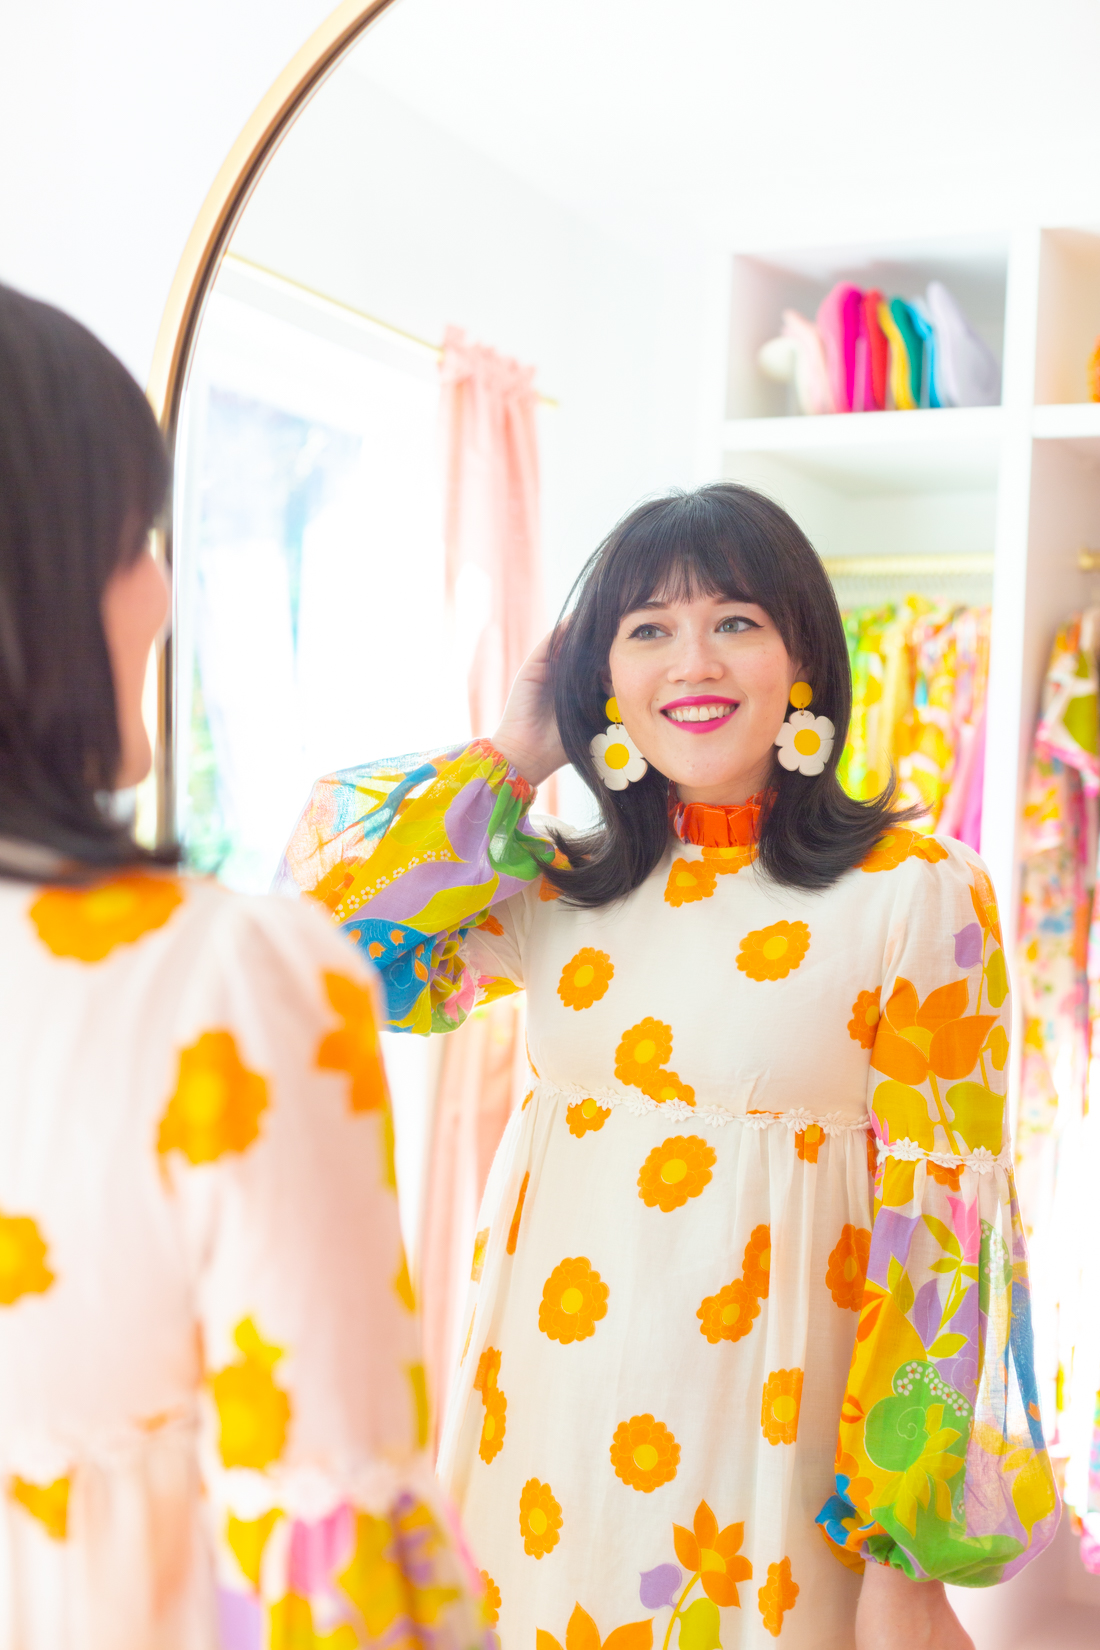
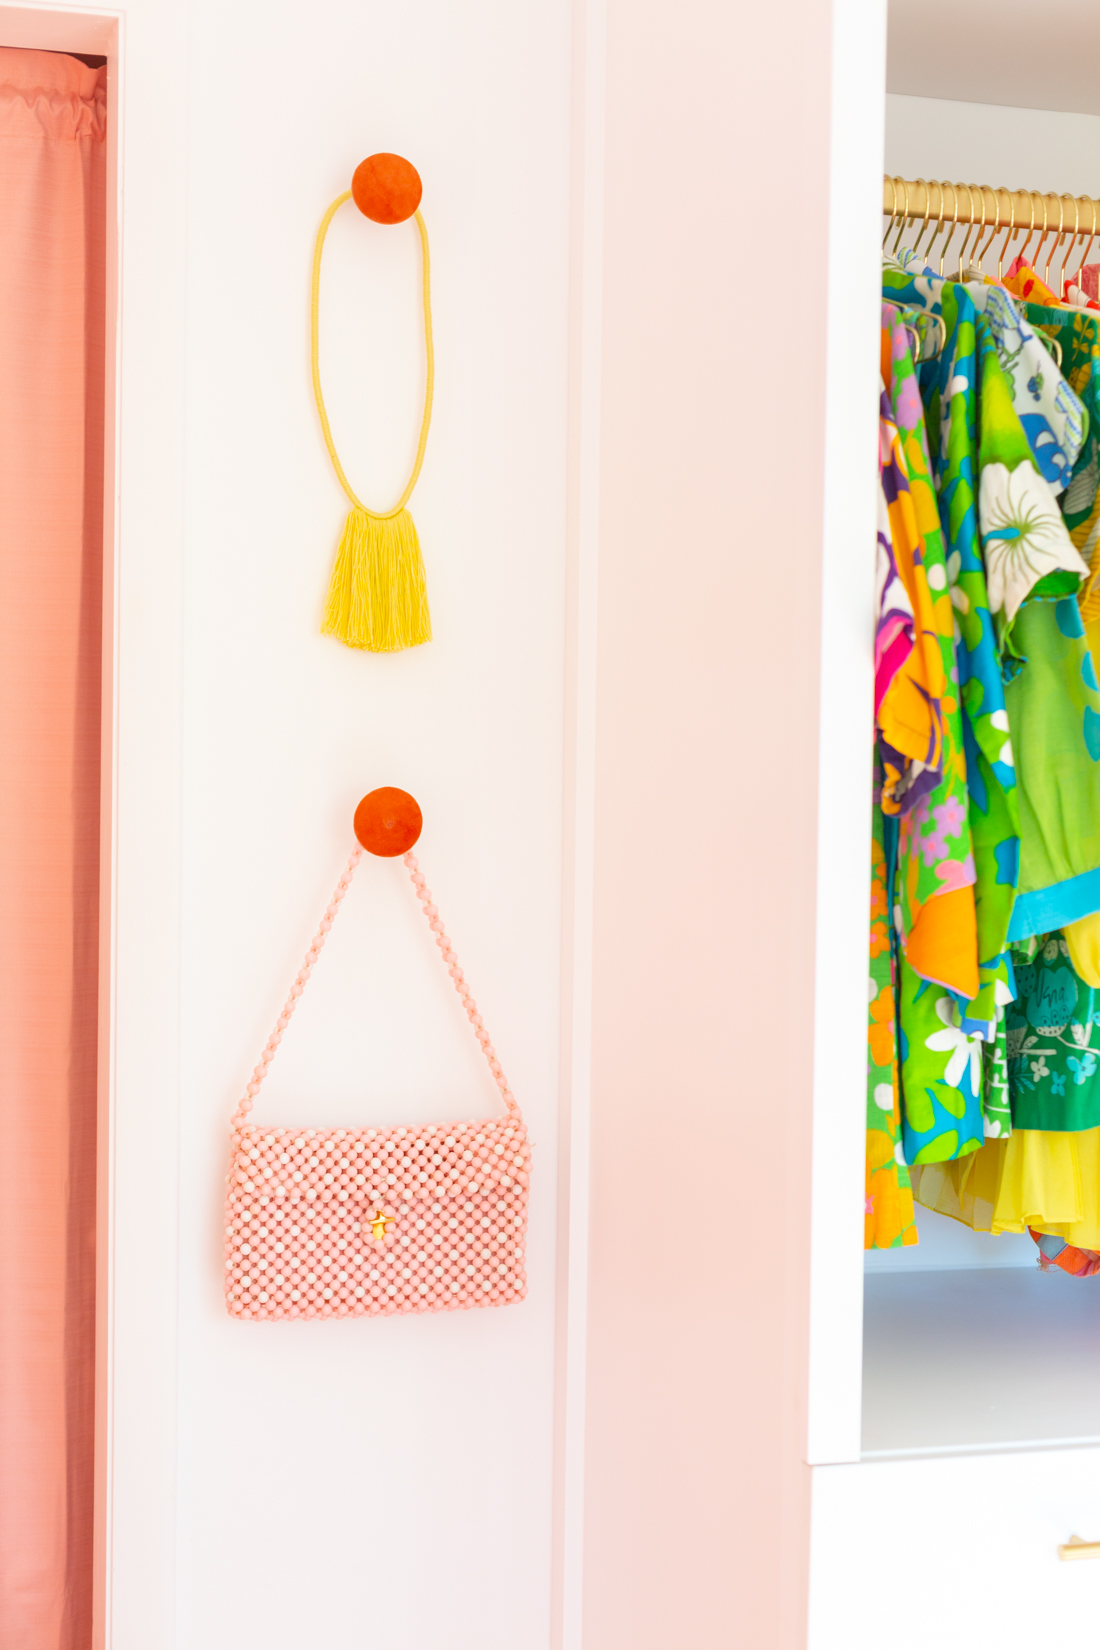
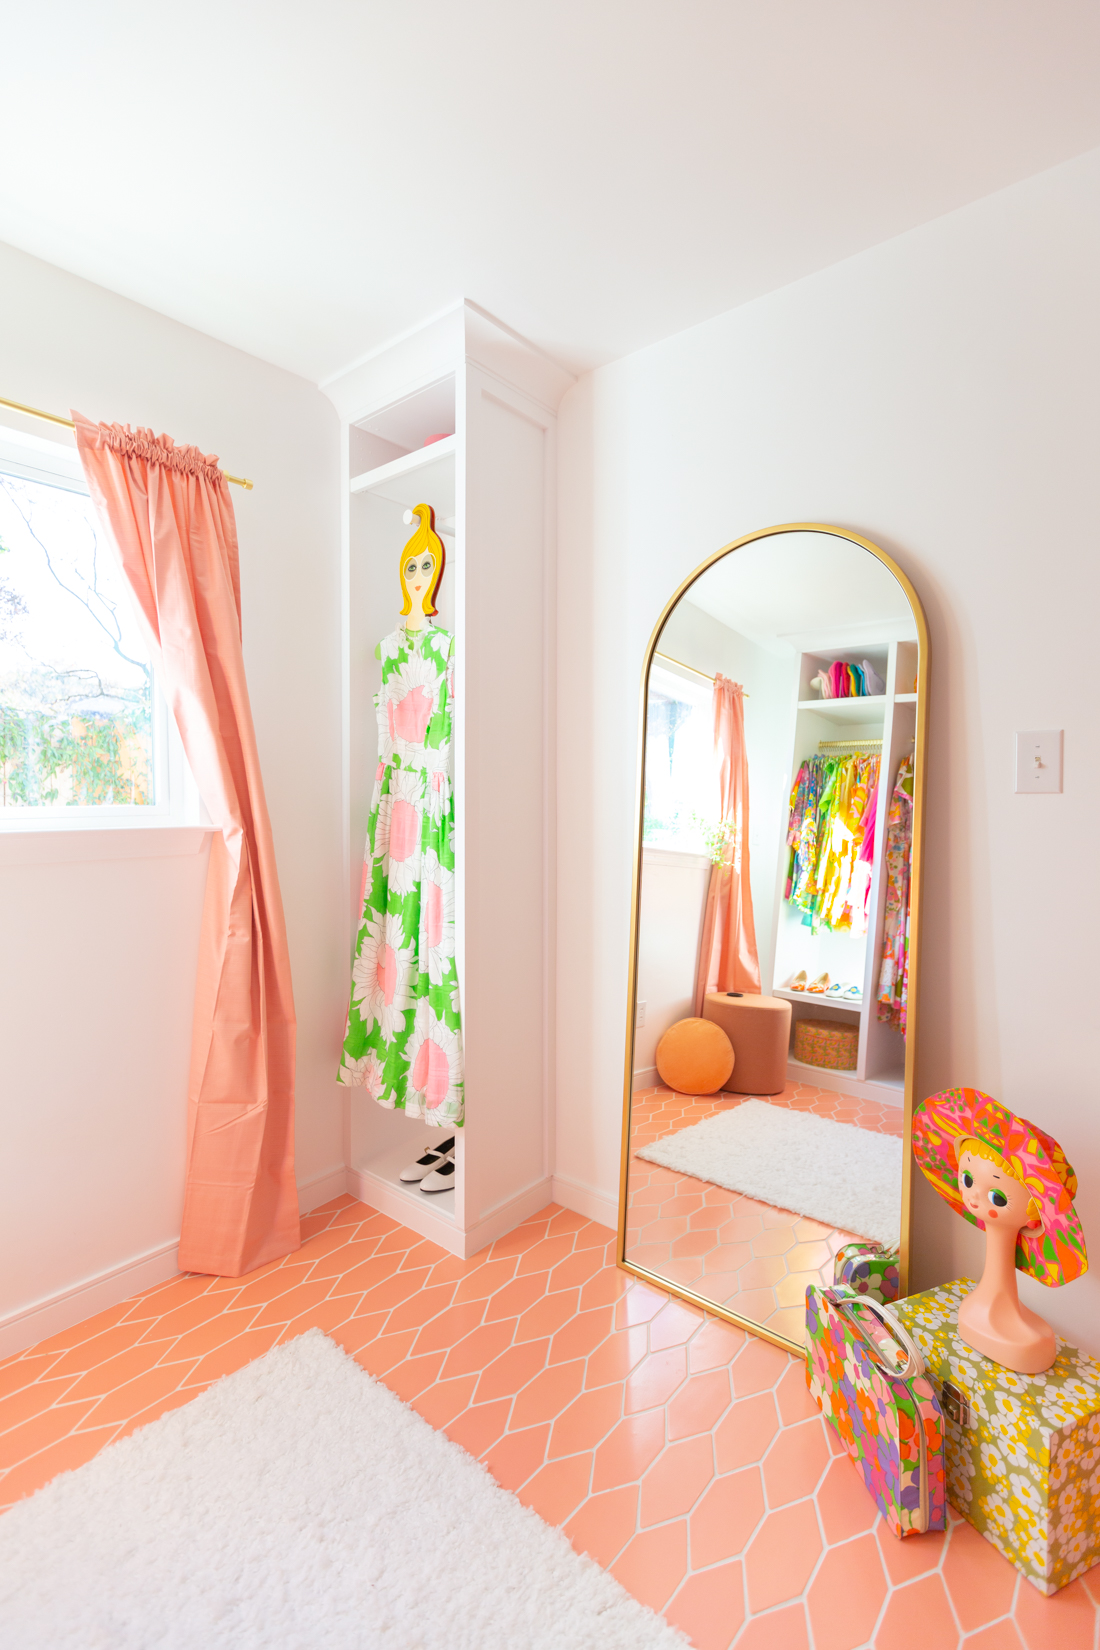
As you all know, we LOVE vintage clothing and objects, and we have both been collecting pieces for over two years now. We picked up some especially great pieces during our road trip that we wanted to display, both clothes and objects, like this psychedelic mannequin head! Part of the design process for our closet was to allow us to display these items and really showcase our personalities throughout the room! My favorite item has to be my poodle watering can, it’s googly eyes just kill me! Haha!

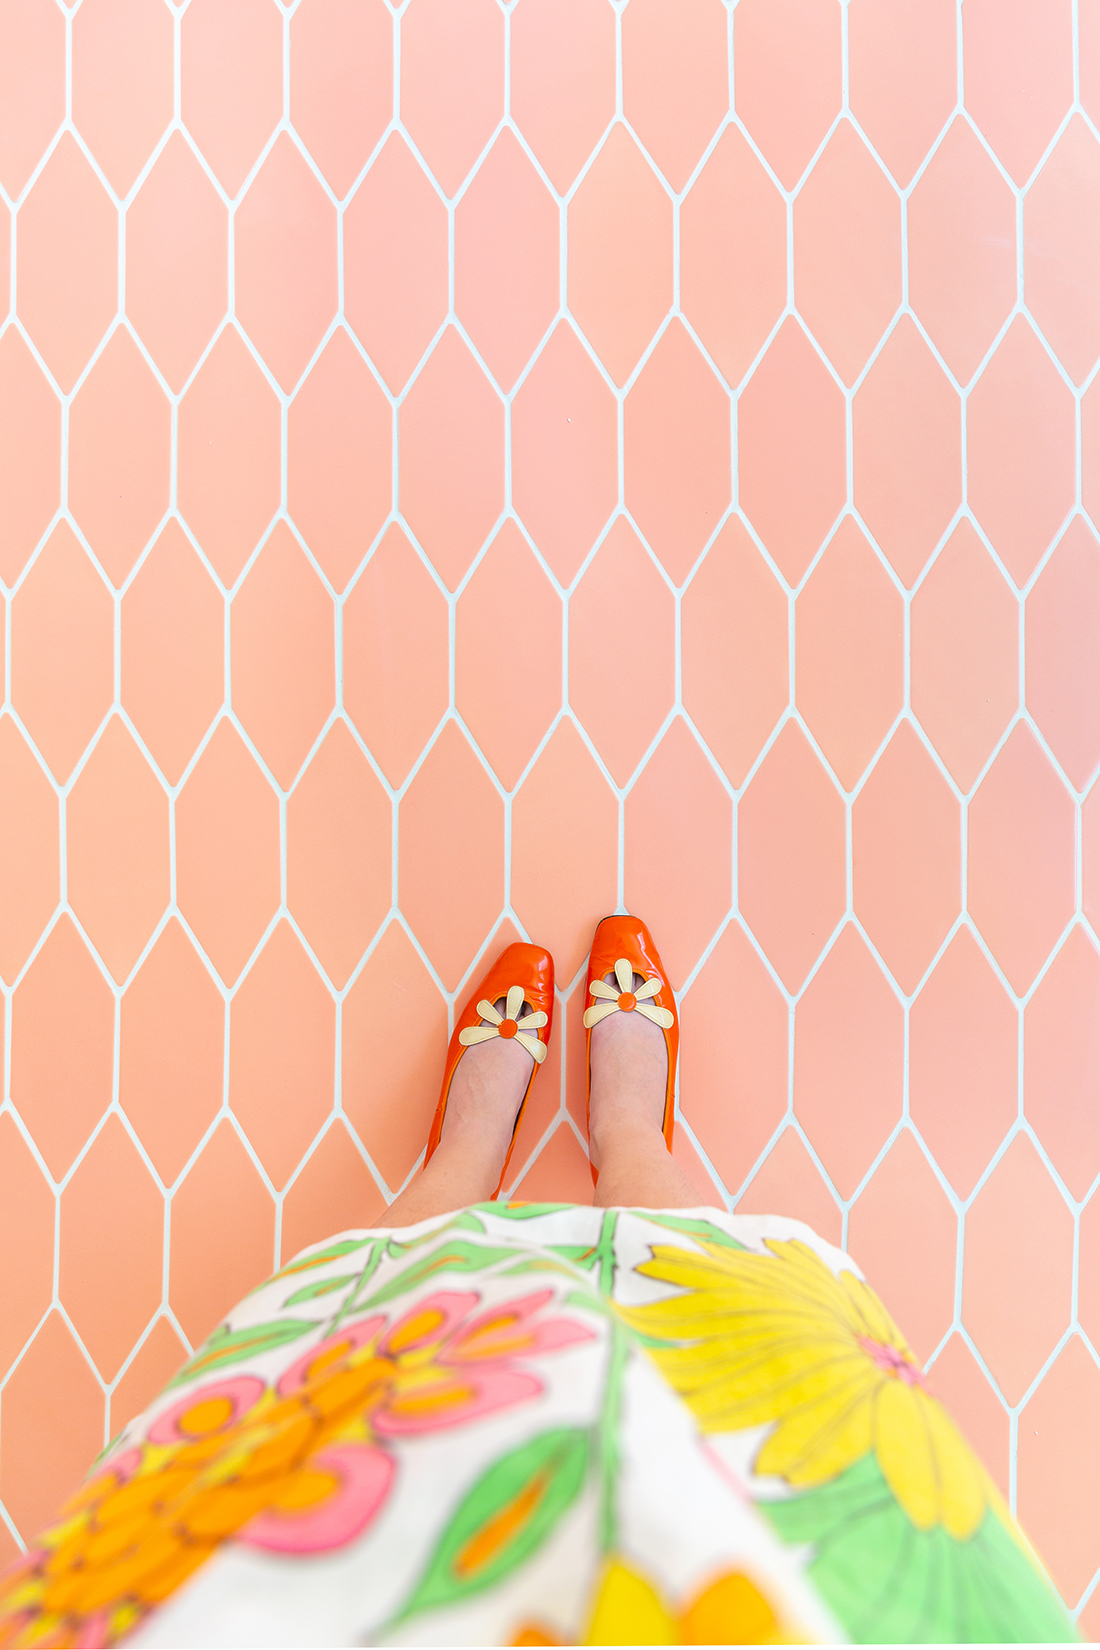
The very first thing we picked once we decided which room we were remodeling was the tile that was going to be on the floor! We weren’t sure what we wanted at first, but the folks over at Fireclay Tile had us covered! We knew we wanted to use their Picket style, but weren’t sure what color we should do. We were torn between a white and coral color, but soon realized an all white room may be a little too much. We ended up picking the Stilbite and we do not regret it one bit!
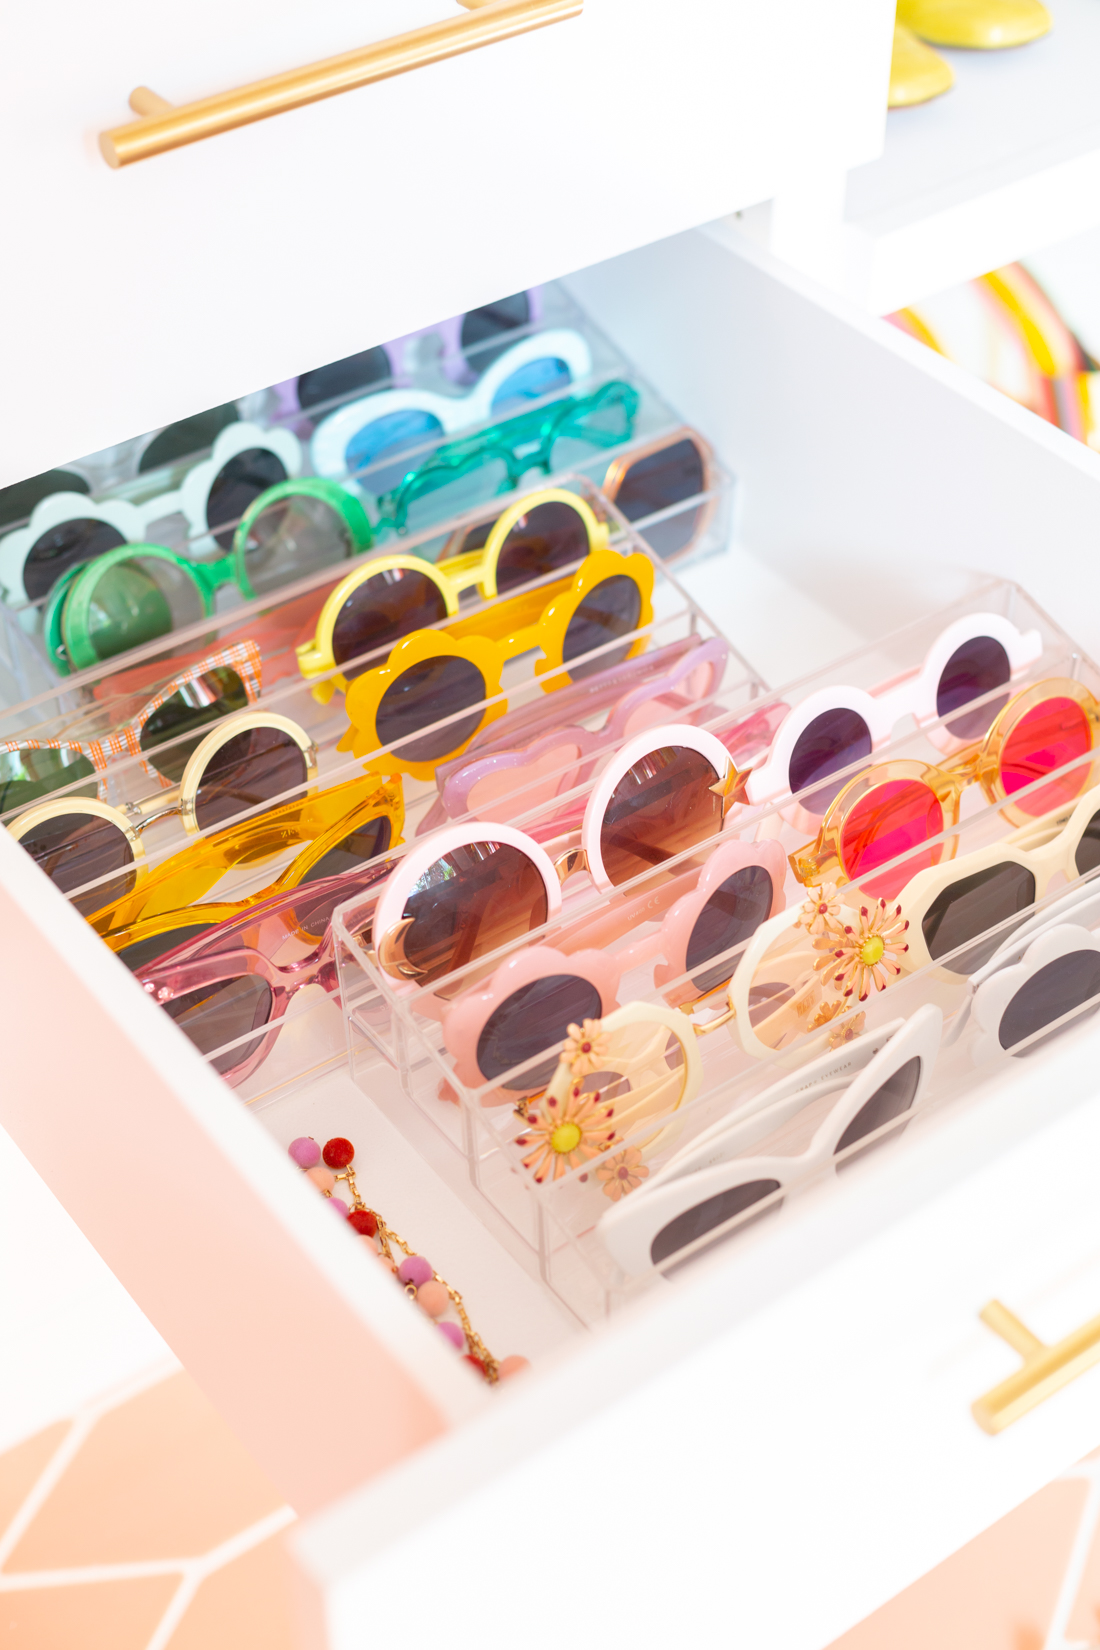
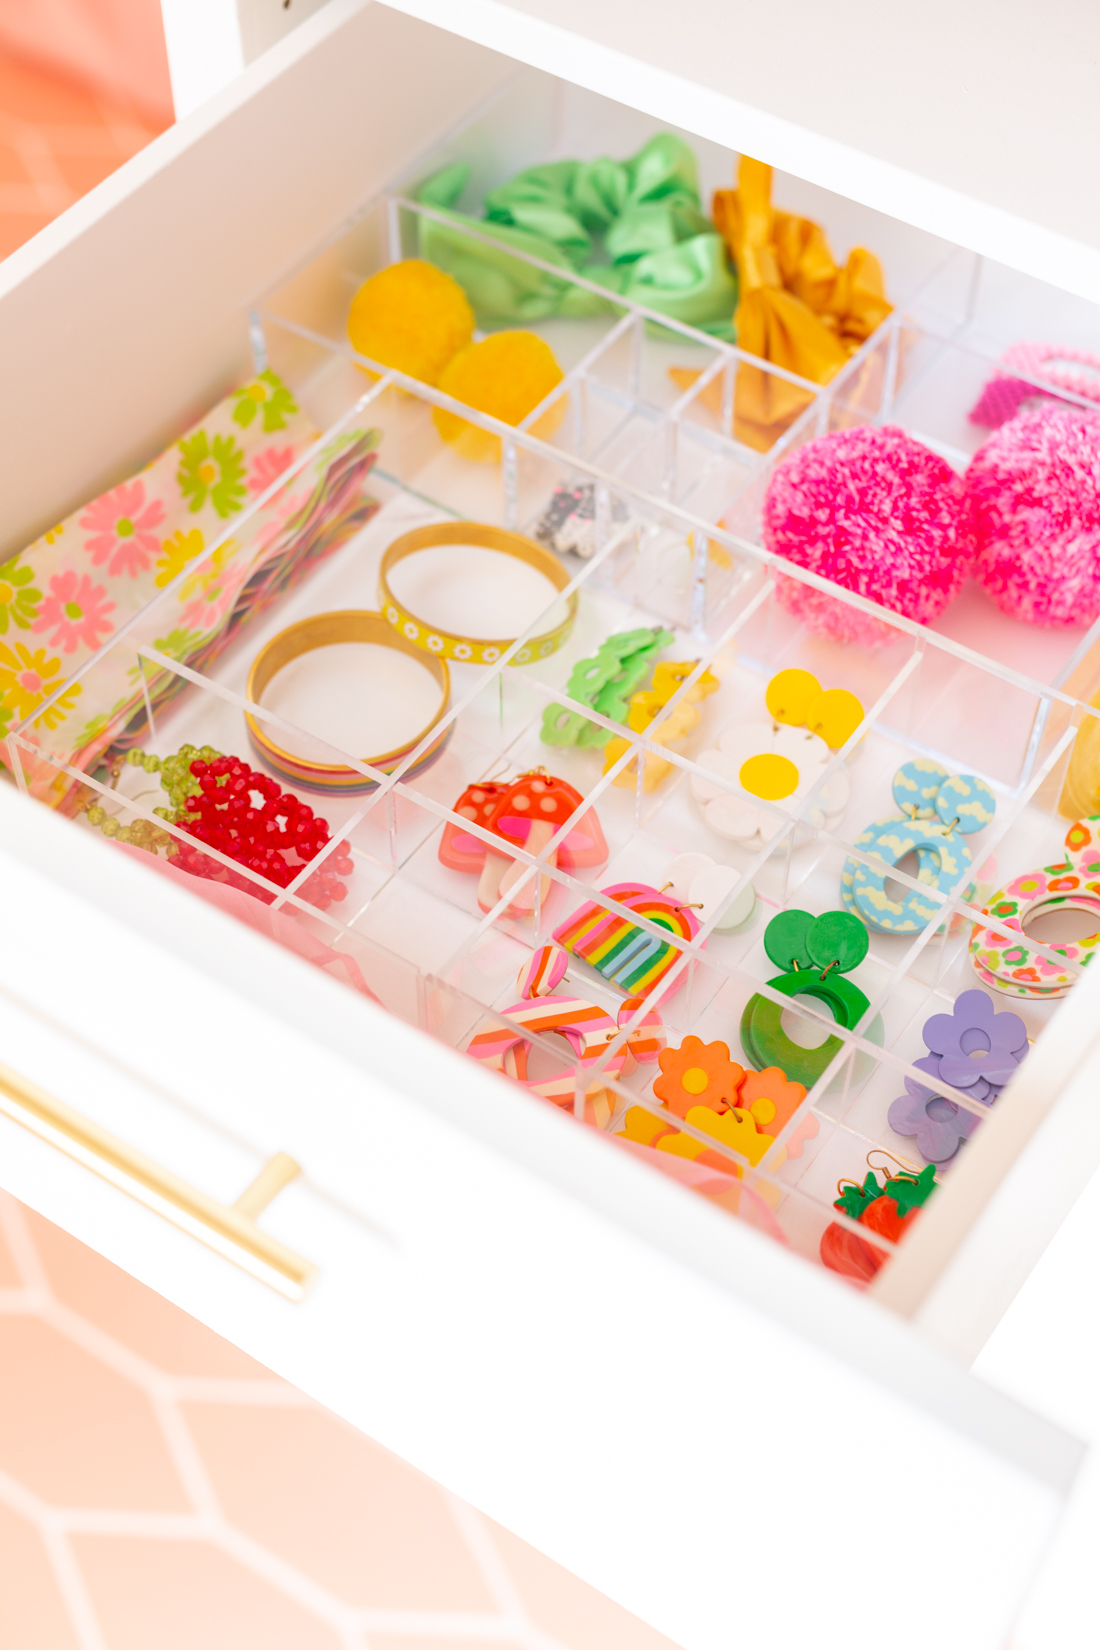
When we designed the closet we knew we needed to have space to place my earrings and sunglasses, but we weren’t sure what the best options would be for doing it. We looked everywhere for jewelry and glasses organizers but we came up short every time. One day while searching, Kyle suggested we use make up organizers and re-purpose them and it was perfect! The organizer is adjustable, so I’m able to fit my largest earrings with my smallest ones! Plus, we can organize them by color or shape as well.
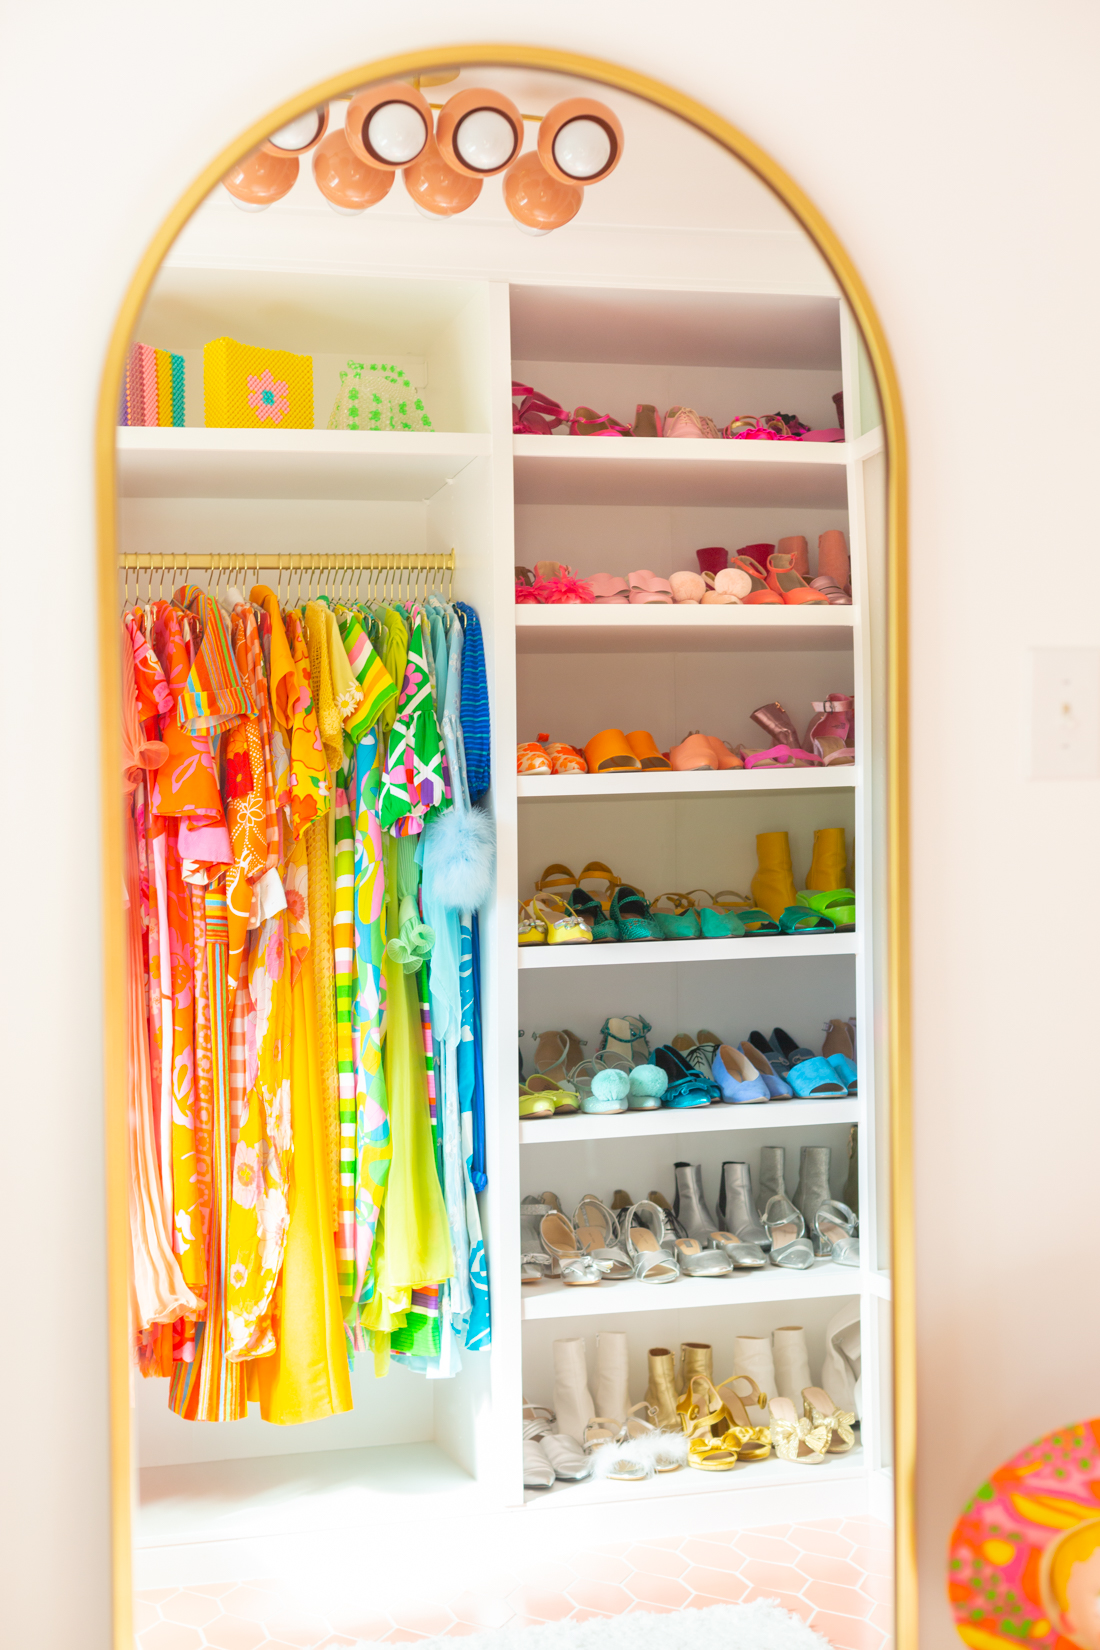


When we tried to find the perfect lights for the closet we kept coming up short, partly because finding vintage lights in working condition is terribly hard and partly because we were looking for the perfect color to match the tile. Luckily, we were able to find this amazing Calliope Chandelier from Sazerac Stitches! I have been wanting a Sazerac Stitches piece ever since we were in our old apartment and I was so excited to get to hang this beautiful one up!
When we were designing the space, Kyle wanted to have a spot that was specifically for me, so he designed this wardrobe with that in mind. It’s a whole corner that I use to plan my outfits for the day, from my shoes, to my hat. The wardrobe is right next to our mirror so I can try on my outfits, and then hang them up ready to go!
Whew!!! I hope you’re still with me, that was one heck of a reveal! It is really crazy to me to see how much of a change the closet went through from beginning to end, and I won’t lie, I think this will be my favorite room in the house no matter what the others look like. We have learned so much from this process and will be applying all those lessons to our remodeling moving forward. Our biggest lesson is to stick with our gut, because we absolutely love the way this closet turned out, and anytime we were doubting a decision we always stuck to our original design. I hope you all love it as much as we do, and I can’t wait to show you the next room reveal! Until then, stay tuned to stories for more previews and behind the scenes looks of how the remodeling is going! P.S. Check out all of the sources below!
Furniture/Fixtures:
Arched Mirror // Peach Ottoman // Ceiling Light // Closet Wardrobes
Decor Objects:
Peach Curtains // Shag Rug // Peach Pillow // Jewelry Drawer Organizer (Container Store) // Sunglasses Organizer // Gold Hangers // Acrylic Organizer (we used for berets) // Hat Boxes (we covered them in vinyl)
Hardware and Paint:
Brass Drawer Pulls // Curtain Rod // Brass Closet Rod // Wall Hooks
Additional Sources:
Diamond Tile // Crown Moulding // Baseboards // Primary Door Paint // Darker Handle Door Paint // Lighter Handle Door Paint // Wall and Wardrobe Paint


8 Responses
Looks so awesome! Thanks for sharing this proCess. It’s such a joy to watch! 🖤
absolutely in LOVE with what you’ve done! Your clothes are the main show too, wow I would love to have that much color in my wardrobe one day!
Love it!! Did you add the trim and crown molding yourself? Or hire someone? (Im in austin, and about to do a similar project)
Hi Alexis!
We had a contractor do that work for us! I would totally recommend him, but he’s off to film a show with HGTV now! 🙁
Maybe in my next life i will marry someone with the same aesthetics as Me ha! My hUsband is a minimalist monocHromatic Futurist SPorty style and our whole house is black white gray 😆