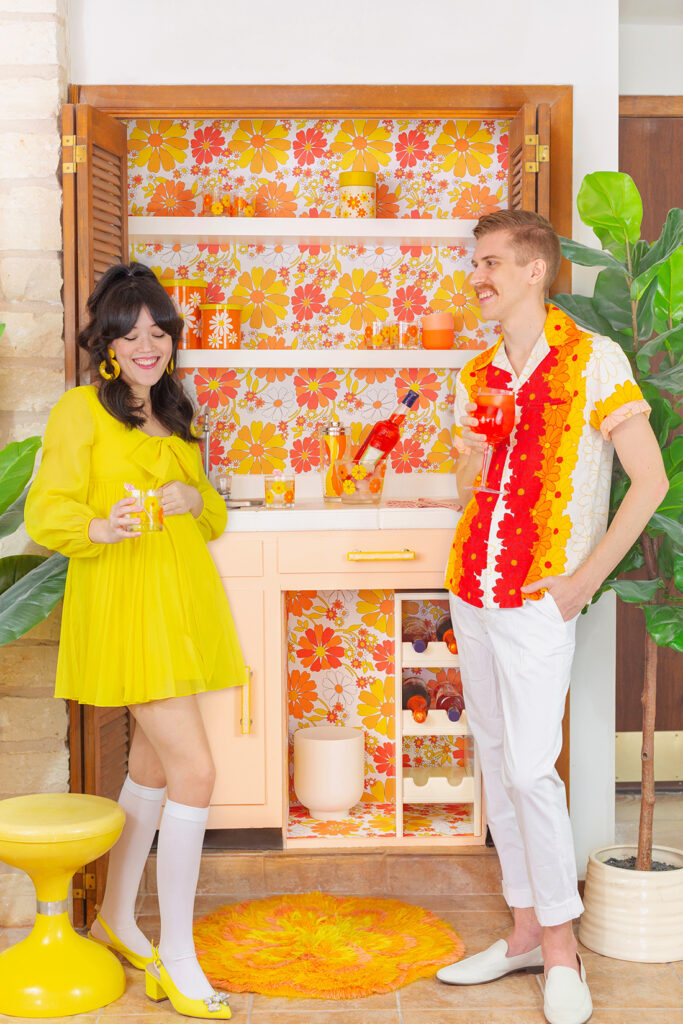

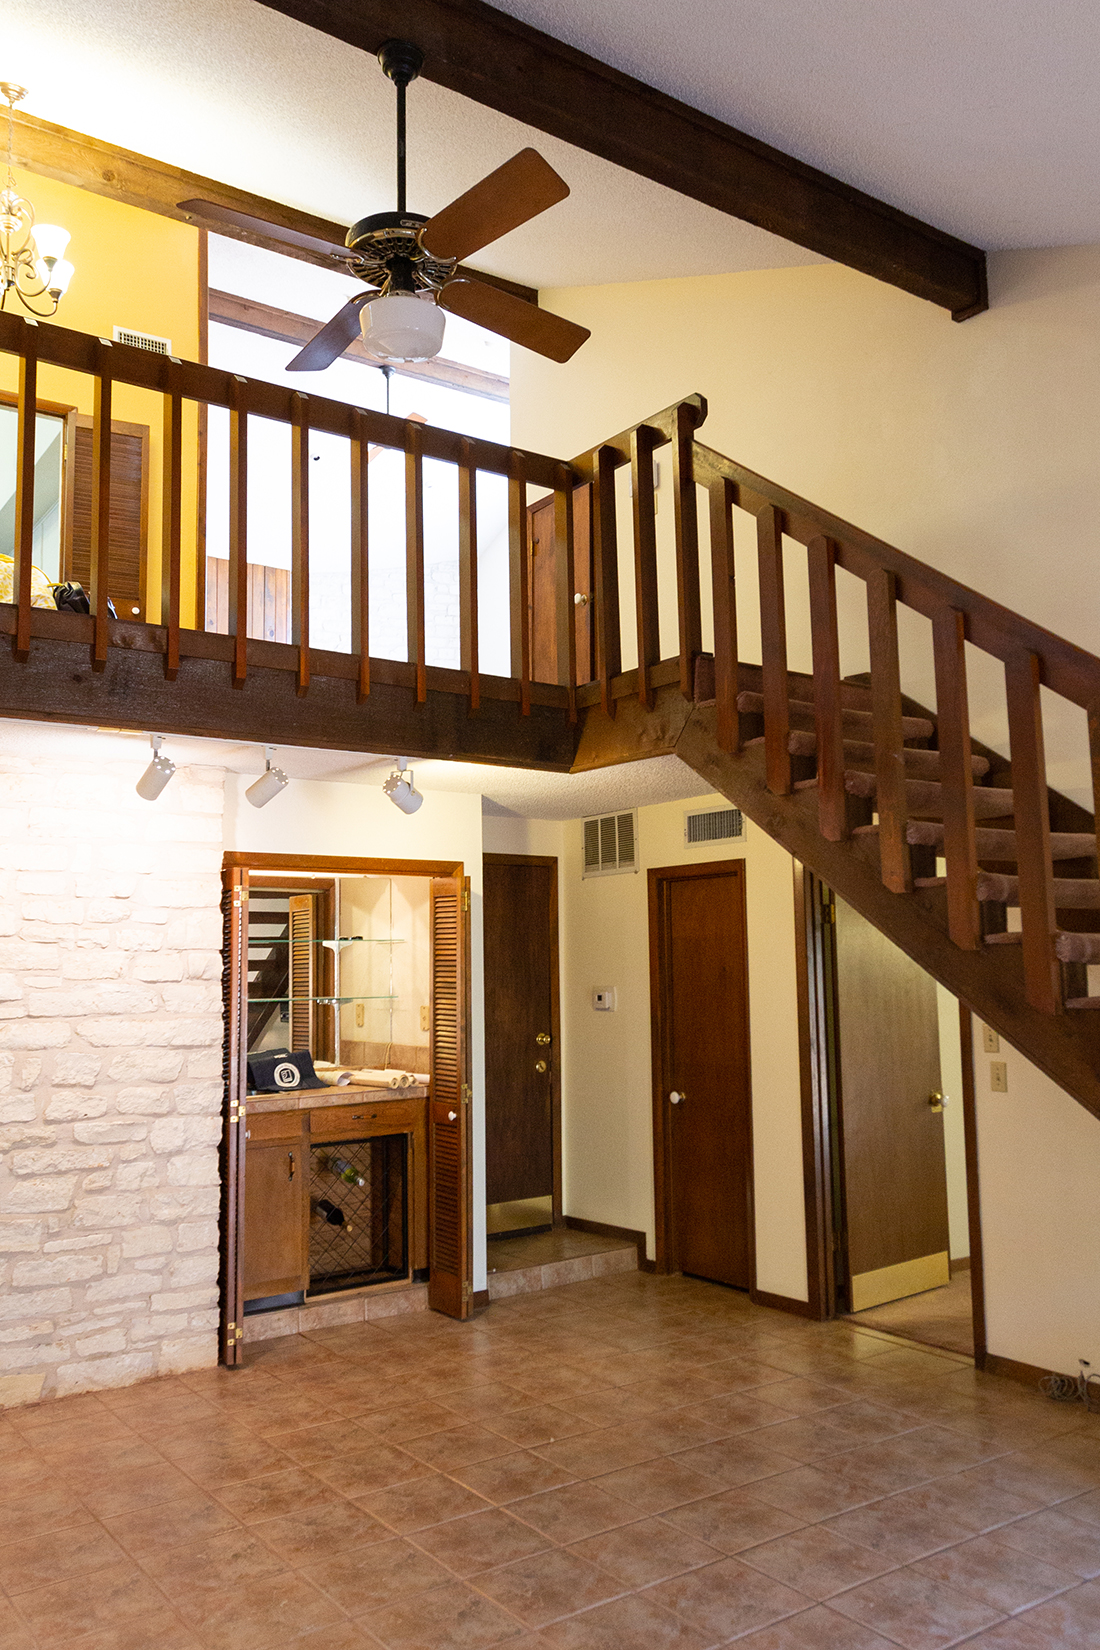
After months of having the wet bar makeover completed, we’re finally sharing the finished space today!!! This little built-in bar was one of our favorite parts about the house, but it wasn’t in great shape and was definitely in need of an overhaul. You can see better in the before photos below, but this bar is part of our downstairs living room and is one of the first areas you see when you exit the main bedroom. When we were planning out our renovation calendar, we decided that the downstairs living room was going to be one of the last things on our list, butttt in the meantime, we wanted to change this bar up with some paint and wallpaper so we can hopefully start using it post-pandemic and post-pregnancy! Since we’re going to be demo-ing the space eventually, we kept a super low budget and used paint that we already had leftover from other projects. I’ll dive into how we painted the countertops below, so let’s get started!
(Also apologies in advance for not having more photos of the final look. Going to blame pregnancy tiredness and that it’s a difficult space to photograph for that one haha! But you get the idea!)
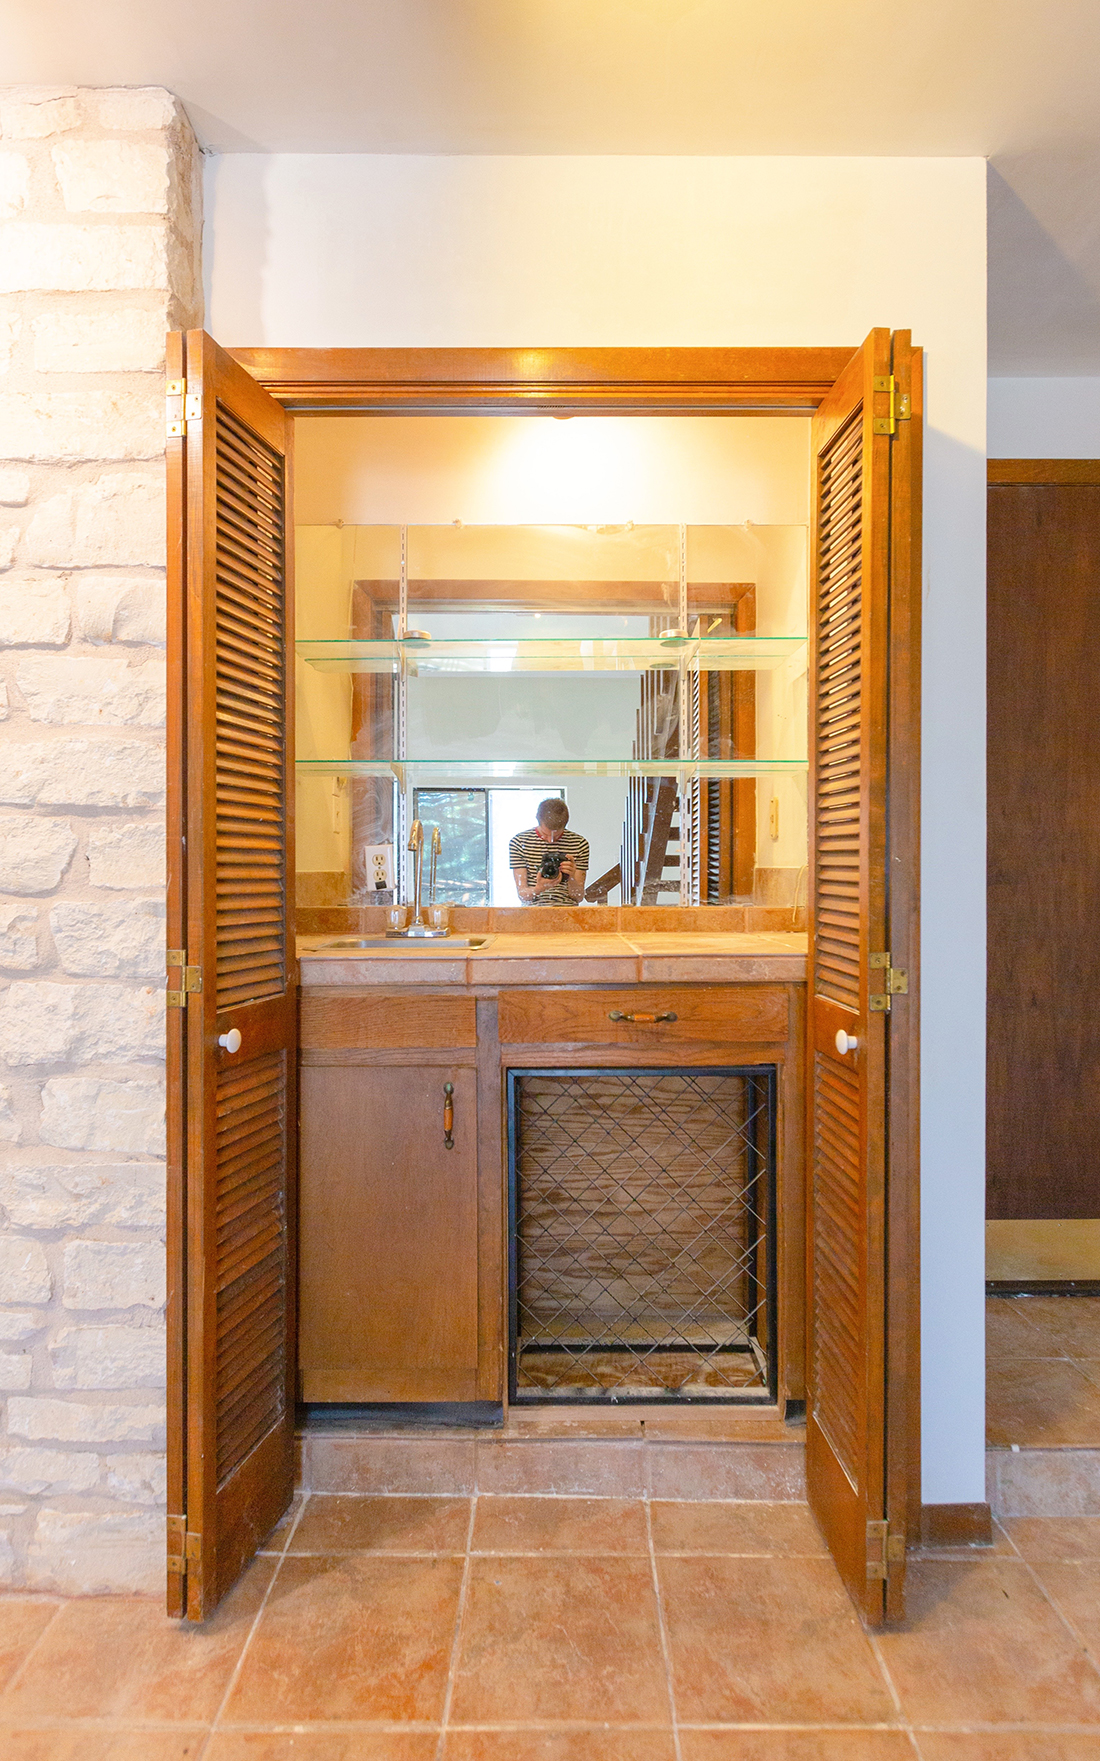
What a transformation, right?! We got rid of the mirrors and shelving, wallpapered the whole inside with peel and stick wallpaper that we designed and got printed at Spoonflower, painted the cabinets and countertop, and added different hardware!
The trickiest part was painting the countertop, and I wanted to run you through a little step-by-step of what we did in case you’re hoping to do something similar in your space.
1. Clean the countertop off really well with soap and water to make sure to get rid of any dirt or grease.
2. Sand with 150 grit sandpaper and wipe any dust off with a cloth.
3. Apply two coats of primer, allowing each coat to dry completely. (This part is the most time consuming depending on the dry time of the primer)
4. Paint over the primer with your paint color of choice. We had to use two coats of white paint to cover the countertop, and allowed each coat to dry before adding another.
5. When your paint color is dry, seal the top with two coats of a polyurethane finish! Allow the countertop 3 days-a week to cure completely before putting anything on it.
And there you have it! It was actually super easy to accomplish, just time consuming waiting for everything to dry! I put links to everything below as well if there’s anything specific you’re looking for. Hope you enjoyed seeing this little makeover! Our next reveal will be the nursery, ahhh!!!
Furniture/Fixtures:
Decor Objects:
Flower Glassware (vintage Colony brand) // Stool (vintage) // Rug (vintage)
Hardware and Paint:
Drawer Pulls (vintage) // Floating Shelves // Cabinet Paint (Valspar in Coral Peach) // Wallpaper (we designed it and had it printed at Spoonflower) // Countertop Paint (Dunn Edwards in White) // Countertop Sealant


2 Responses
This looks fantastic!! What an improvement. Could you share where the matching shirt is from? So fun!
Hello there! I am obsessed with vintage stuff from housewares, clothes, shoes, colors etc. Where do you get your clothes from!? I love the bright happy 60’s attire!