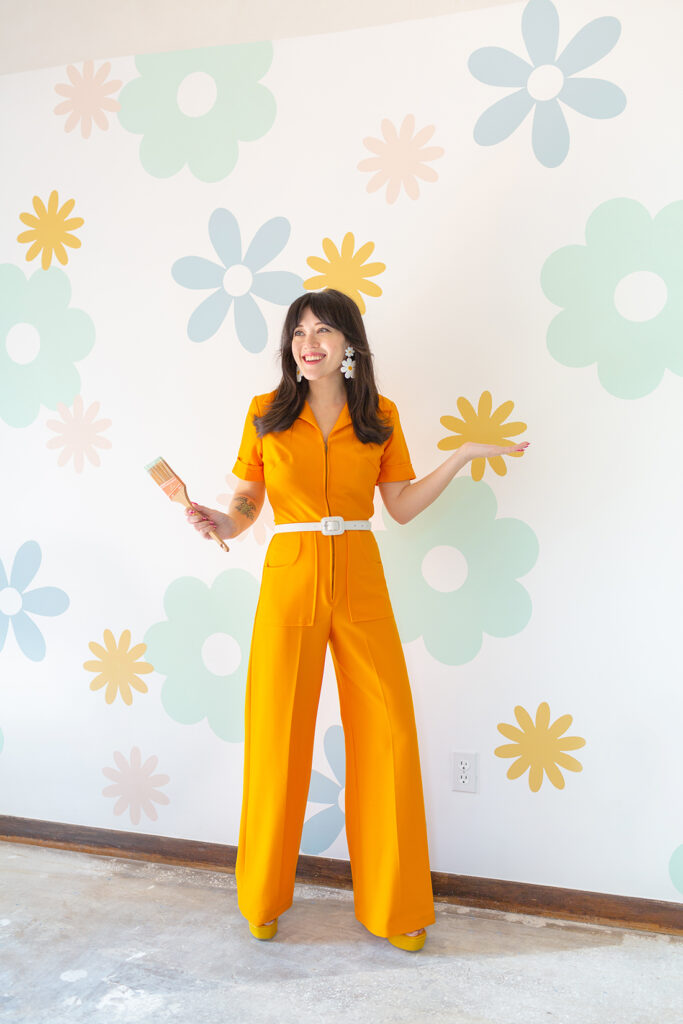

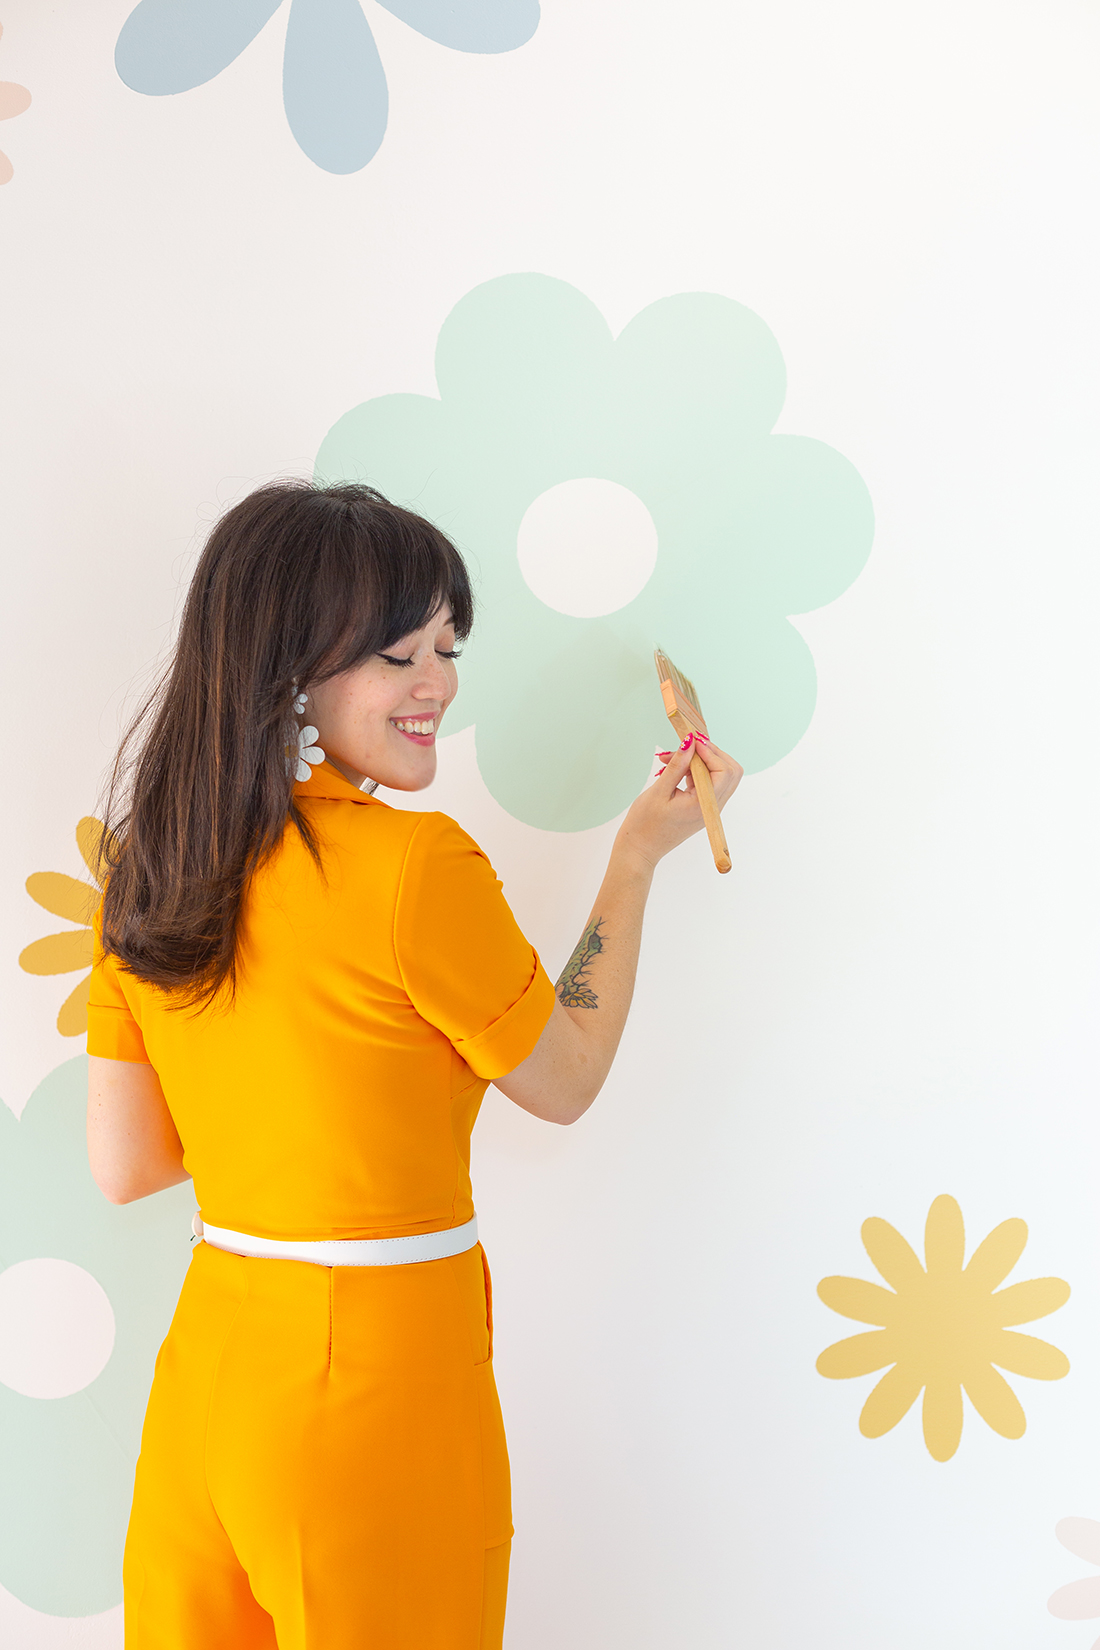
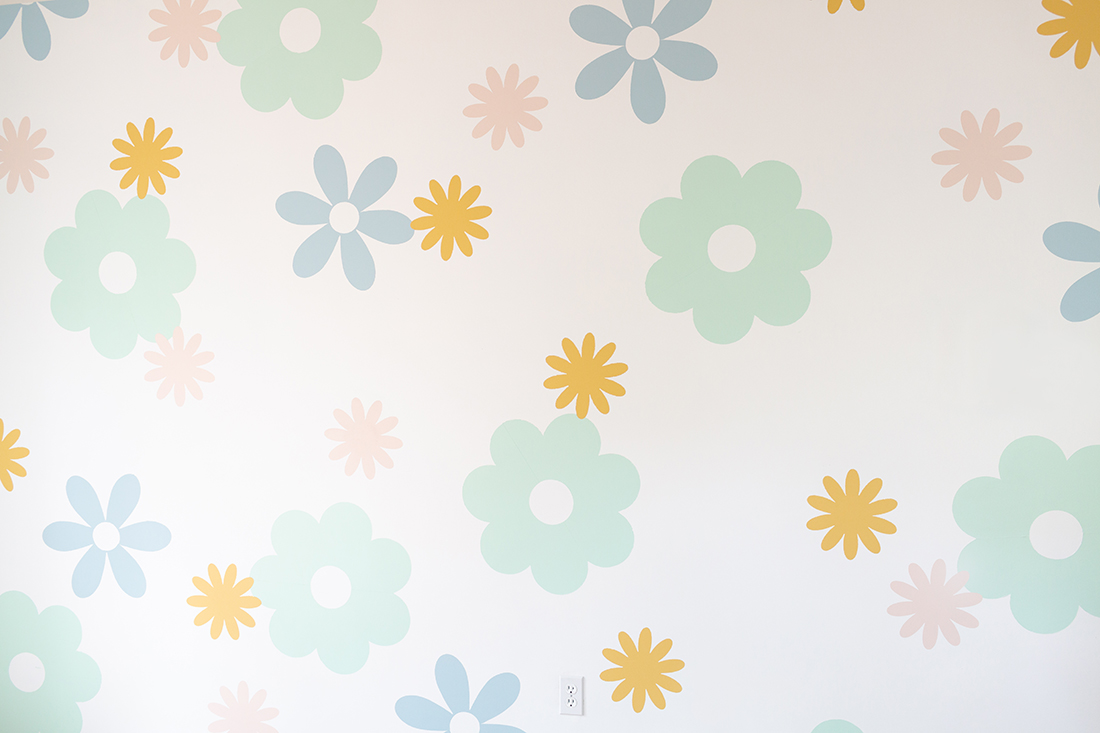
We are so excited to reveal this floral mural we have been working on! Since we want to keep the theme of 60’s and 70’s aesthetics throughout our house, we thought it only made sense to have a mural in just about every room. For this room in particular we decided we would focus more on the flower power theme of the 60’s.
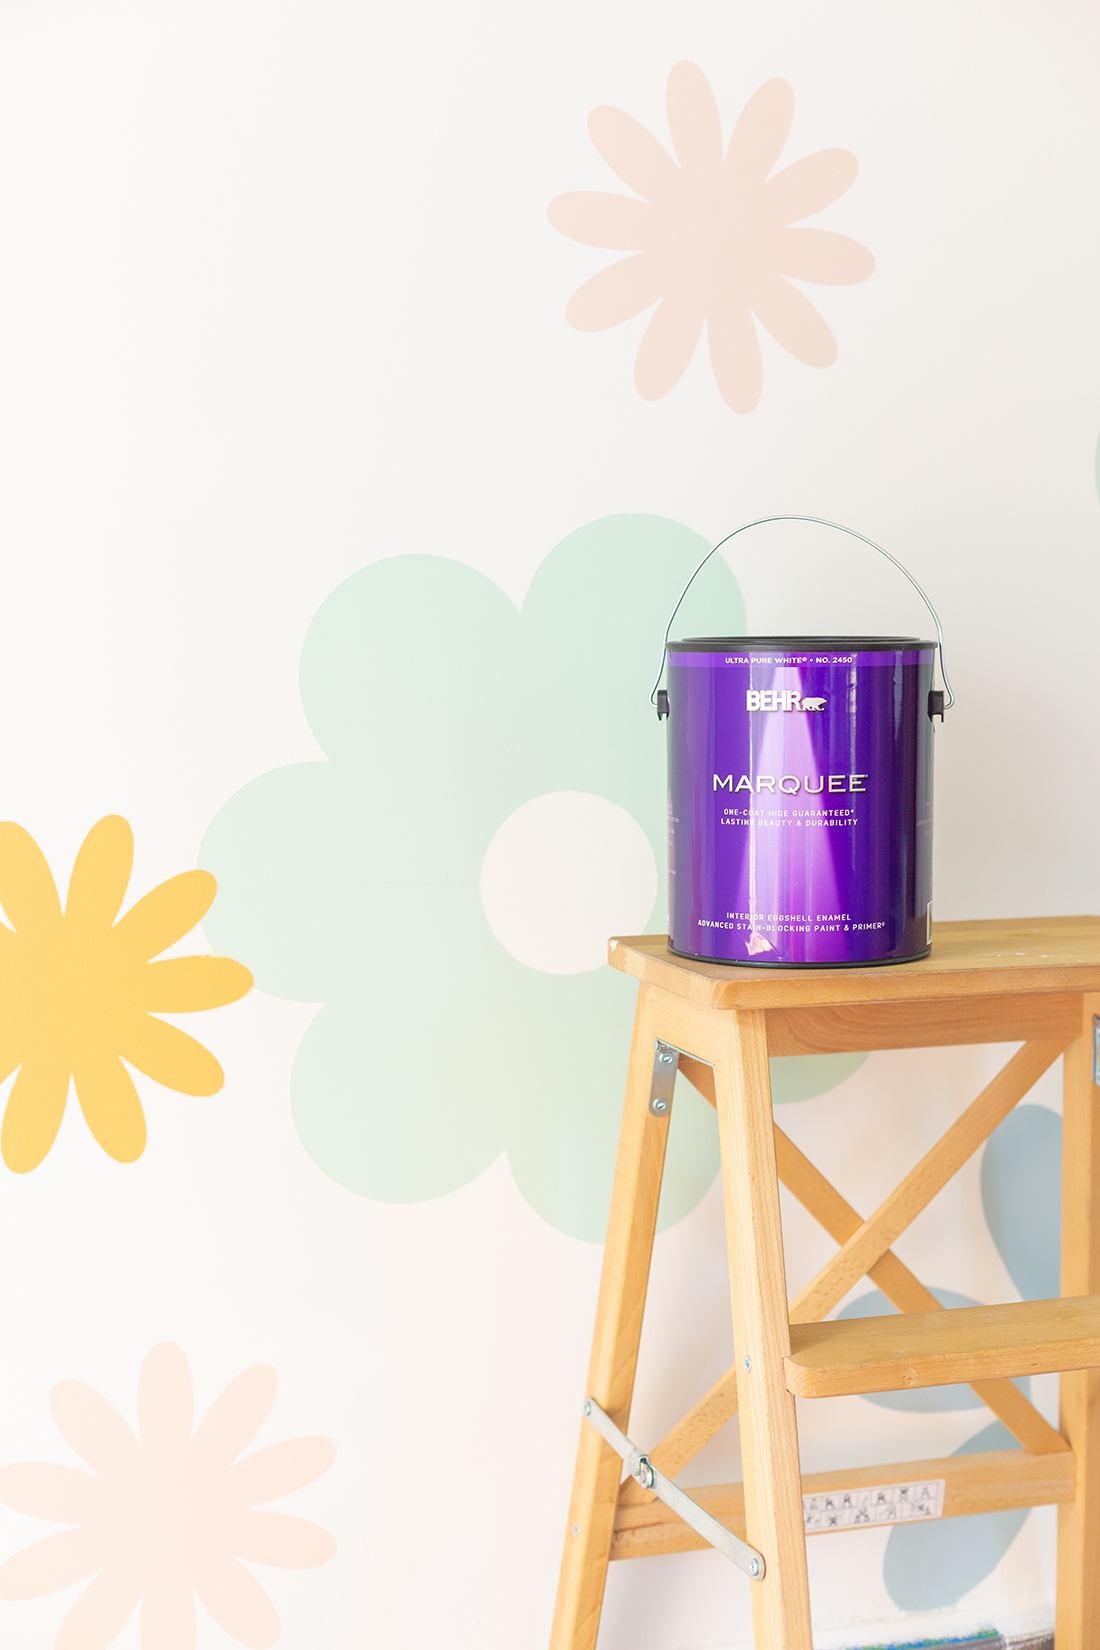
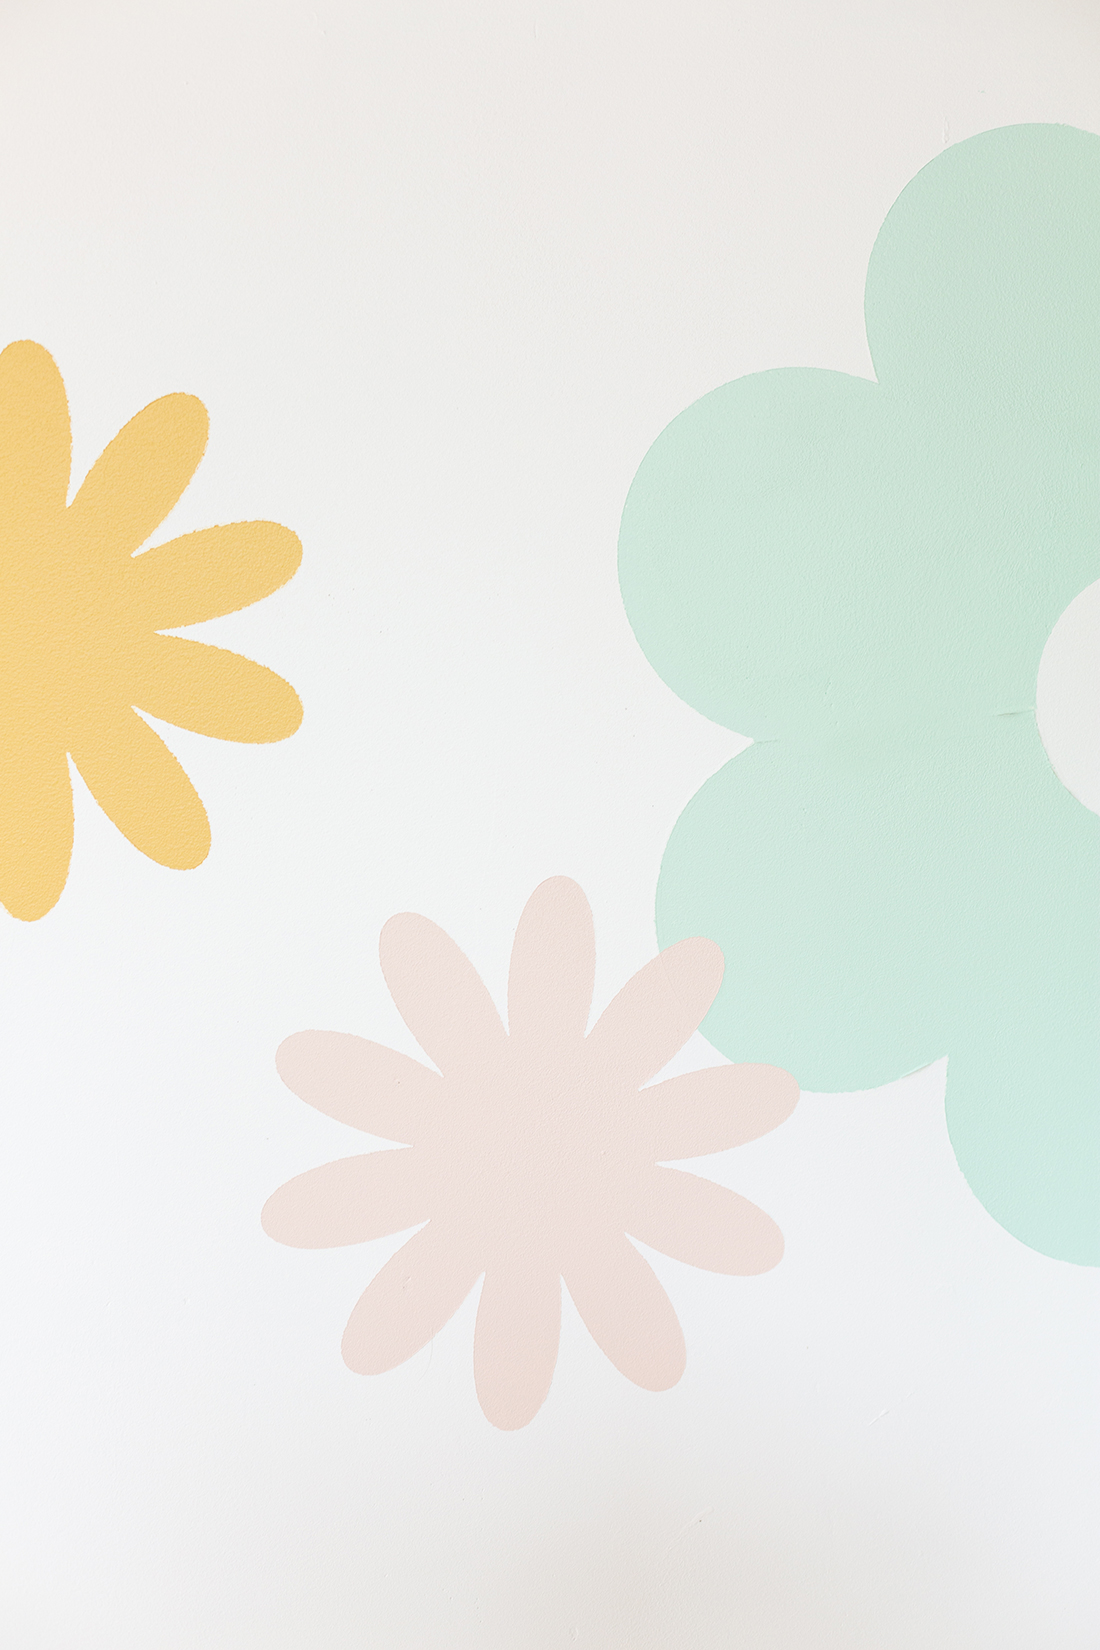
As we were picking out the colors for this project we knew we had to go with our favorite paint brand, BEHR® Paint, because not only do they have amazing color choices; we are always able to get a smooth coat and finish with their paints because of how great they are. And to add to it, they just introduced their BEHR® Color Trends 2021 Palette, and we picked the perfect color to be the star of our mural, their beautiful Wishful Green M410-2!
Along with 20 other creators and designers, I chose a color to feature from the palette. While the entire palette consists of elevated and comforting hues, Wishful Green M410-2 was perfect for our project because it’s a nostalgic mint green hue with a fresh appearance. We also used other colors from the palette, because they are all so complimentary with each other, including: Cellini Gold HDC-CL-18, Dayflower MQ3-54, and Seaside Villa S190-1.

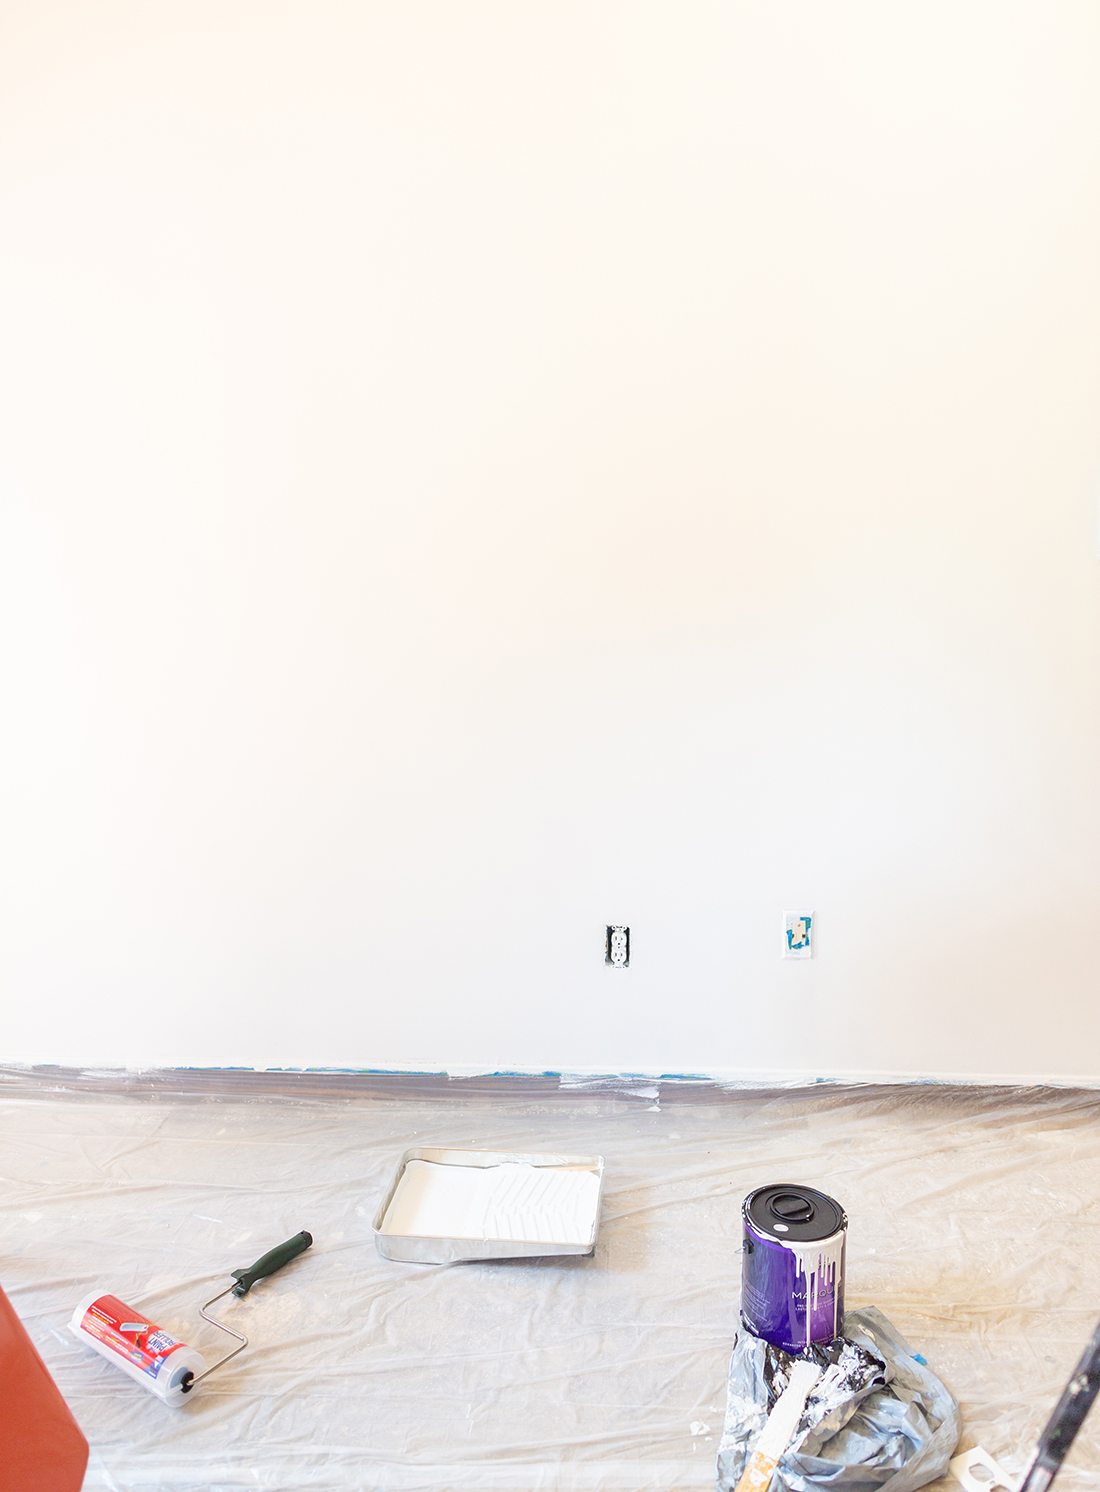
This is the before photo! Just a plain, white wall that is ready to be spruced up!
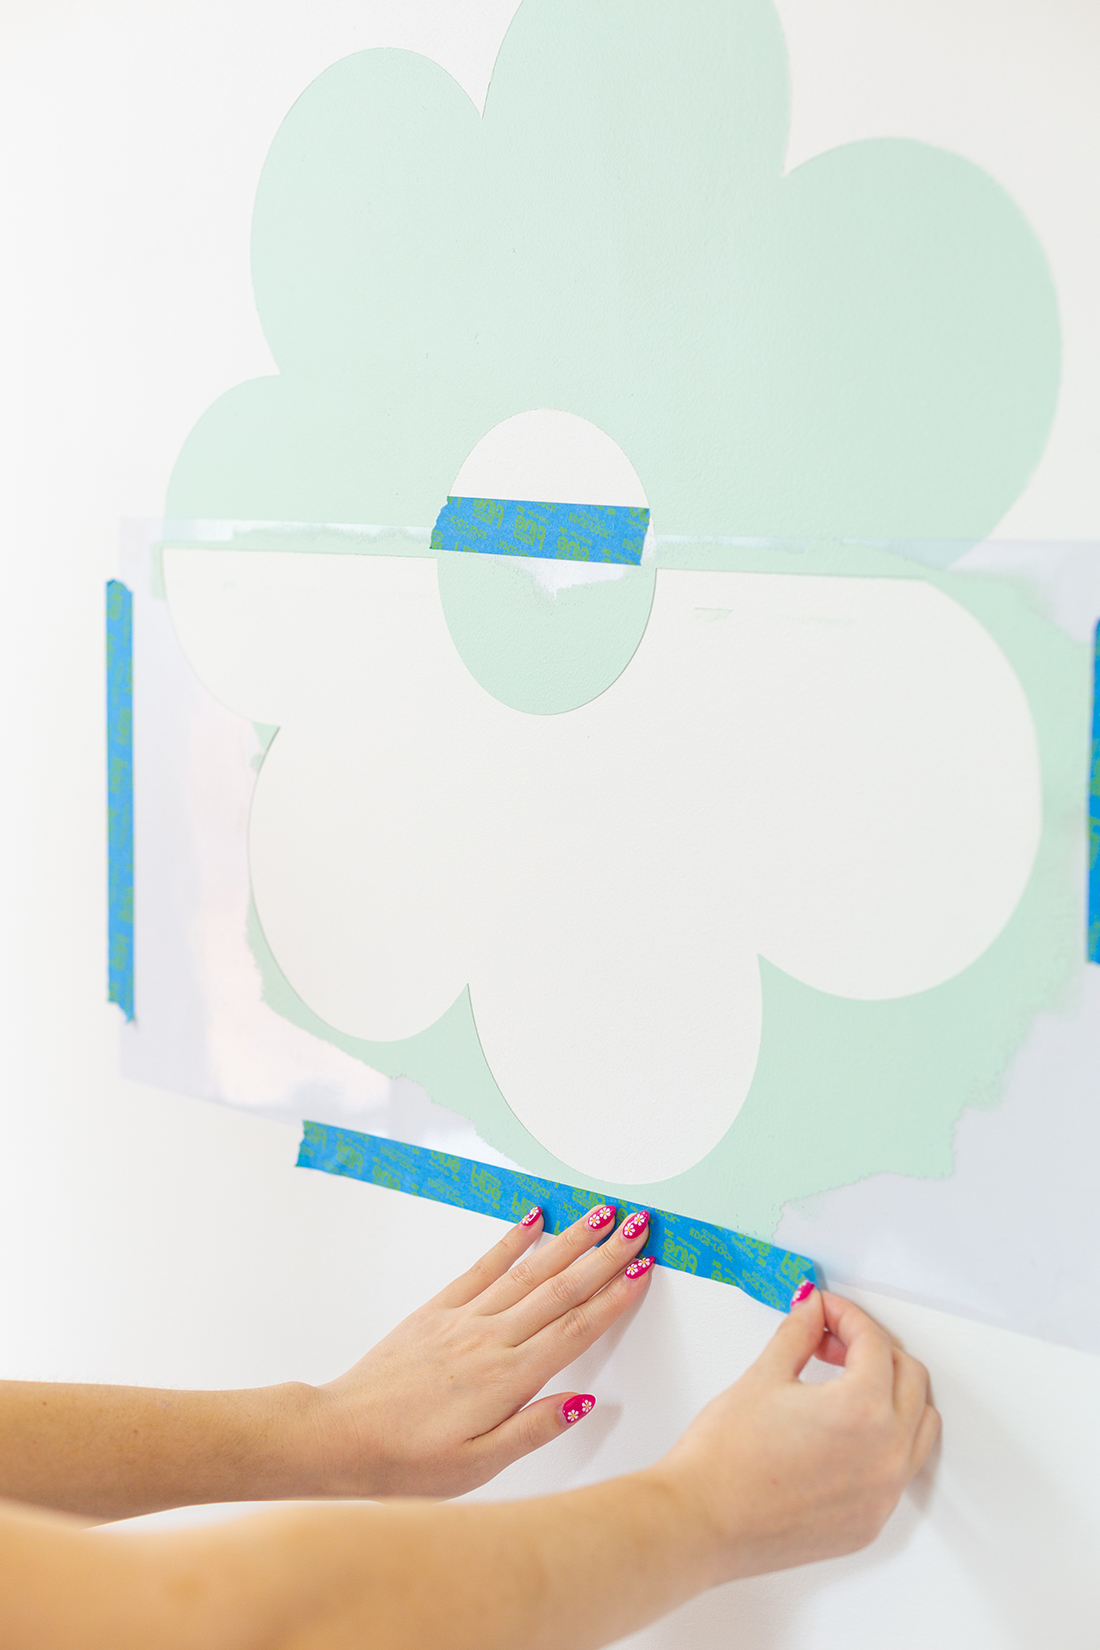
When we were brainstorming the perfect way to paint our mural, we came up with the idea to create our own reusable stencils. To do this, I designed a stencil and uploaded it onto my cutting machine. We then cut the stencil out of an acrylic sheet we bought at the art supply store. Using a repositionable adhesive spray we then applied the stencil to the wall, and then painted it. Once the paint has dried we simply peeled the stencil up and prepped it for the next flower! It made things so much easier, and helped cut the time we spent creating the mural in half!
 Wishful Green M410-2 paint
Dayflower MQ3-54 paint
Seaside Villa S190-1 paint
Cellini Gold HDC-CL-18 paint
Acrylic sheet
Cutting Machine
Repositionable adhesive spray
Projector
*All paint used was BEHR MARQUEEⓇ Interior in Eggshell

1. First, I designed my stencils on the computer, then imported them into my cutting machine. Using a deep cut blade, and on the poster board setting, we used our cutting machine to cut out the stencils.
2. Using a projector, we put our design onto the wall we were painting to guide where we would be placing the stencils. If you don’t have one, you can simply place them wherever you want instead.
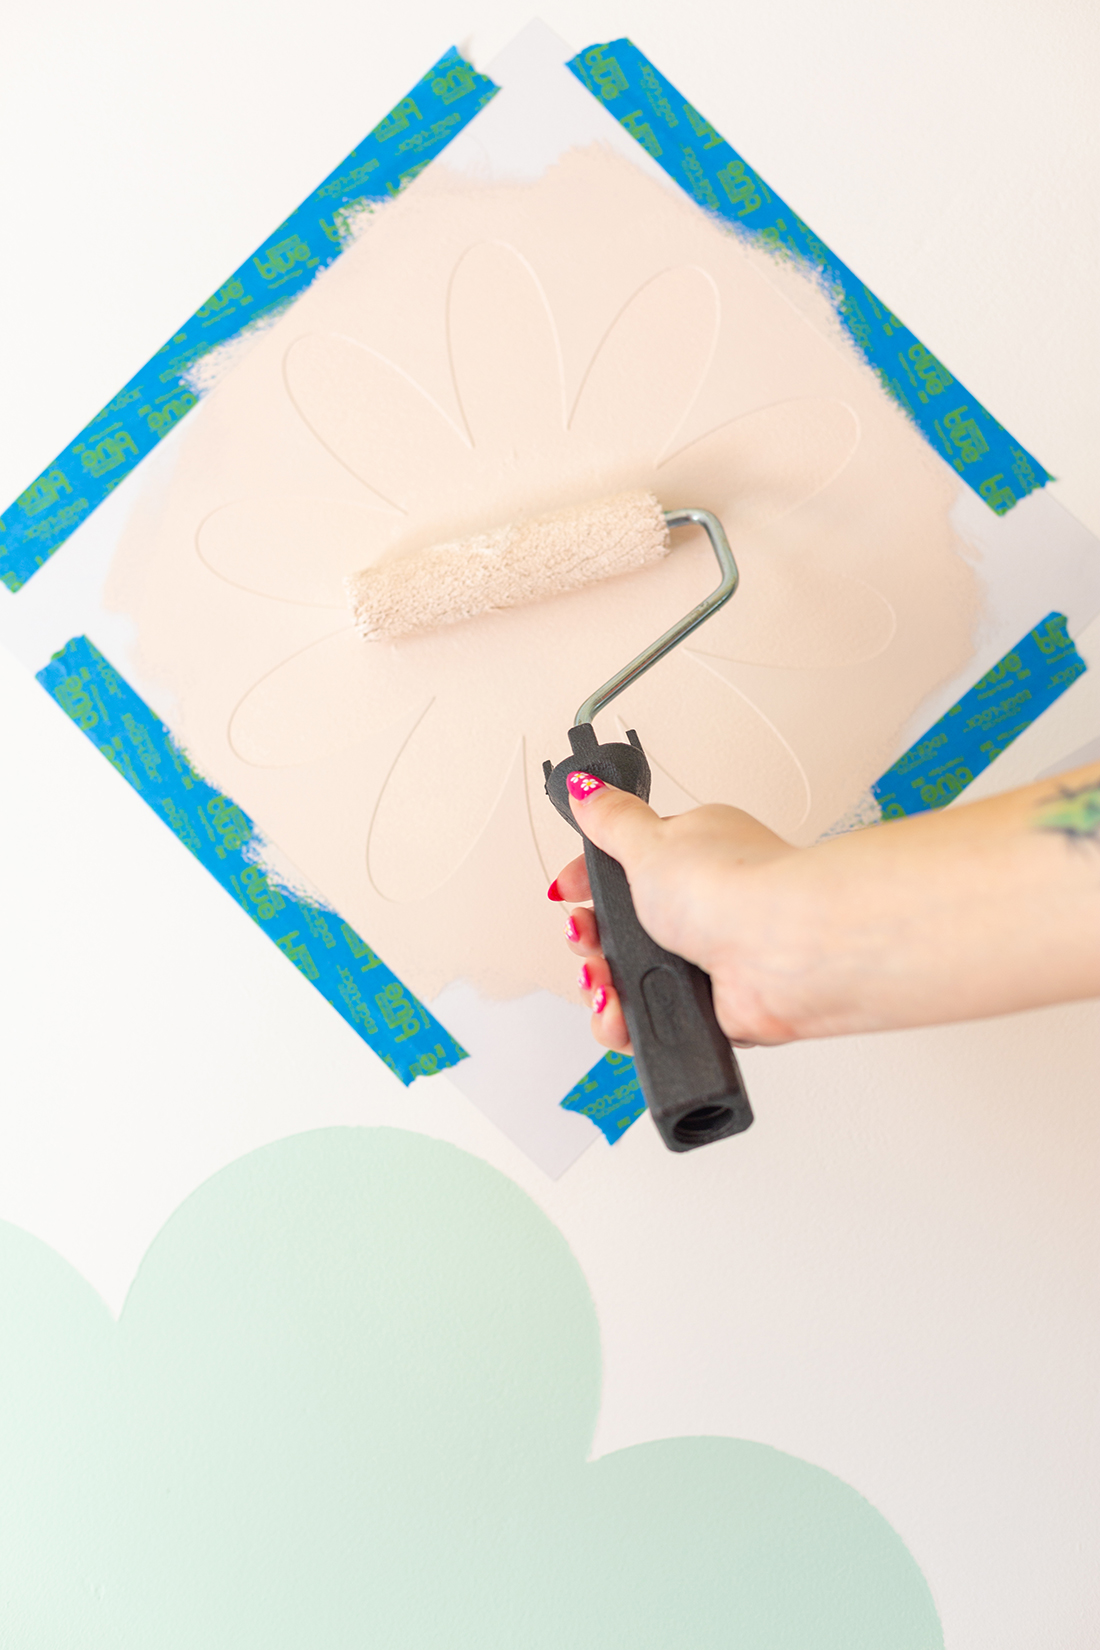
3. Next we sprayed the back of the stencil with our adhesive spray, and allowed it to set for about half a minute. Then we placed it on the wall where we wanted to paint and made sure it was flat. We also went ahead and secured it with a tape on each side, to protect from over painting.
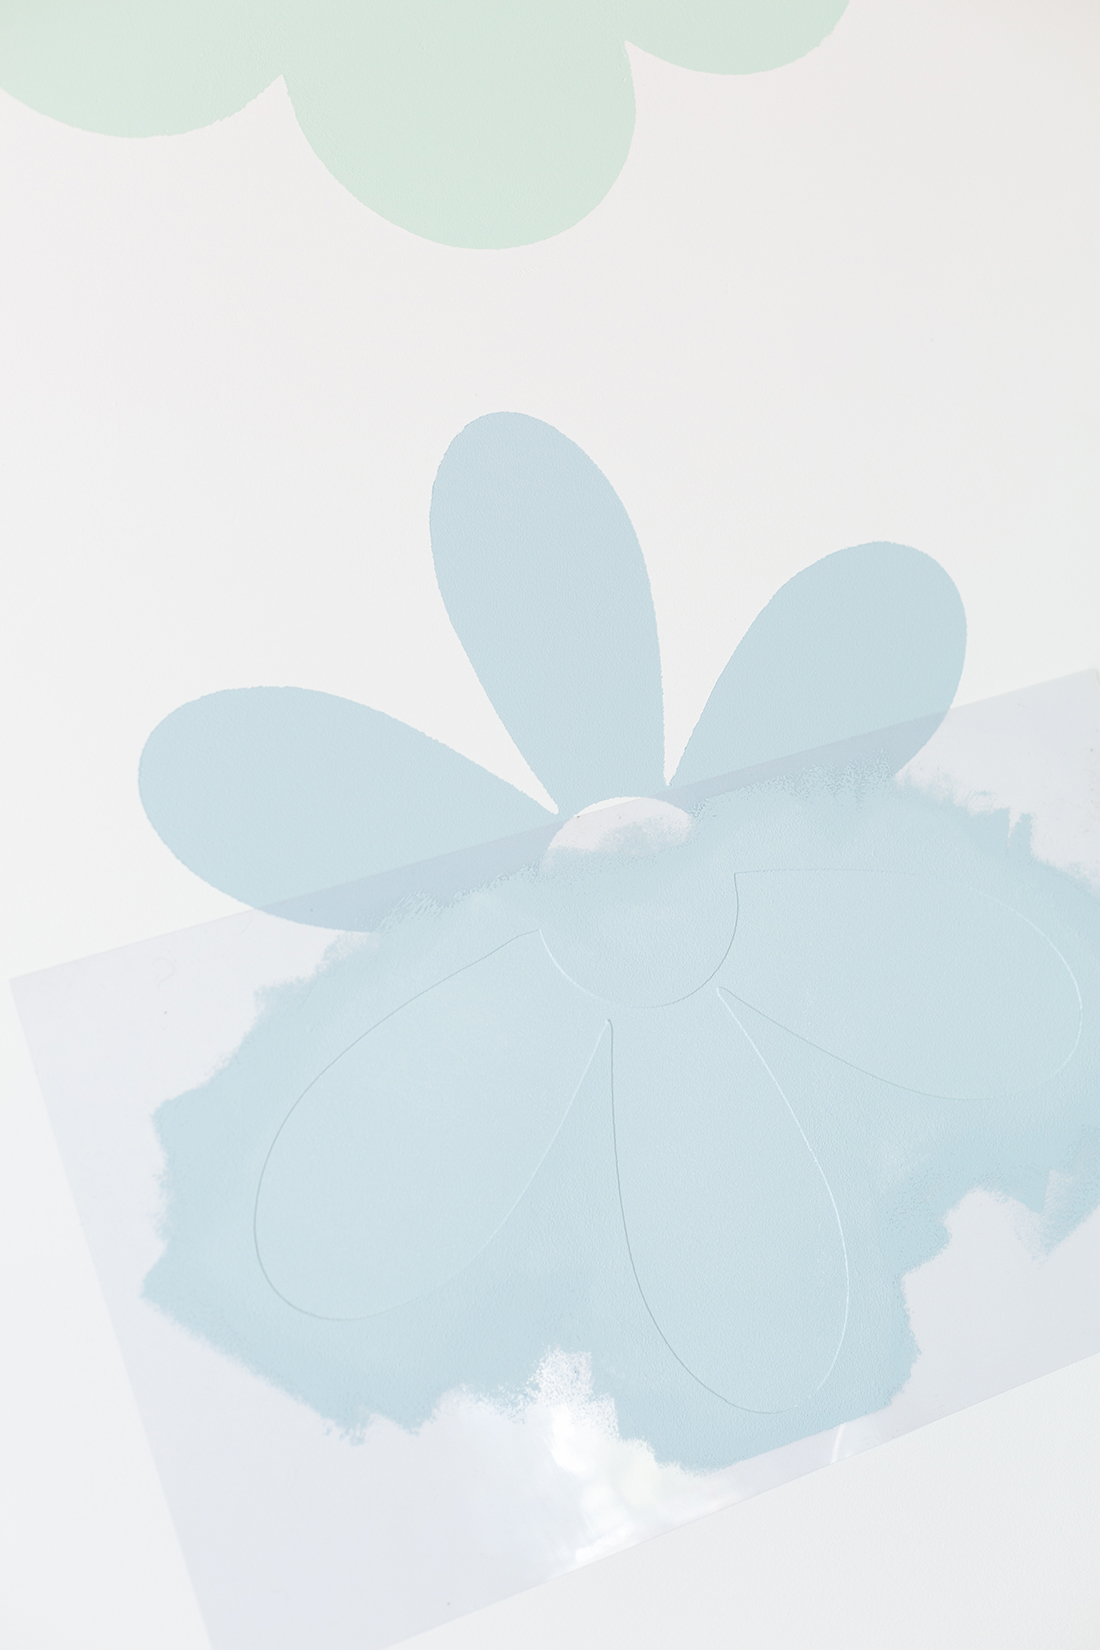
4. Now, paint the stencil your desired color, using a thin coat of paint. If you use too much paint, your stencil may stick and tear the design.
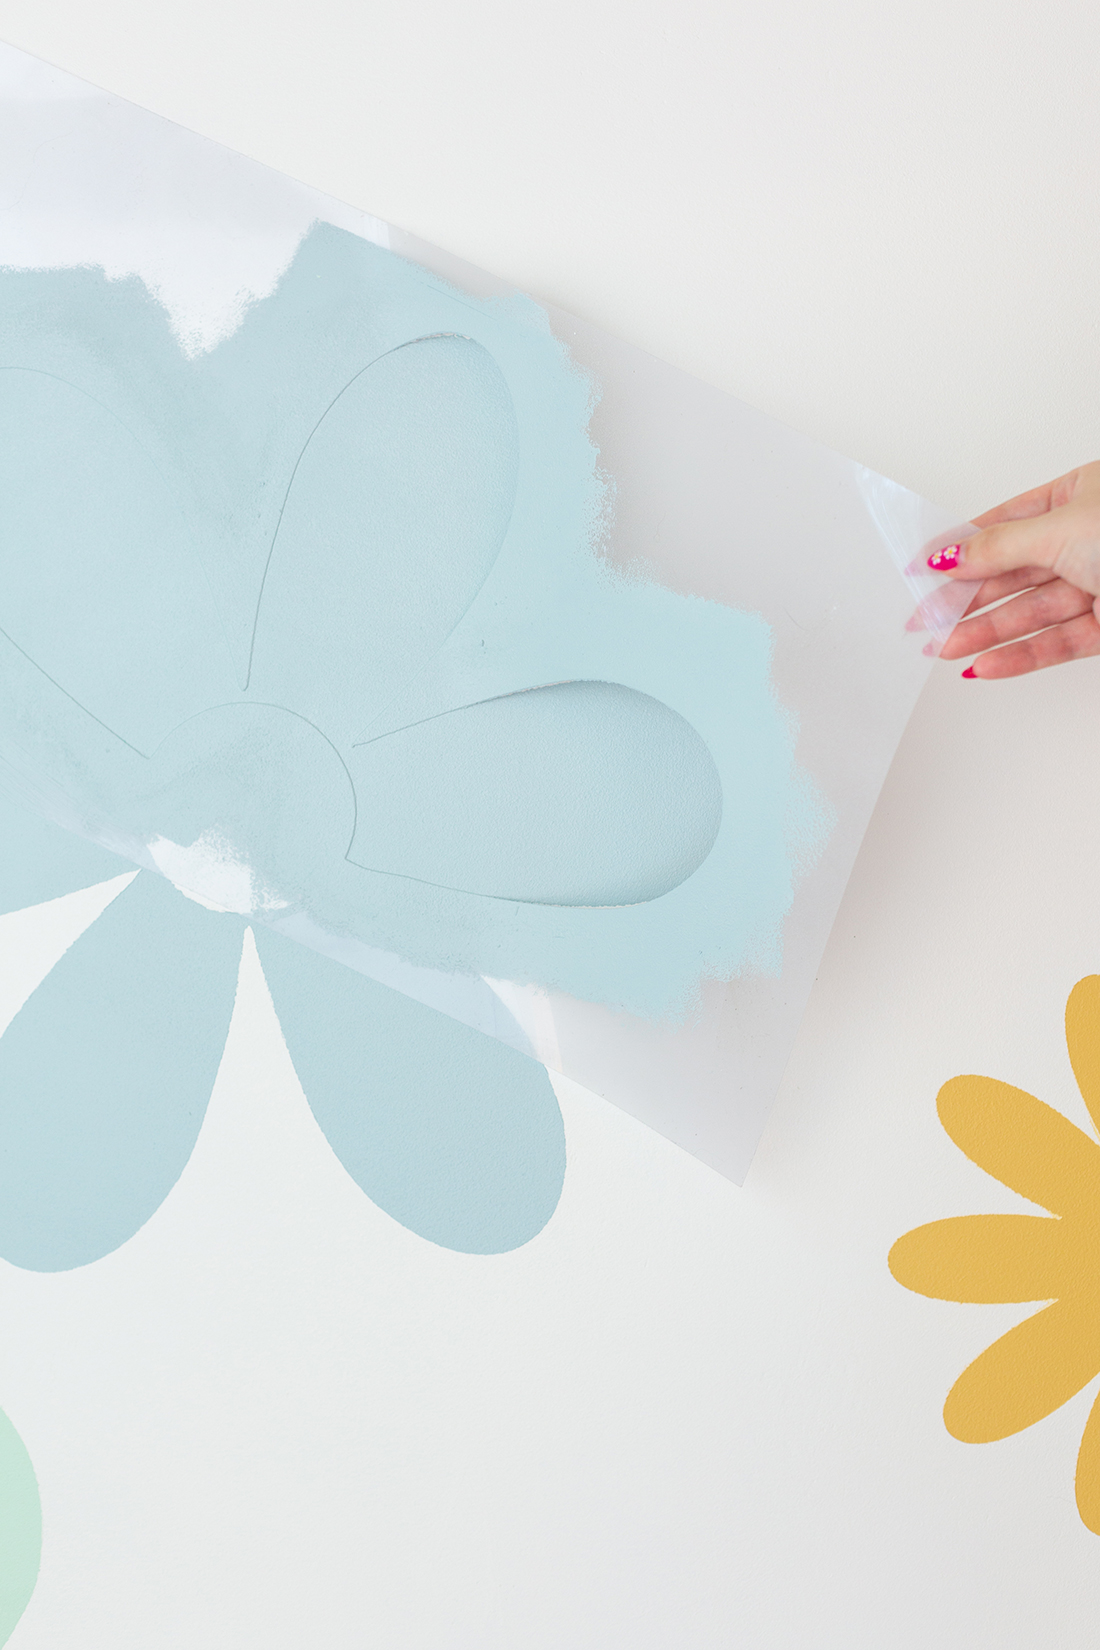
5. Wait about 15-20 minutes, or until the paint is dry to the touch, then slowly peel away the stencil. As long as your stencil is dry, you can then repeat the process, spraying on more adhesive, and reapplying the stencil as many times as you want!
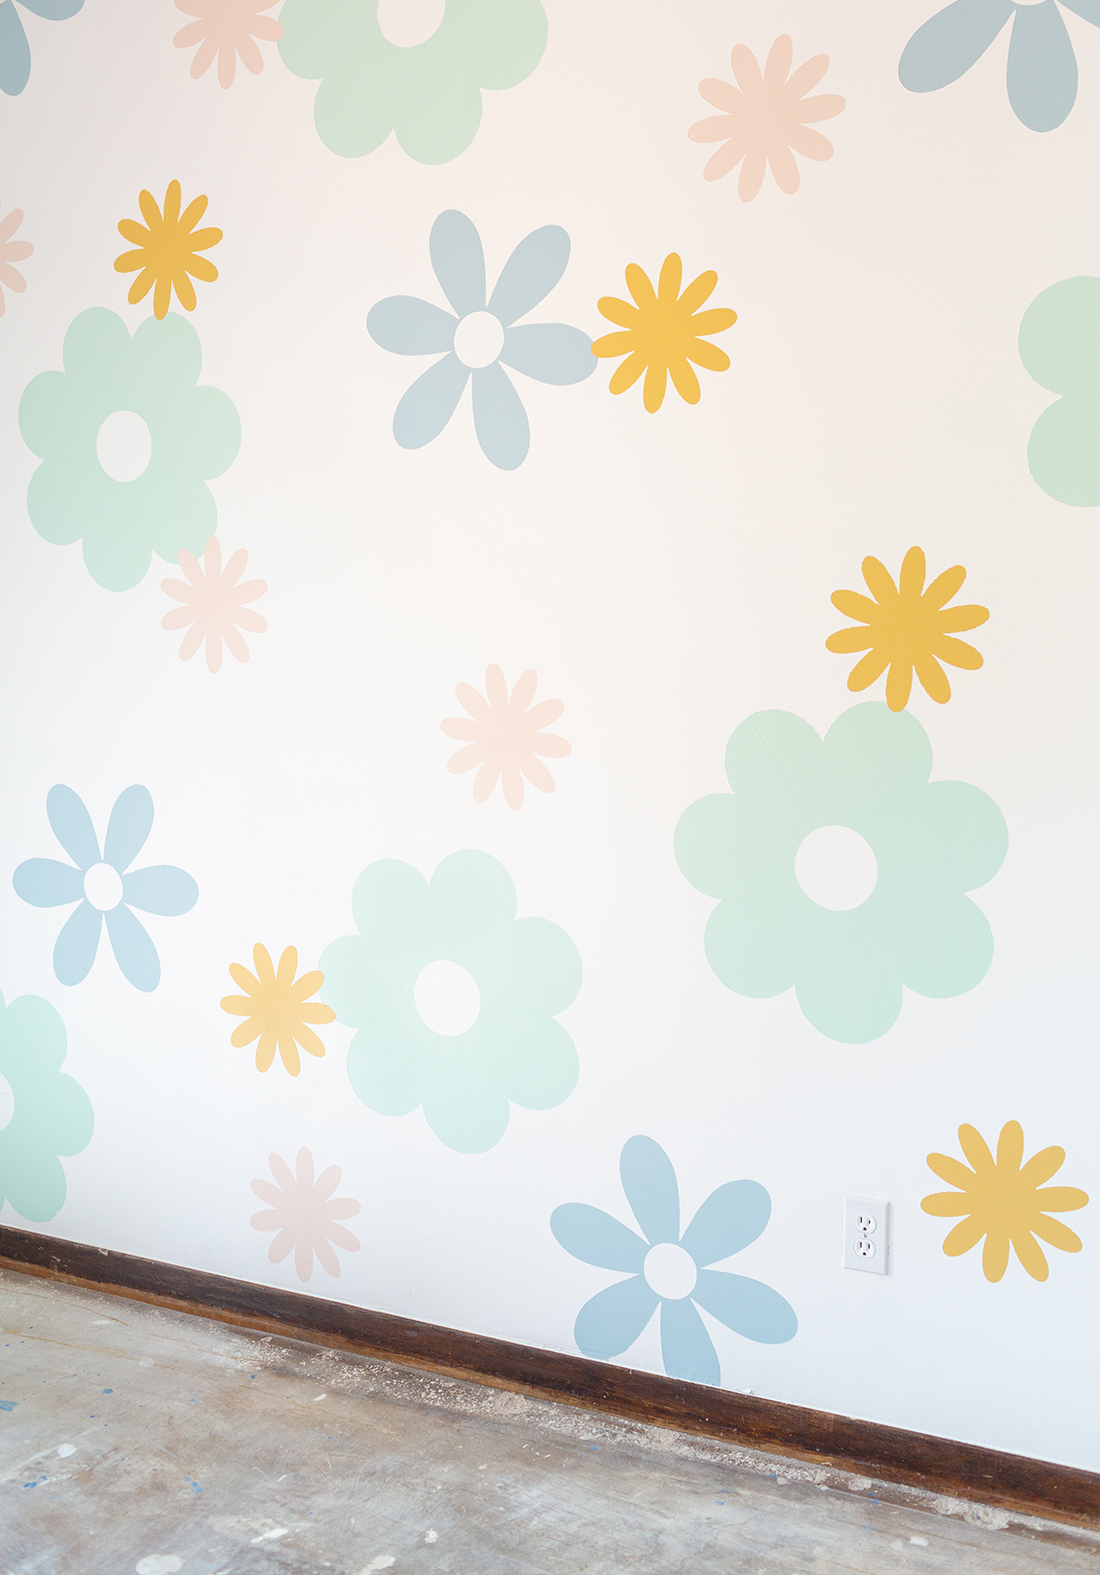
Who would have thought painting a mural could be so easy! It goes by much faster the more brushes and people you have, and it only slightly increases the messiness factor. We had 4 paint trays with four brushes all over the floor, and we managed to get by with only a drip of paint! I can’t wait to bring this new skill to our next paint job, it’s so much easier than free hand painting a mural. Next up in this room are new baseboards and flooring, stay tuned!
This post was sponsored by BEHR Paint. All content and opinions are my own. Thank you for continuing to support sponsors that make this blog a lot more Aww Sam! You can find more about our sponsorship opportunities here.


