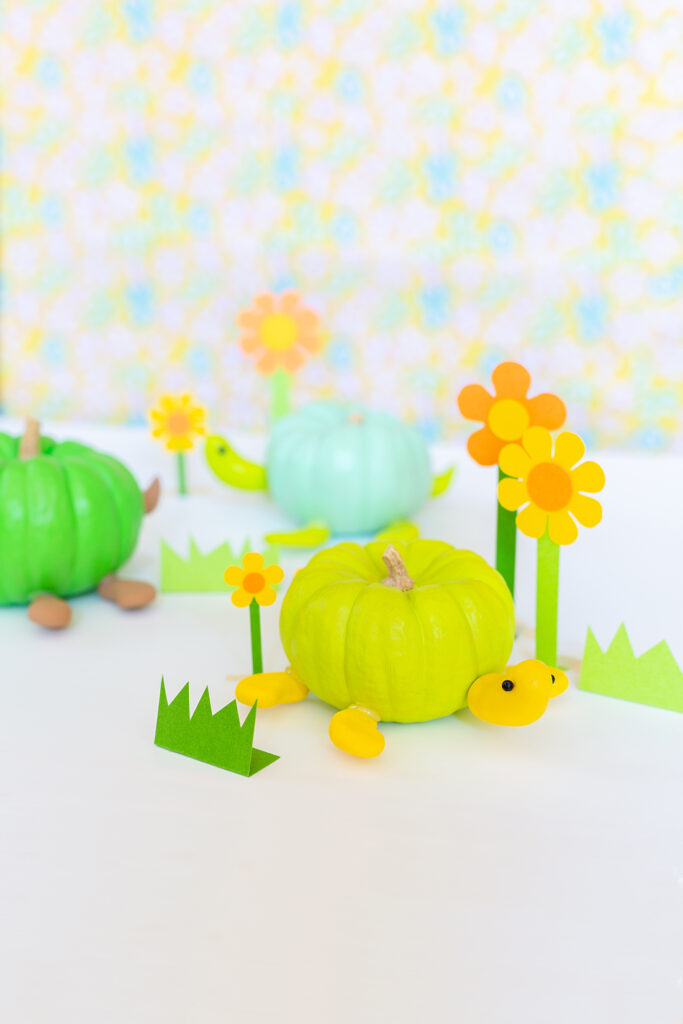
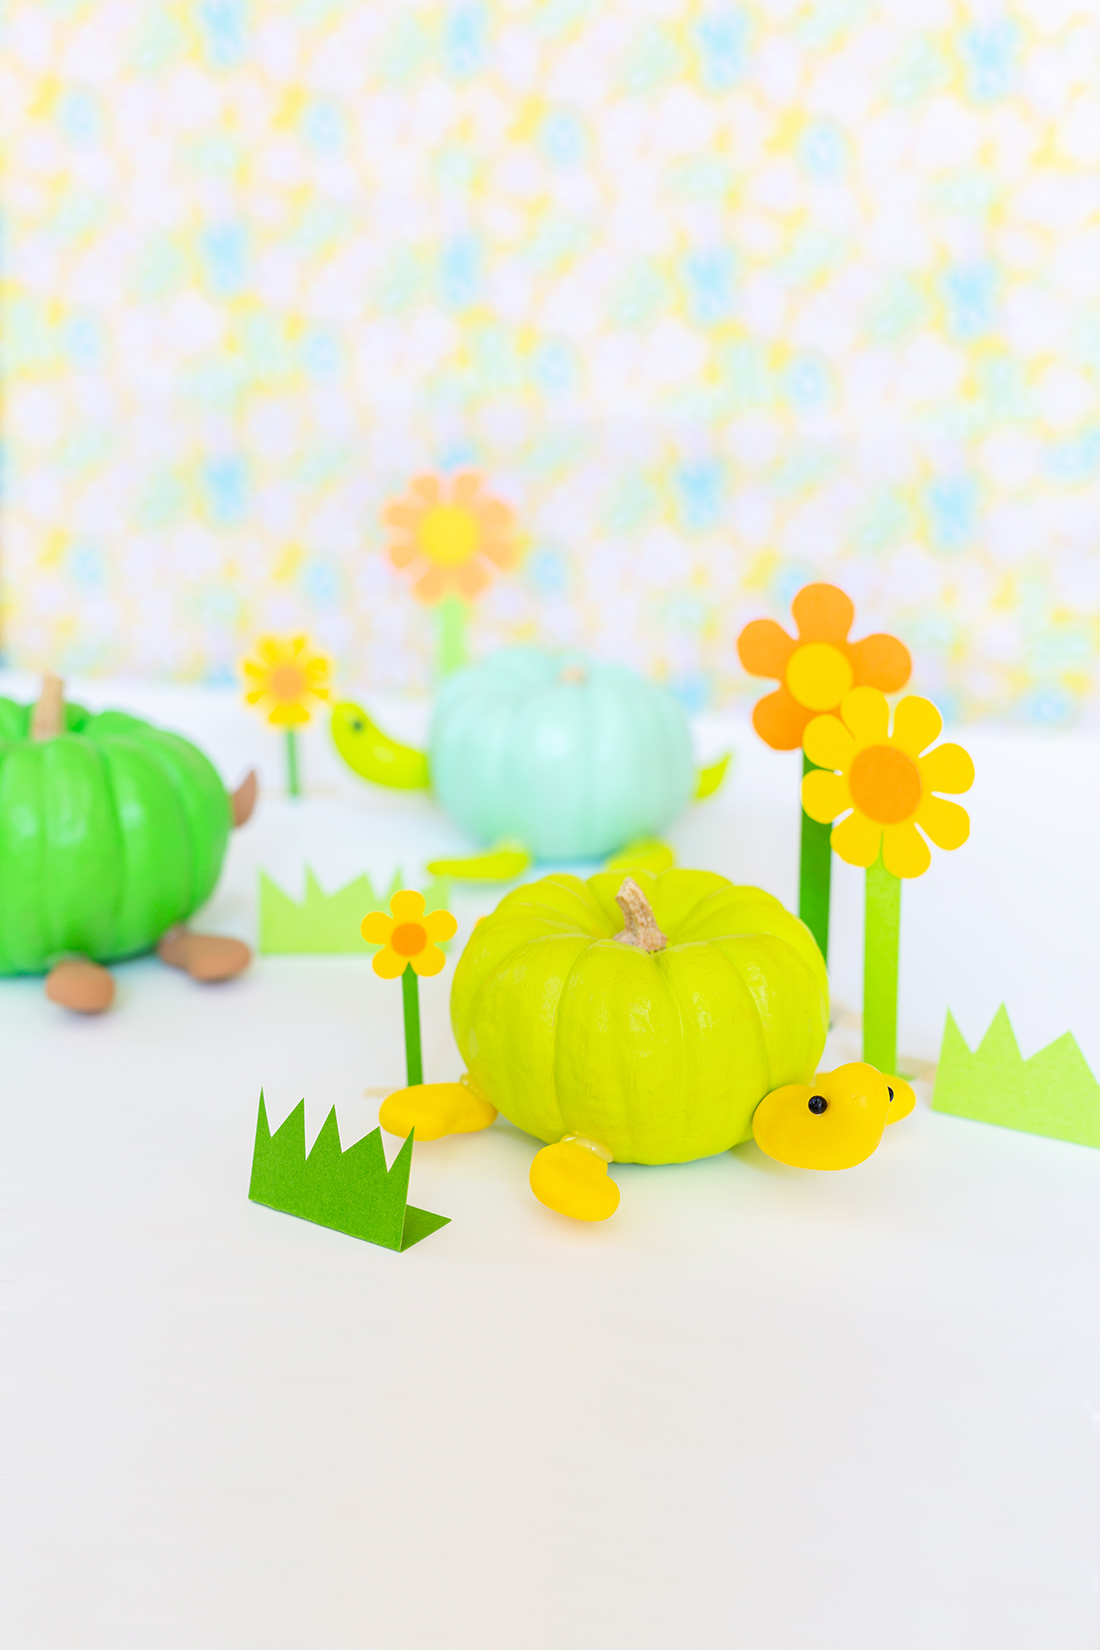
Is it really already Halloween season?! My favorite time of the year by far! We had a cold front come through this week and now it feels much more like Fall, so in honor of the change in weather we decided to put out our first DIY of the season….a no carve pumpkin project!!! I’ve been collecting a bunch of really cute turtle shaped items for our house, so I wanted to make Halloween decor that would fit right in. This is such an easy project, and would be so fun to make with kids or even with larger pumpkins. Now I think I know what we will be doing all weekend; watch out pumpkin patches, here we come!
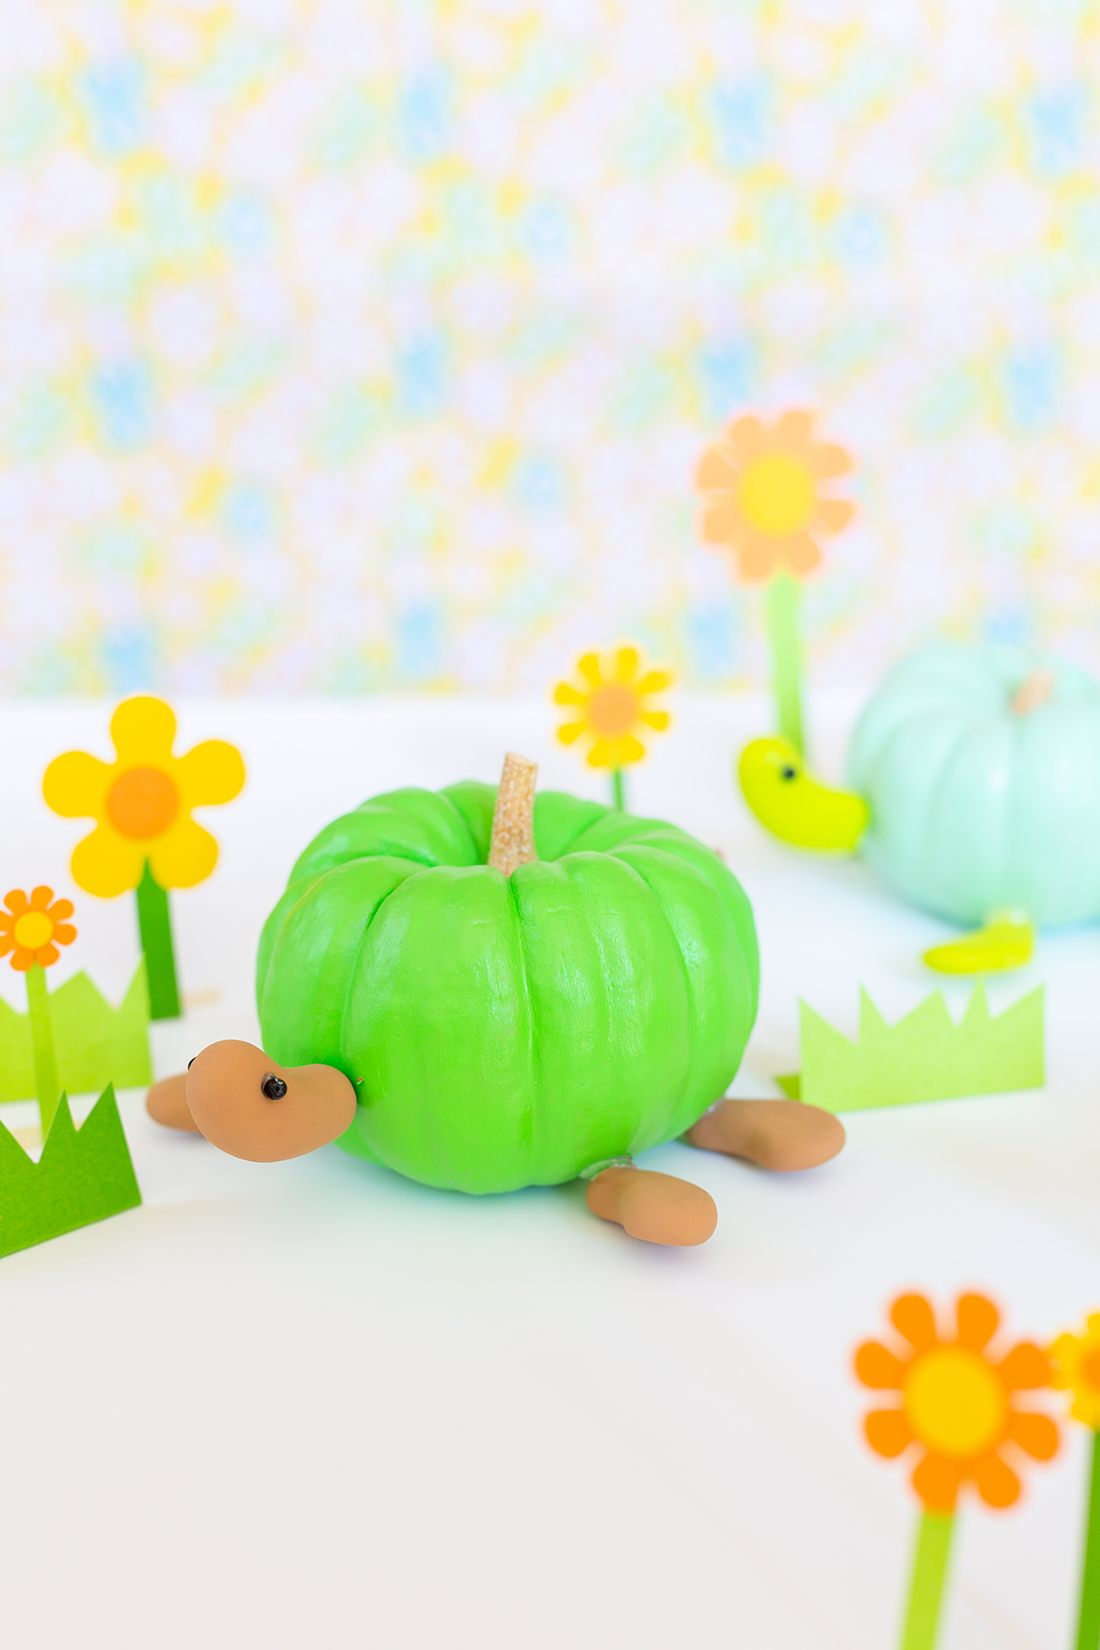
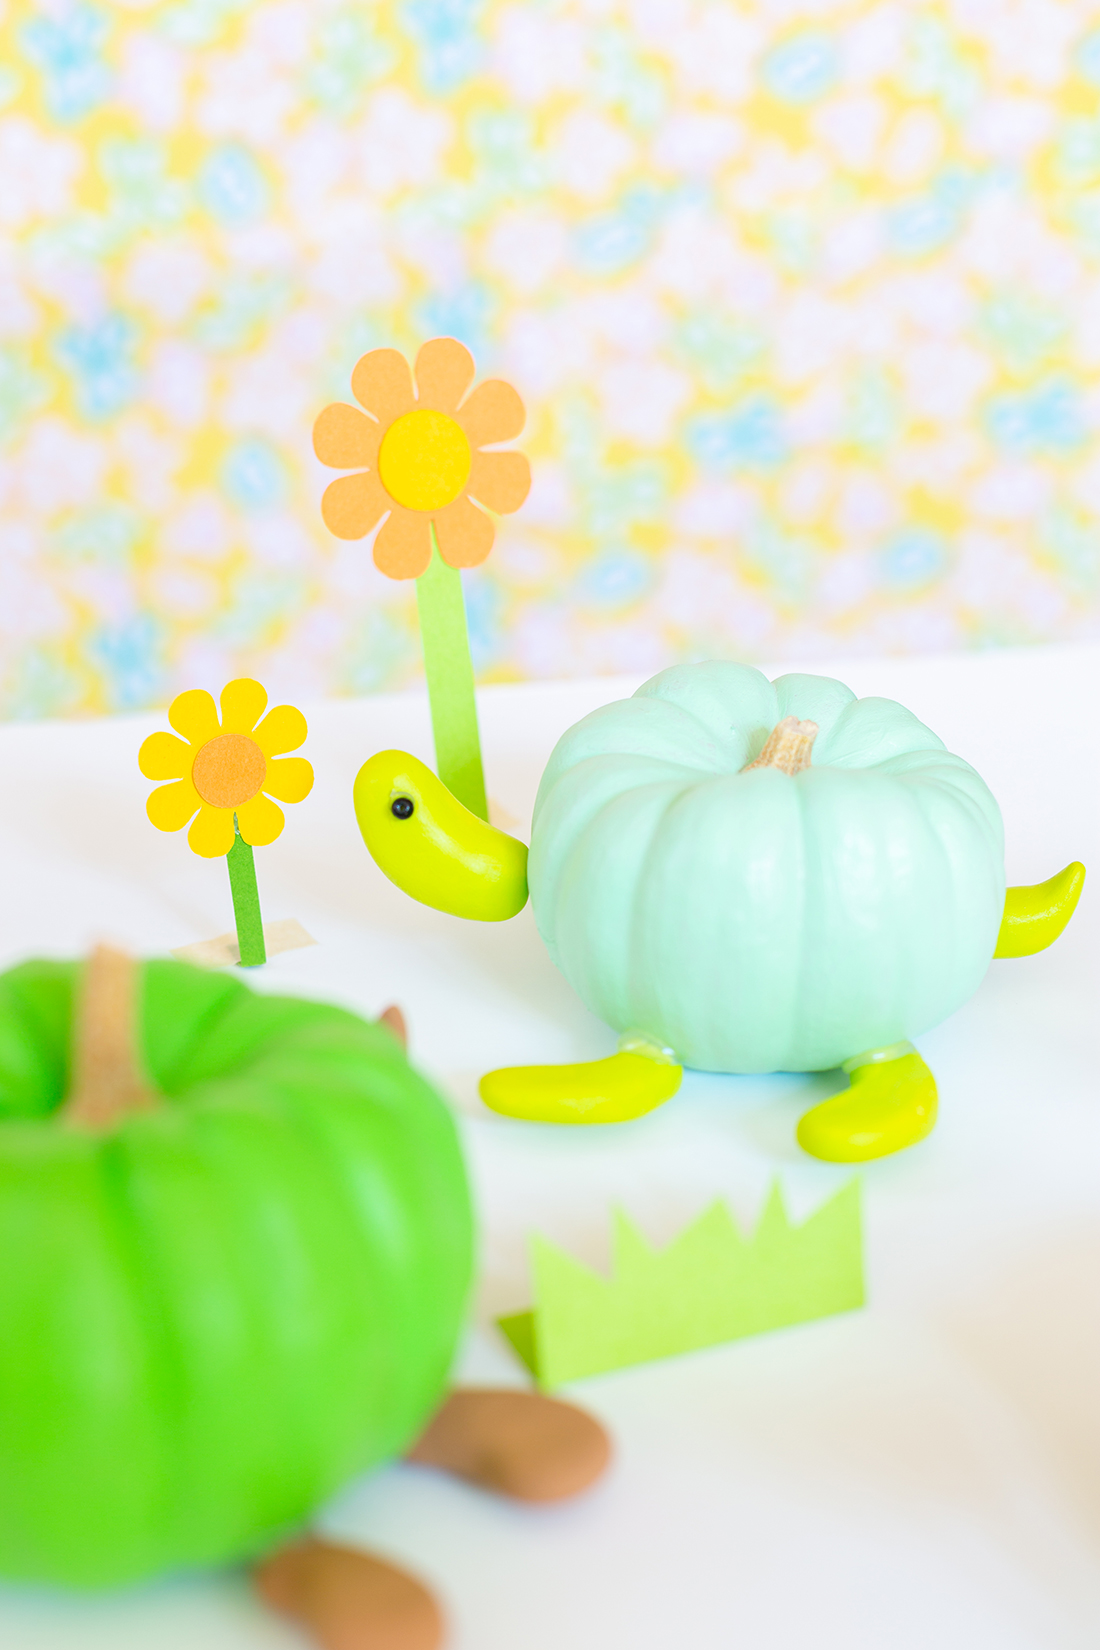
 Pumpkins shaped like a turtle shell
1 bag of model magic/modeling clay
Paintbrush
Acrylic paints in various colors (we used greens, yellow, mint and brown)
Small beads for eyes
Toothpicks
Hot glue gun and glue sticks
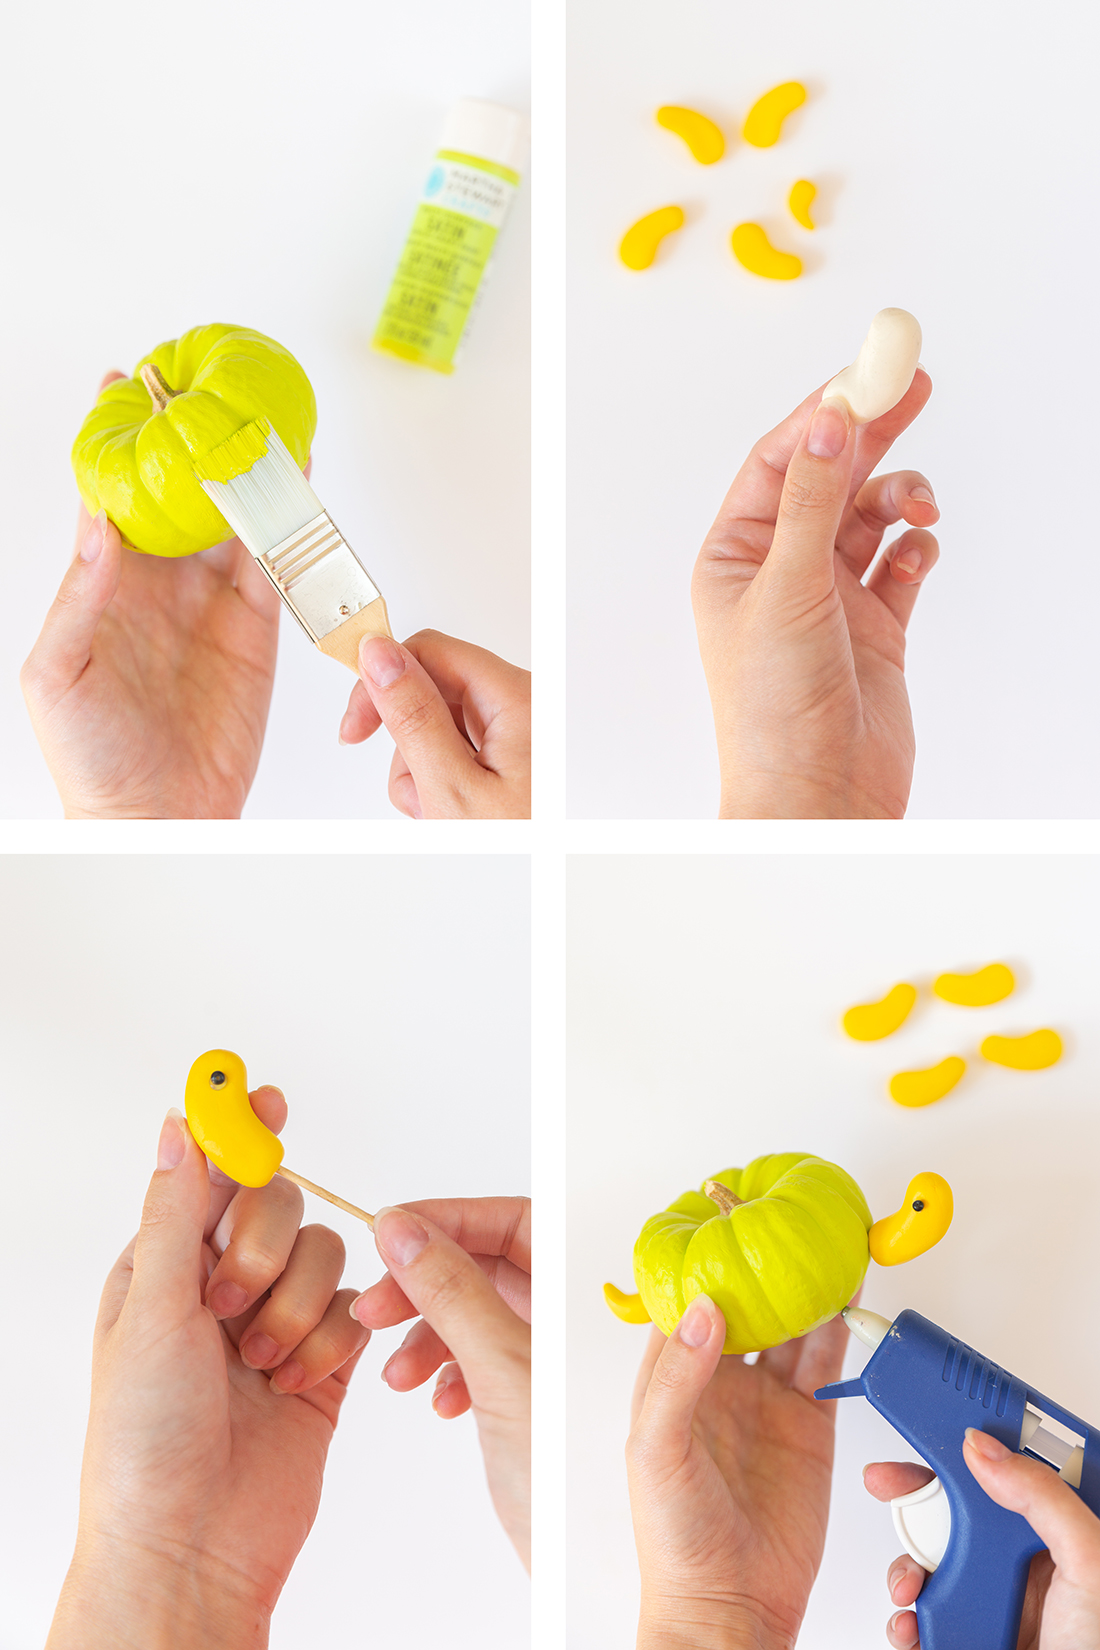
 1. Paint your pumpkin your desired color and allow to dry completely. We painted two coats to cover the pumpkin thoroughly.
2. Using your pumpkin for size reference, form the shape of a turtle head, 4 legs, and a tail using your model magic clay. Allow the clay to harden enough so that it doesn’t change shape when you move it.
3. Once your modeling clay has hardened completely, paint it your color of choice and allow it to dry.
4. Now you just need to assemble your turtle! Glue a bead on each side of the head, then using toothpicks stick the head and tail into the body of your turtle. Last, apply a small drop of hot glue to each of the legs and apply them to the body.
You know what they always say, slow and steady always wins the race, so that must include the race to Halloween right? 😉 Hopefully these little turtles get you cracking a smile and excited for decorating your house for Halloween. Just remember to give your new friends food, water and sunlight! Just NEVER, EVER after midnight….or else they may change!


