Since our last tassel-related post, I’ve been dying to do another post, but this time with bigger tassels. I’d had my eye on this tassel hat from Kate Spade for a while, but it was always wayyy out of my price range, so I thought we could show you how to make your own tassel hat straps today! There’s no good way to carry around a hat when you aren’t wearing it (shout-out to everyone who has ever had to wear their hats on the airplane), so I’m all for carrying it around on my back like a backpack. Especially when the straps are this cute! PLUS, You can easily disconnect them or put them back on whenever you want, so they’re great for when you’re on-the-go!



Hat of your choice (I got mine at Asos)
Yarn in various colors
Embroidery needle
Hot glue gun
White rope (here)
Large jewelry clasp (here)
Scissors
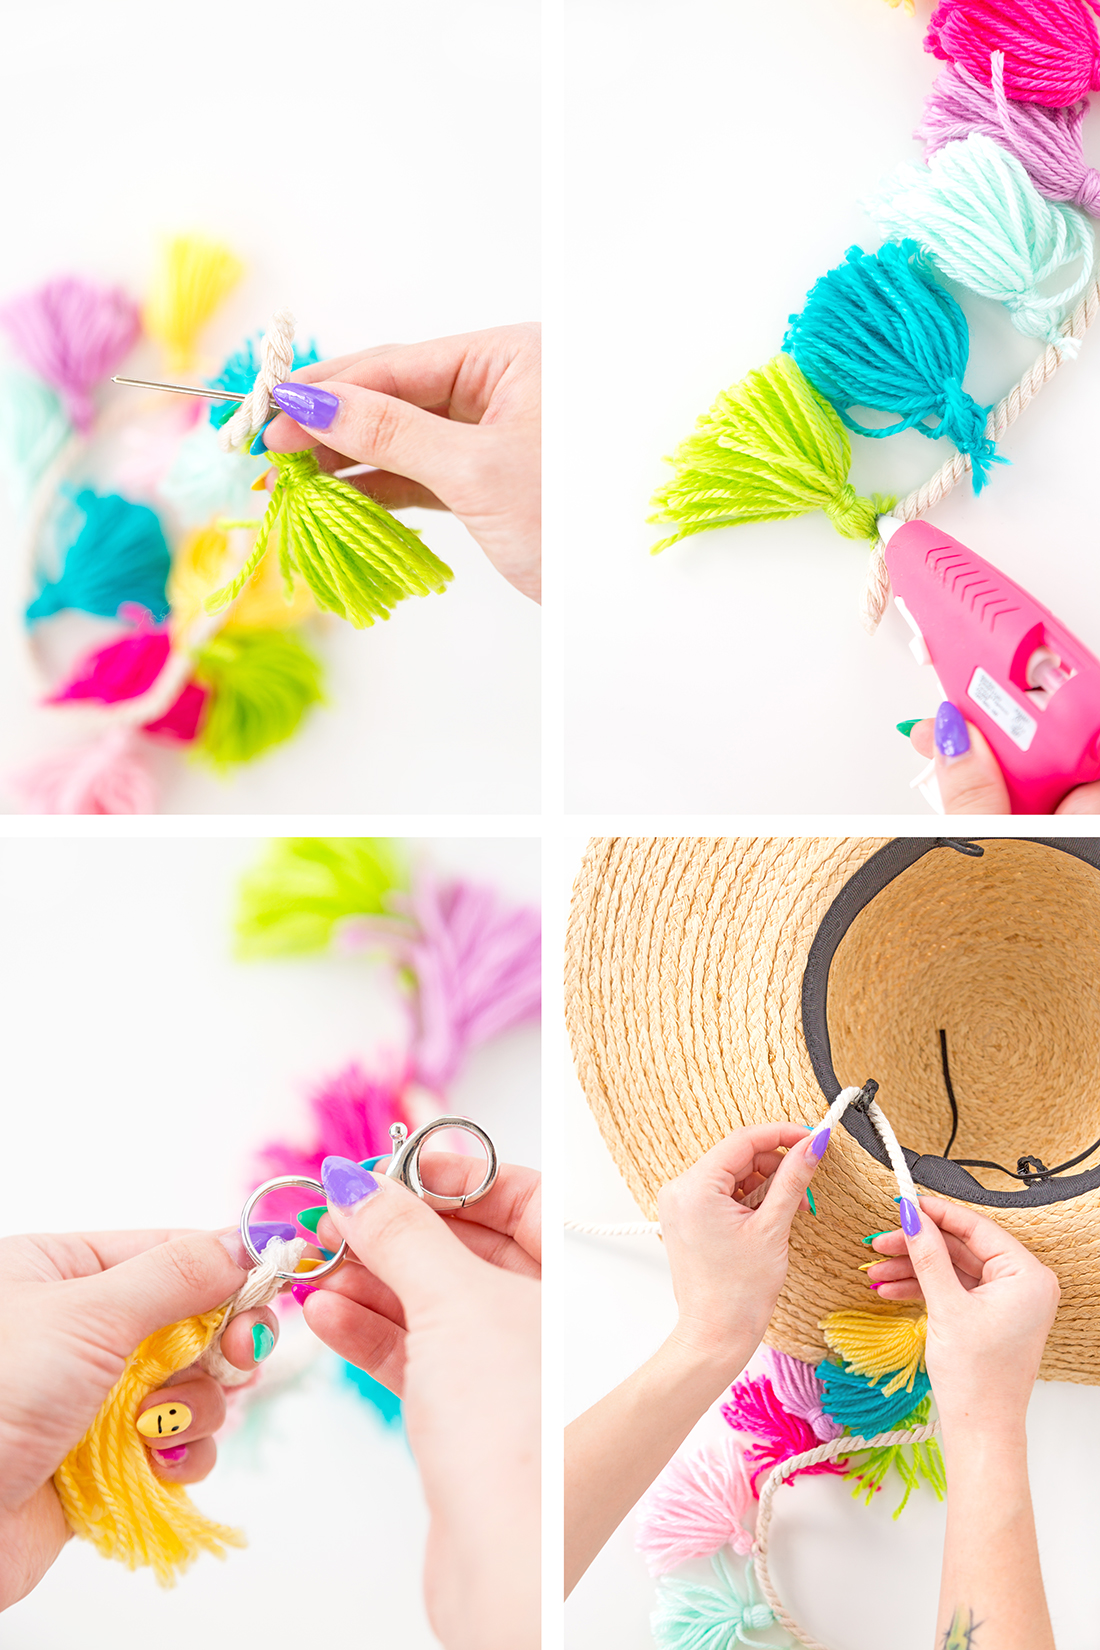

1. Using our tutorial here for how to make tassels, use various colors of yarn to make around 12 tassels for each strap.
2. Wrap the rope up and around your shoulder to see how long the straps need to be. Cut them to the correct length. Using your hot glue gun, hot glue the ends of the rope so that it doesn’t unravel.
3. Space the tassels out along your rope so they are placed in even increments. With your embroidery needle, thread the ends of the tassels through the rope and tie a tight knot.
4. Hot glue the knot of the tassel in place and trim any loose yarn ends.
5. Cut four small loops out of string or yarn and hot glue them to the inside of the hat at equal distances.
6. Use the keyring on the jewelry clasp to connect it to one end of the rope. Tie the other end of the rope to one of the loops you just placed on the inside of the hat.
7. Use the clasps to connect the rope to the inside of the hat and transform them into straps.




Photos by Kyle Larsen
Be right back, going to go add straps to all of my hats now! This project is so simple I was debating on actually posting this one, but I love how it turned out and I’m totally adding hat “backpacks” to my list of accessories!


