


11″ pink latex balloons
Pink spray paint
Hot glue gun
Polyester fiberfill or batting
White paper


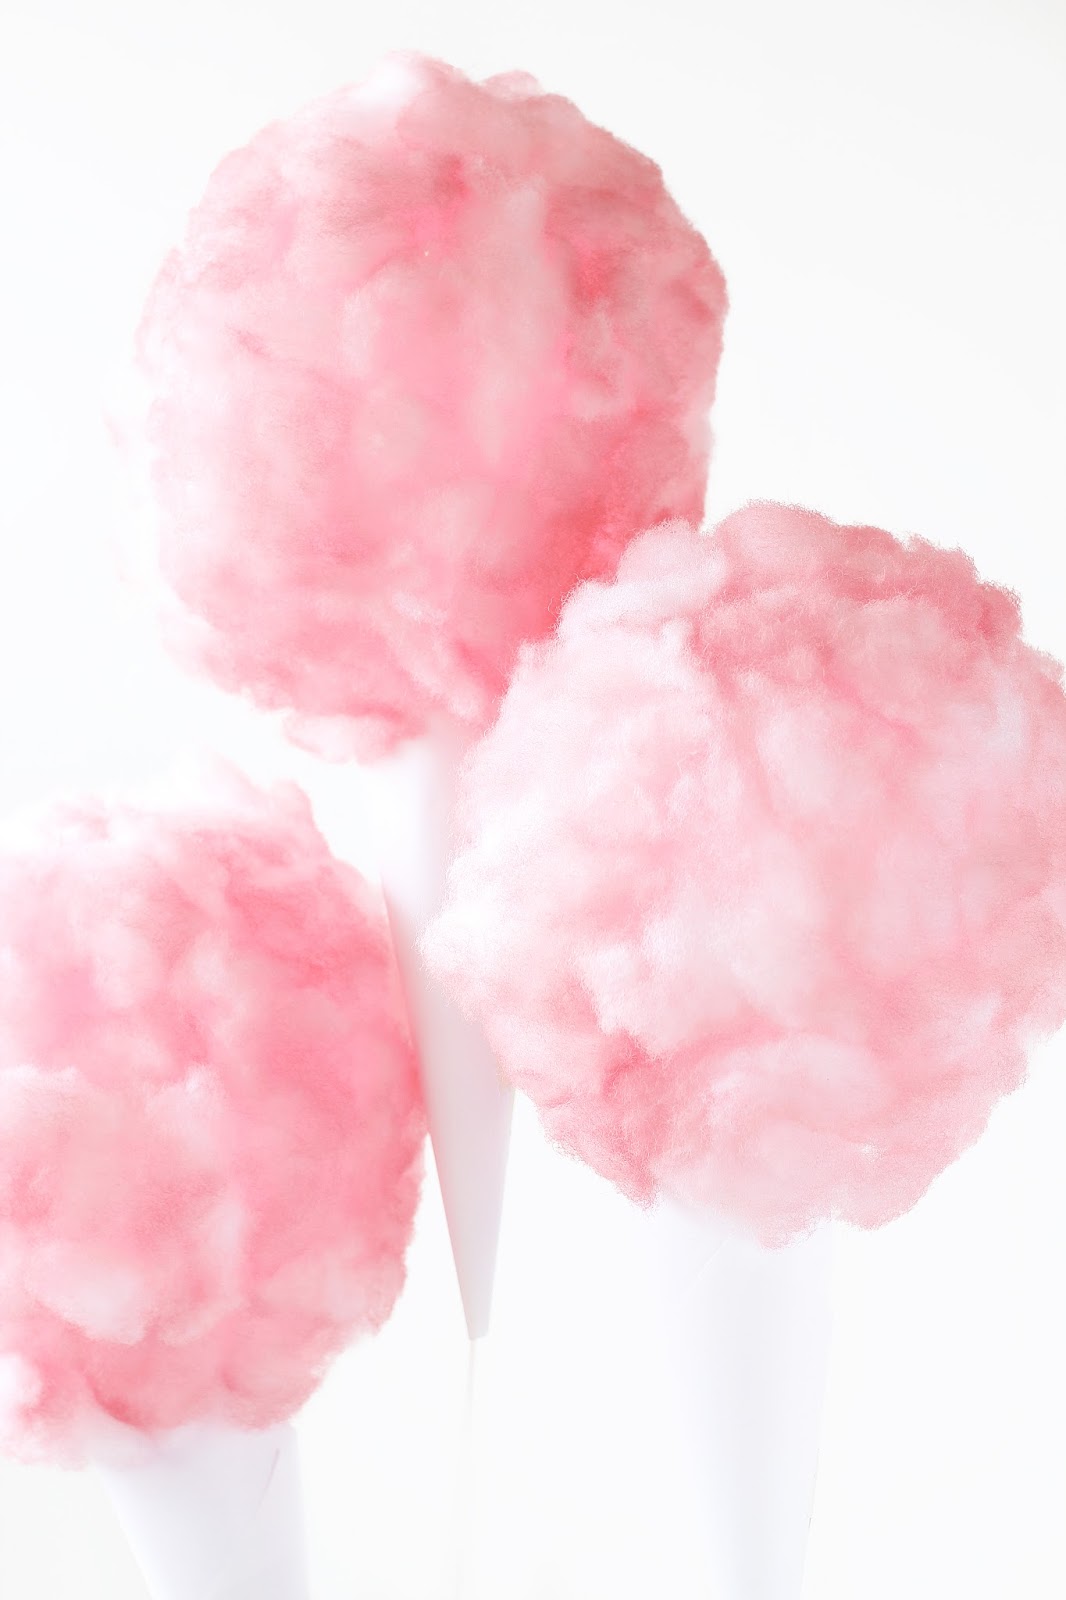
1. Use spray paint to color your polyester stuffing pink (or whatever color you would like it to be).
2. While waiting for that to dry, inflate your latex balloons. Don’t attach the string yet as you will need to get it through the cotton candy cone.
3. Use white or patterned paper and roll into a cone shape. String the string through the cone and tie it to the balloon.
4. Plug in your hot glue gun and use it on the low setting to glue your cone to the bottom of the balloon. (Trust me, it’s crazy, but hot glue works on balloons!)
5. Once the polyester stuffing is dry, glue it around your balloon. Try not to use too much glue or stuffing because this will keep the balloon from floating.


Are you hungry for real cotton candy yet? I just got a cotton candy cart in the mail from Nostalgia Electrics that you’ll see very soon, so I’m about to go make myself some fluffy deliciousness! Go throw a cotton candy party, and have fun making these balloons!


6 Responses
These are amazing! I never would have even tried hot glue on a balloon, but I'm going to now.
This is TOO CUTE!! Love Love this Idea 🙂
love these
Making these for my granddaughter's 2nd birthday party! TOO CUTE!!
Hi! I would love to make these for a dance coming up for teens with specials needs in LA and am wondering what you used to make the cones with and how they are secured. Thank you for the sweet tutorial!